
 7250
7250
BenchPrep has streamlined your user management by designing easy to use features in Console. In this article, we’ll cover the general ways Console allows you to manage your users’ experiences.
The Users Page
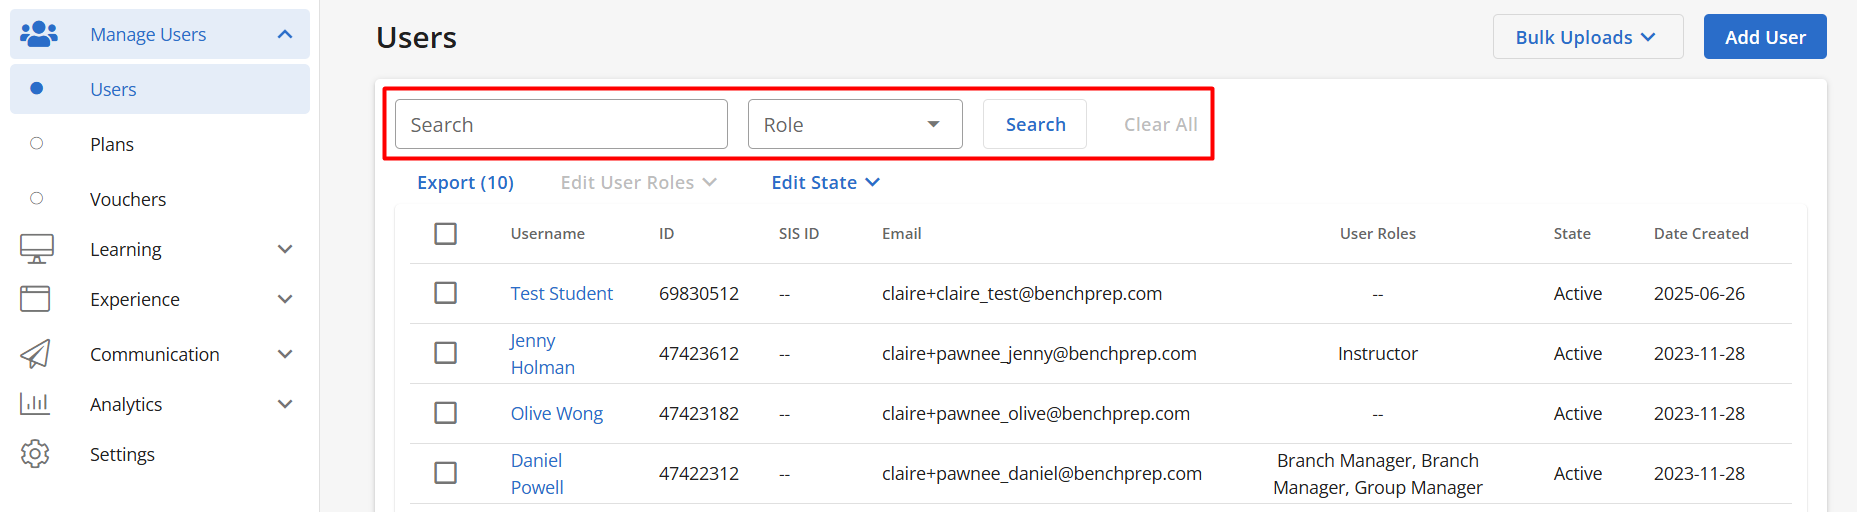
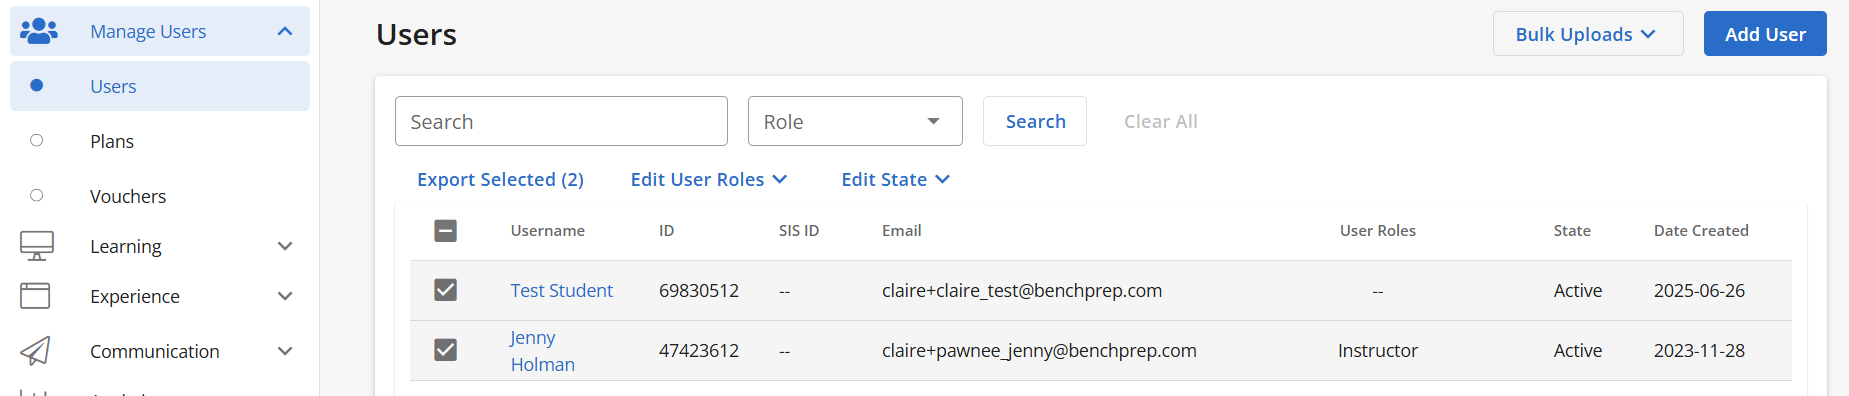
The home page of Console is the Users page, which lists all the users in your tenant. This page allows you to search for users by Name, ID, SIS ID, or Email Address. You can also narrow your search by specific Role.
Once you narrow your search, you can easily export a CSV file of the results by selecting Export Filtered.
The User Details Page
Note: All of these features require permissions to use, which can be assigned in Console.
Selecting any username will bring you to the User Detail page, which displays their ID, email address, last log in and other information. It also has a some useful features:

-
Actions allows you to deactivate users and manually redeem vouchers on users' behalf.
Notes: Console admins and users with a role containing deactivate:users permission can deactivate users. Deactivating a user renders their account unusable; they will no longer be able to log in and therefore will be unable to access their courses. The profile and its data will still exist and still be visible to you, though, and you can reactivate it whenever you want to. Once reactivated, the user will be able to go back in to the profile and resume progress. In certain instances assistance from BenchPrep will be provided to restore access, contact support to confirm. To deactivate users in bulk reference Deactivating Users in Bulk section.
-
Impersonate allows you to impersonate any user, which helps when troubleshooting issues that your users may be experiencing.
Notes:-
When you are impersonating a user, you are logged into their account, and any activities you complete will be saved to that account. Be careful to look but not touch and always log out (click on the "x" towards the top of the screen) when you are finished.
-
If you'd like to impersonate users without having to worry about making changes to their accounts, you can impersonate them in your tenant's staging environment. Any changes made in staging will not affect live users, and staging will refresh every 3 weeks to match what's in production.
-
-
Manage Password enables you to update passwords or send a Password Reset email to the user.
-
Edit allows you to edit a user’s name, email address, SIS ID, and enable/disable Extended Time Accommodation (if the feature access is turned on by BenchPrep).
-
Overview lists roles assigned to the user, and allows you to Add and Remove Roles, as well as create a custom role.
-
Licenses lists the user’s licenses, and allows you to Extend enrollment periods and Remove licenses.
The Enrollments column displays the the number of enrollments associated with each license. Click on the number to see the course names and statuses.
-
Enrollments lists the user’s enrollments, and allows you to Grant Test Resets and Reset Progress in a course.
- To reset the course progress for a user follow these steps:
1. Locate user in Console.
2. Click on the Enrollments tab on the user’s detail page.
3. Next, locate the course and click Reset Content. A prompt will appear click Reset Content to confirm.
4. After clicking Reset Content a pop up message will appear letting you know the process has been queued. An email will be sent once the reset completes successfully.

- To reset the course progress for a user follow these steps:


Note: Resetting a learner's course will reset progress in pieces of content including (lessons, questions, exams, assignments etc). It will also reset all of their external assets (e.g. Skillable Labs, PBQs, SCORM packages).
Creating a User
-
Select Users under the Manage Users section in the left-hand navigation bar
-
Select Add User at the top right-hand corner

-
Fill out the Account Details page

-
Select Create User. A status message will inform you the user has been successfully created and you will be brought to the end user’s User Detail Page.
Assigning a Role
After the user has been created, you can assign the appropriate user roles by following these steps:
-
Select Assign Role

-
Choose an existing role from the dropdown, or select Create a New Role to create a custom role.
Note: Only Admins have the ability to create a new role.
-
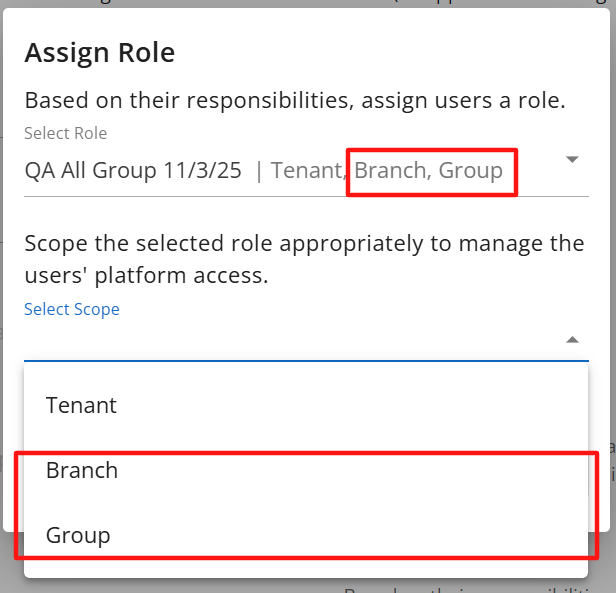
If you chose an existing role:
-
If the role is tenant‑scoped, no scope selection is required.
-
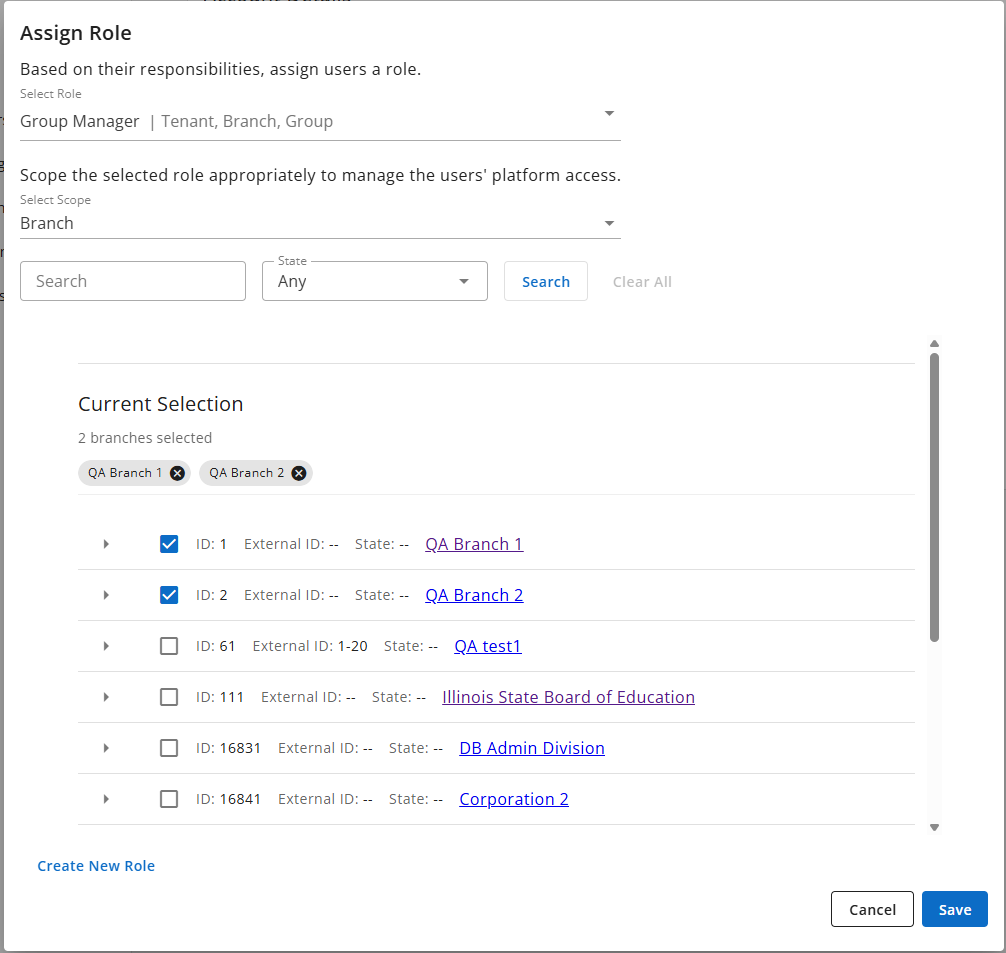
If the role is branch‑scoped or group‑scoped, select the scope and then choose one or more branches or groups from the multi‑select list by clicking the appropriate checkboxes.
-
Click Save to apply the role in all selected contexts.
-
-
If you selected Create a New Role:
-
Choose the appropriate permissions and scope.
-
Click Save to create and assign the new role.
-
The user will be notified via email of their account access. In the email, they can complete their registration and log into Console.
The email template cannot be modified in Console at this time. To customize this template, please reach out to BenchPrep.
Importing Users
If you’d like to create multiple users at once, you can bulk import them on the Users page. Bulk importing users does not allow you to edit/update user names, emails, or passwords for accounts that already exist. These will be skipped during the import process.
- Select Users under the Manage Users section in the left-hand navigation bar.
- Click on Bulk Uploads at the top right-hand corner.

- Click on See upload instructions to download a template and create the CSV file.

- Select your CSV file for user import.

- Assign a role for your users (optional). If the role requires a scope (e.g., Branch or Group), select the appropriate scope and then select one or more branches or groups by clicking the relevant checkboxes. Click Save.


If you’d like to create a new role, click on Create New Role. However, this will exit you from the importing page and will not save your changes. We recommend creating any custom roles that you need first before importing users. - Click on Import to import your users.

- A pop-up message will appear indicating your import is in progress. You won’t be able to upload an additional file until this import has been completed.

- Once the import is finished, you’ll receive a confirmation email that will provide more details on what was imported and if any errors occurred during the process.
Editing User Roles in Bulk
Admins, or users with a custom role with create:user_roles and delete:user_roles permissions, can bulk assign or remove user roles.
Assigning User Roles in Bulk
To add roles to users in bulk, follow these steps:
- Select Users under the Manage Users section in the left-hand navigation bar.
- Select the users that you’d like to add roles to.
- Click on Edit User Roles, and select Assign User Roles.
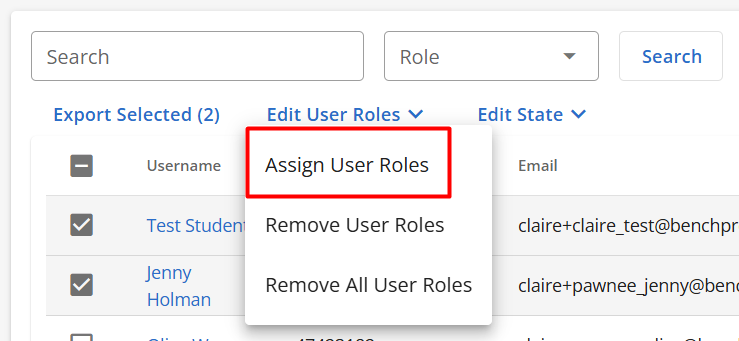
- Select a role to assign to users. If the role requires a scope (e.g., Branch or Group), select the appropriate scope and then select one or more branches or groups by clicking the relevant checkboxes. Click Save.

Note: Only roles that are contained within the admin user’s active role scope will appear as available options to assign. The same applies to branch/group selection with only branches or groups within the admin's scope will be available to select.
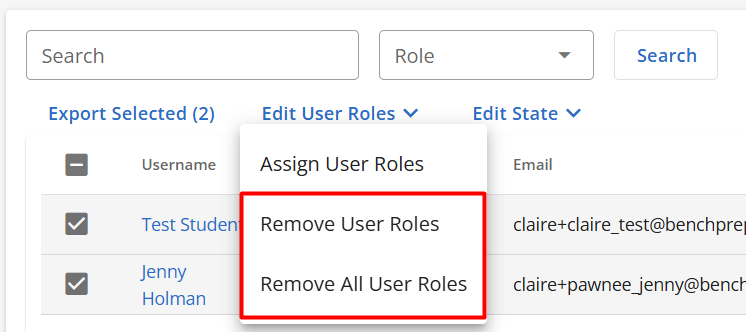
Removing User Roles in Bulk
To remove roles from users in bulk, follow these steps:
- Select Users under the Manage Users section in the left-hand navigation bar.
- Select the users that you’d like to remove roles from.
- Click on Edit User Roles. Select Remove User Roles to remove specific user roles, or select Remove All User Roles to remove all of them.
- If you selected Remove User Roles, select the roles you’d like to remove, and click on Save. Only roles that are contained within the admin user’s active role scope will appear as available options to remove.

If you selected Remove All User Roles, click on Continue to confirm. Choosing to remove all user roles will only remove those user roles that are contained within the admin user’s scope.

Note: Legacy admin roles, such as District Admin, District Supervisor, Institution Admin., Institution Supervisor, and Instructor roles cannot be removed via Console. Please contact BenchPrep support for assistance in removing these roles. BluePrint roles, such as Owner, Collaborator and Content Reviewer, can be removed directly through BluePrint by BluePrint Admins or Owners. For detailed instructions click here.
Bulk Deactivating or Activating Users
To deactivate or activate users in bulk follow these steps:
- Locate the users you want to deactivate or activate, and select the checkbox next to each name.
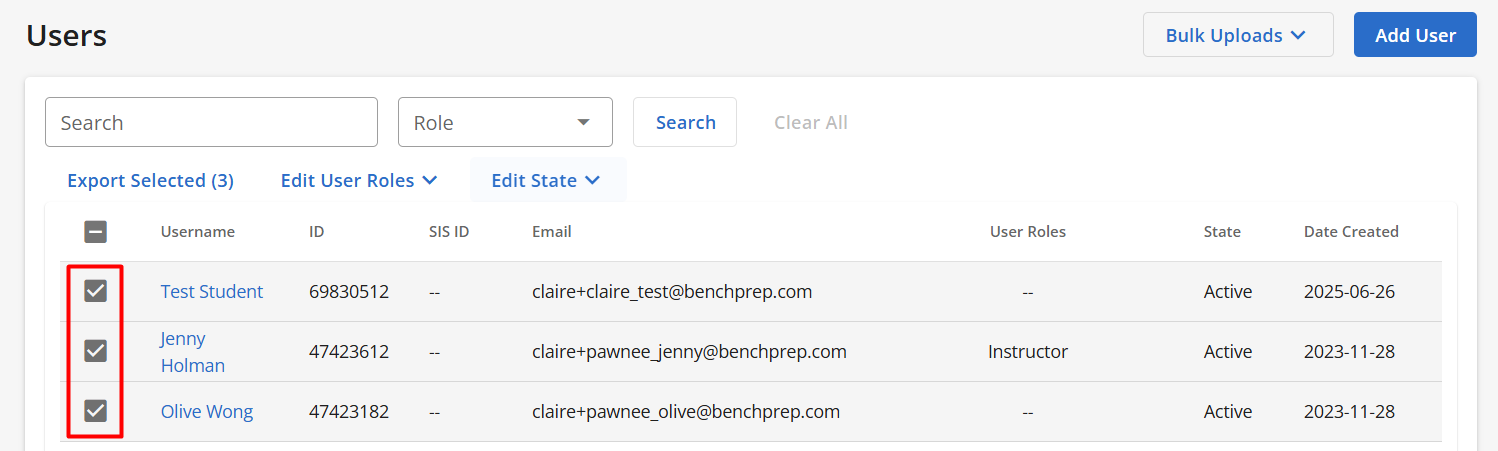
- Click on Edit State, and select Deactivate or Activate.
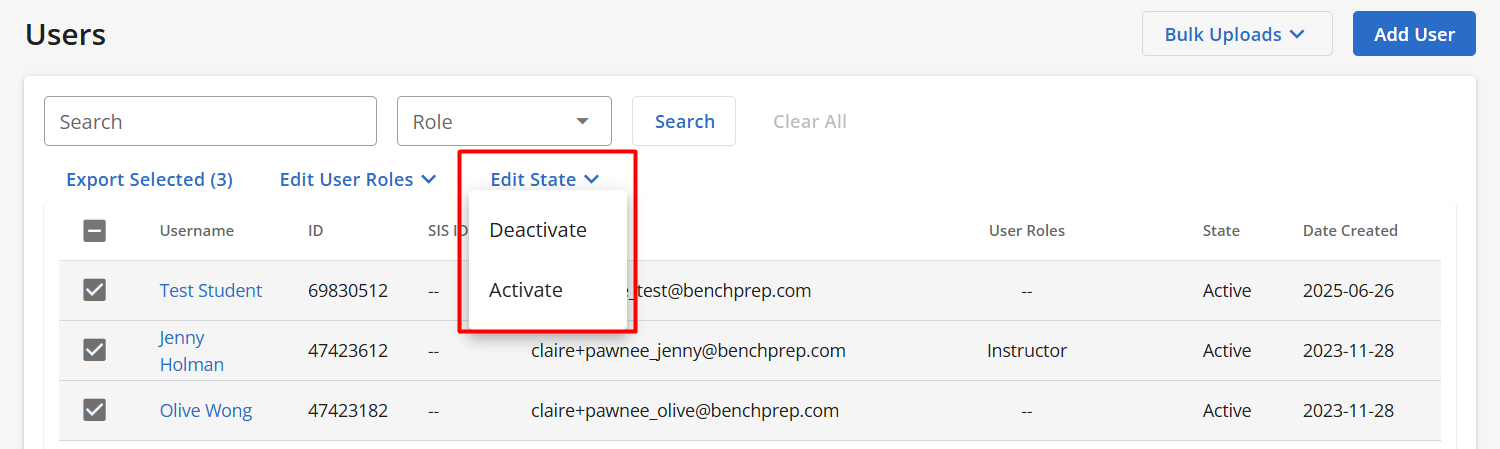
- Click on Deactivate or Activate again on the confirmation modal to proceed.
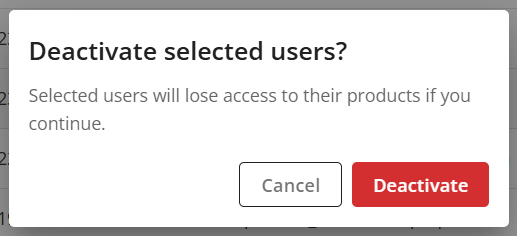
Once confirmed, you will not be able to initiate another bulk deactivation or activation until you have received the confirmation email the previous bulk action was completed successfully.
Within Tenant Dashboard, you can also deactivate users in bulk. To learn more about deactivating users in bulk through Tenant Dashboard, click here.
Bulk Deactivating or Activating Users via CSV
To deactivate or activate users via a CSV, follow these steps:
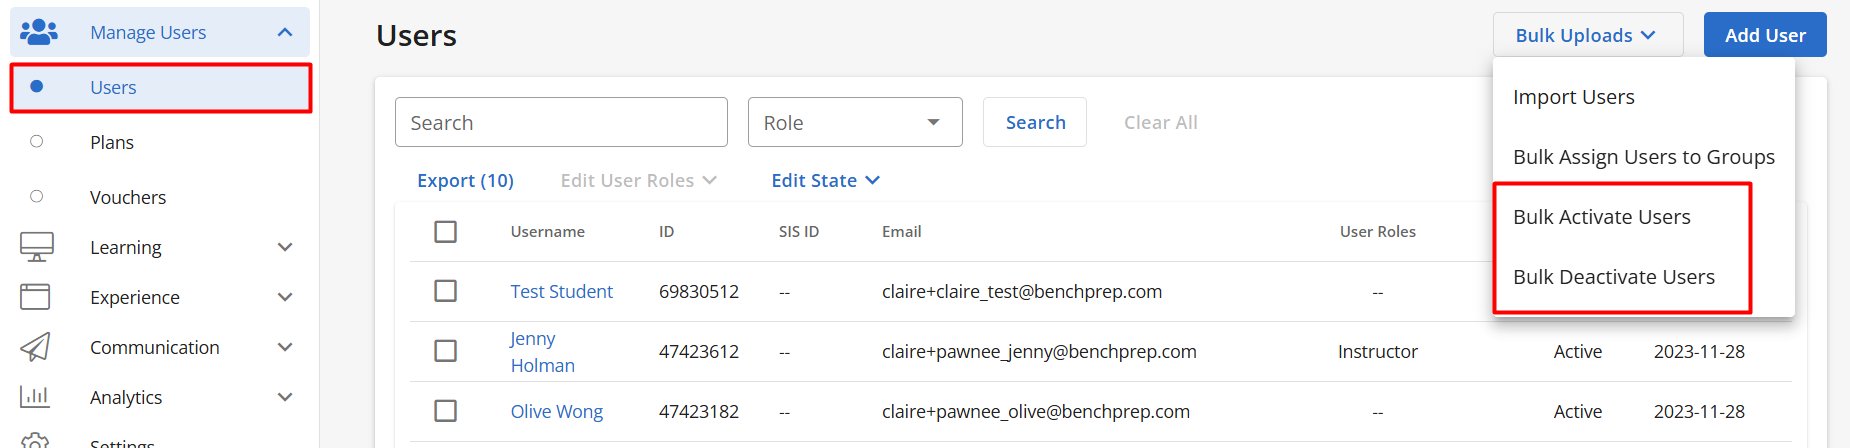
- On the Users page in Console, click on Bulk Uploads and select Bulk Deactivate Users or Bulk Activate Users.
- Upload a CSV file. For more information on how to format your file or download a template, click on See upload instructions.

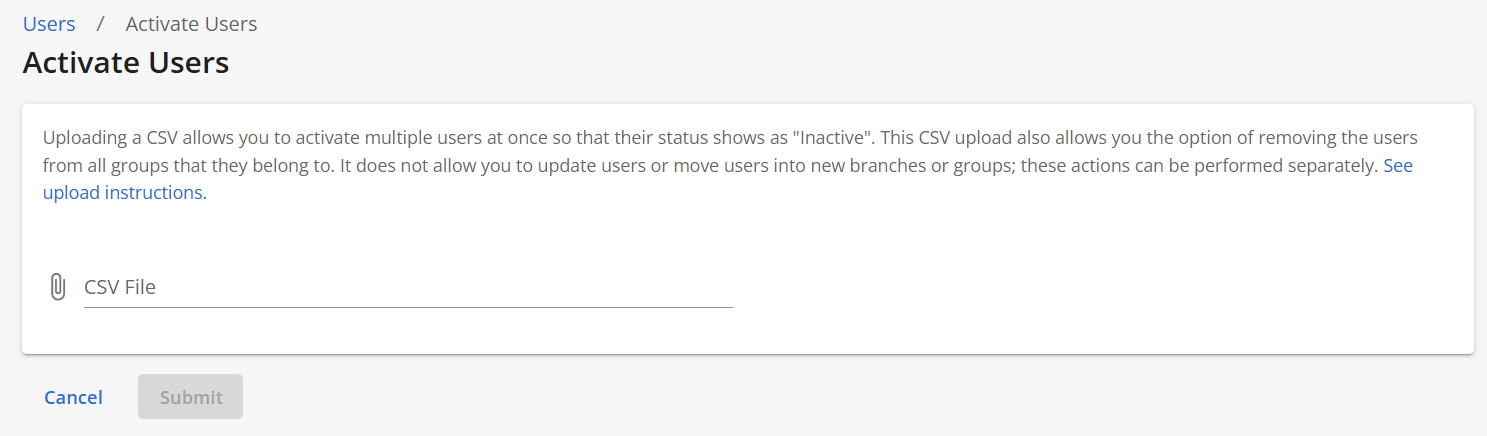
- Click on Submit.
- Once the deactivation or activation is complete, you will receive a confirmation email.

