2519
2519
A Console Admin or a user with a custom role containing the following permissions can access BluePrint to create, update, or delete materials:
- Access BluePrint
- Create Materials
- Read Materials
- Update Materials
- Delete Materials
Additionally, the role must be assigned at the content package level. Being assigned as an Owner, Collaborator, or Content Reviewer within a course does not automatically grant access to manage materials in BluePrint.
A user with access to a course through an Owner role and a custom role containing the permissions above assigned at the content package level will be able to manage materials for that course in BluePrint.
A Console Admin or a user with a custom role containing the following permissions can access BluePrint to view BluePrint materials:
- Access BluePrint
- Read Materials
Users will only be able to view materials within the scope where the role is assigned. For example, if the role is assigned at the branch level, the user will be able to view BluePrint materials uploaded to courses associated with branch plans connected to that branch.
To learn more about custom roles click here to access our Knowledge Base article.
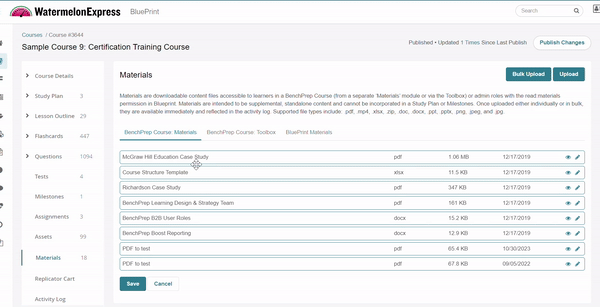
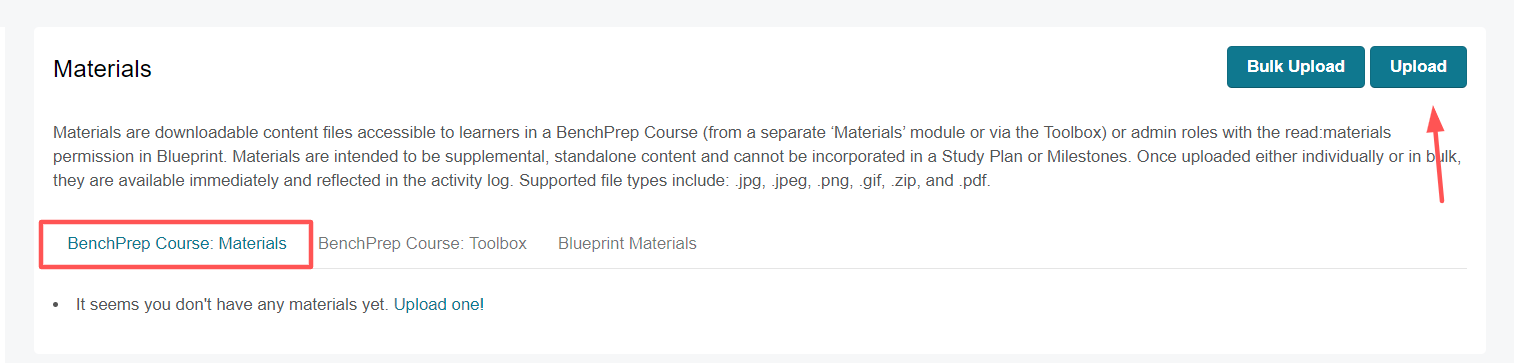
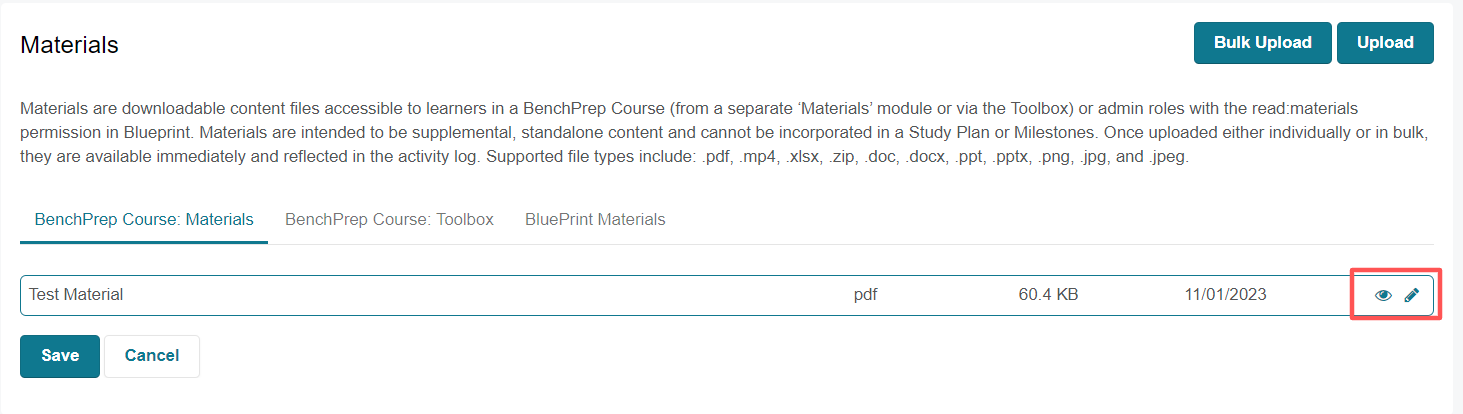
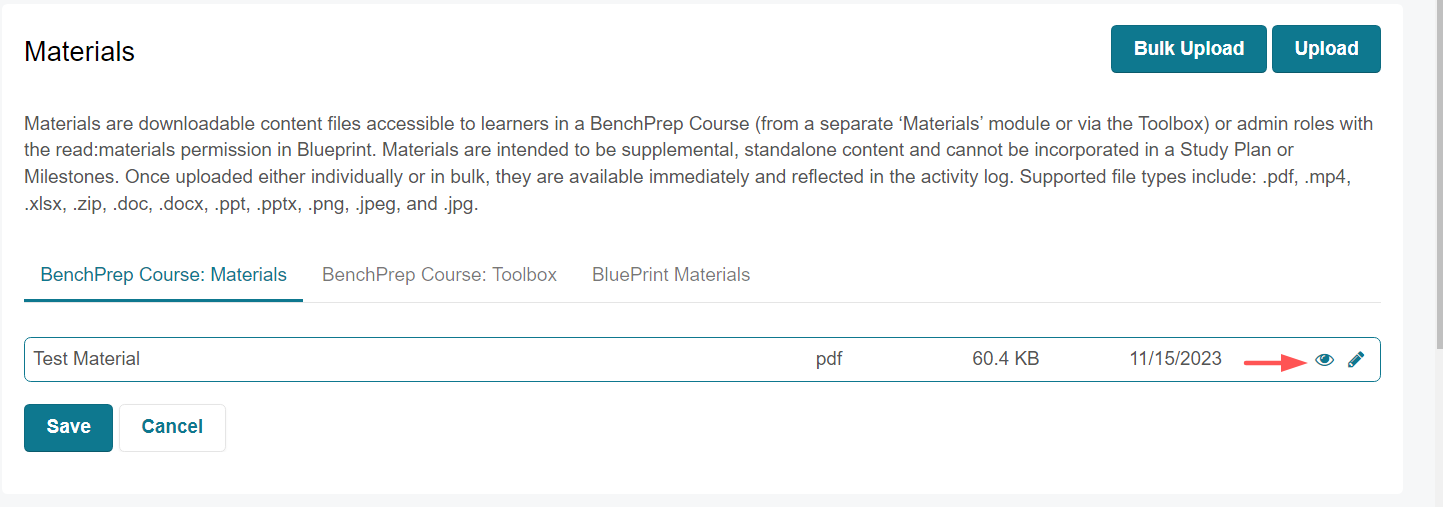
Materials Page
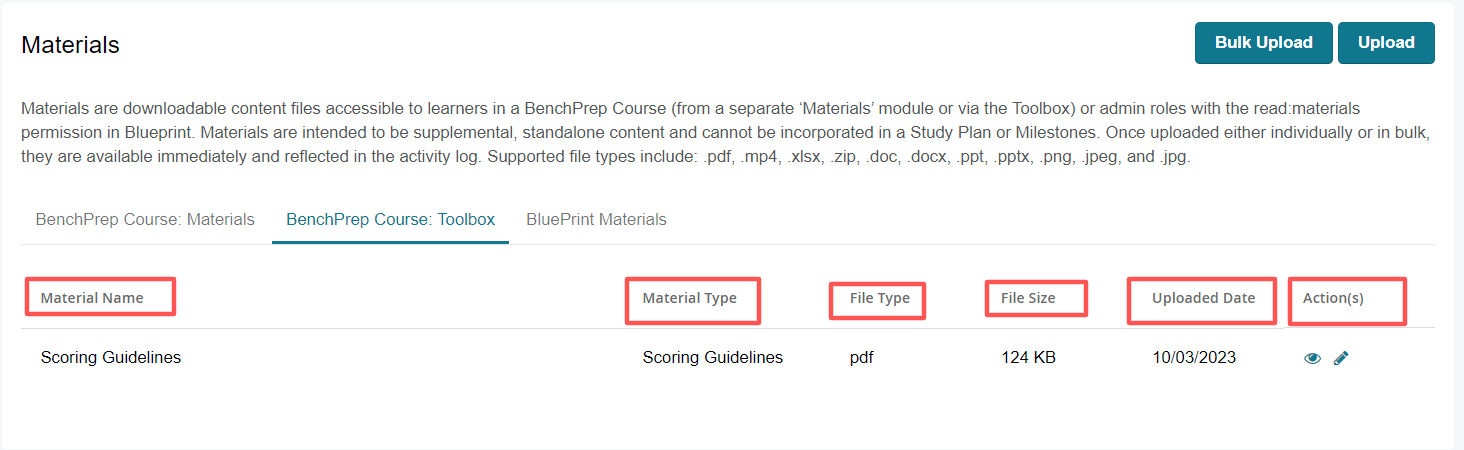
The Materials Page shows all materials that have been uploaded to this course. There are 3 tabs for each different type of Material - BenchPrep Course: Material, BenchPrep Course: Toolbox, and BluePrint: Materials. For each Material Type listed it will display the material name, file type, size, date of the upload and Action(s).
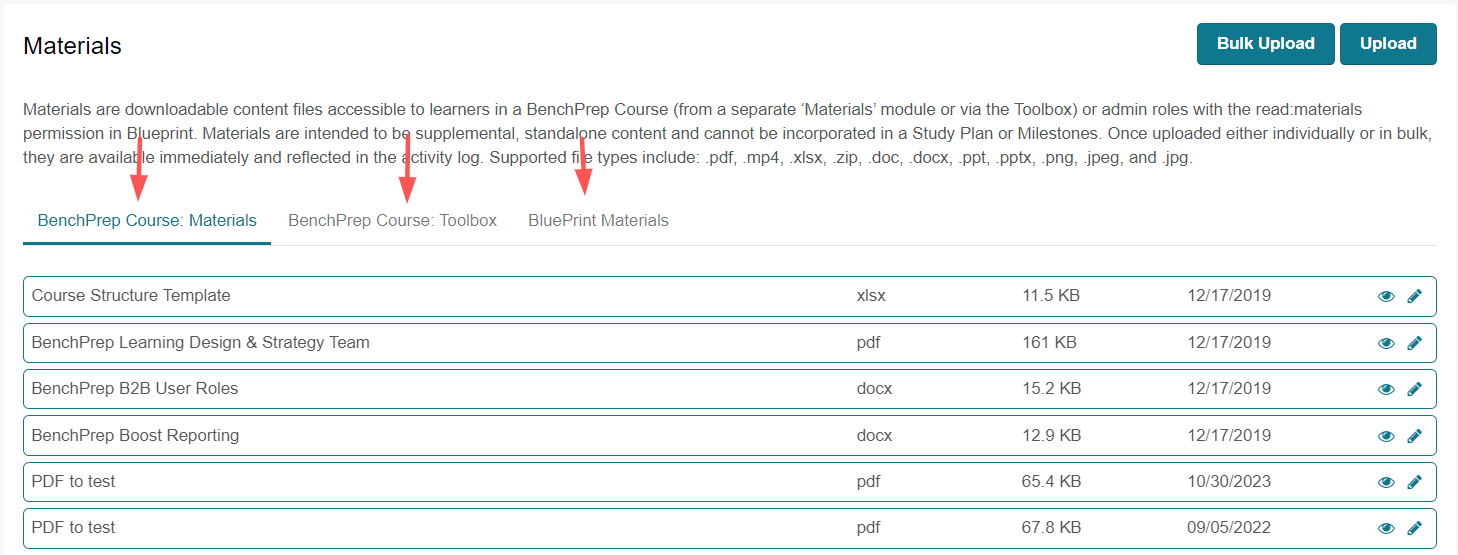
Note: The Enable Student and Instructor Materials feature access needs to be enabled to ensure the uploaded materias are visible to the targeted audience. This feature access is controllable at the Tenant, Course, and Branch level. More info on the feature access can be found here.
Uploading Materials
To upload materials follow these steps:
- Access BluePrint and select the course desired for uploading materials.
- Next, click on the Materials tab in the left hand navigation menu.
- Select , click Upload.
- Next, fill out the following:
A. Material name (the name displayed to the learner or instructor).
Note: Materials can not have the same name and same file type as
another material in the course.
B. Material description (optional). - Select Type of Material to upload:
A. Benchprep Course: Materials (accessible via the learning application).
B. Benchprep Course: Toolbox Materials (accessible via the learning application)
Toolbox materials can only be used once per each type. If the same type of Toolbox Material is uploaded it will replace the current Toolbox Materials.
1. Formula Sheet
2. Scoring Guidelines
3. Abbreviation
C. Blueprint: Materials (accessible via BluePrint for Instructors). - Choose the file you want to upload then click create.

You will receive a confirmation notice at the top of the page once the Material has been uploaded successfully.
Note: You do not need to build the course in BluePrint for Materials to display within the course. Once uploaded the materials will be immediately available in the course. The Enable Student and Instructor Materials feature access needs to be enabled to ensure the uploaded materials are visible to the targeted audience. This feature access is controllable at the Tenant, Course, and Branch level. More info on the feature access can be found here.
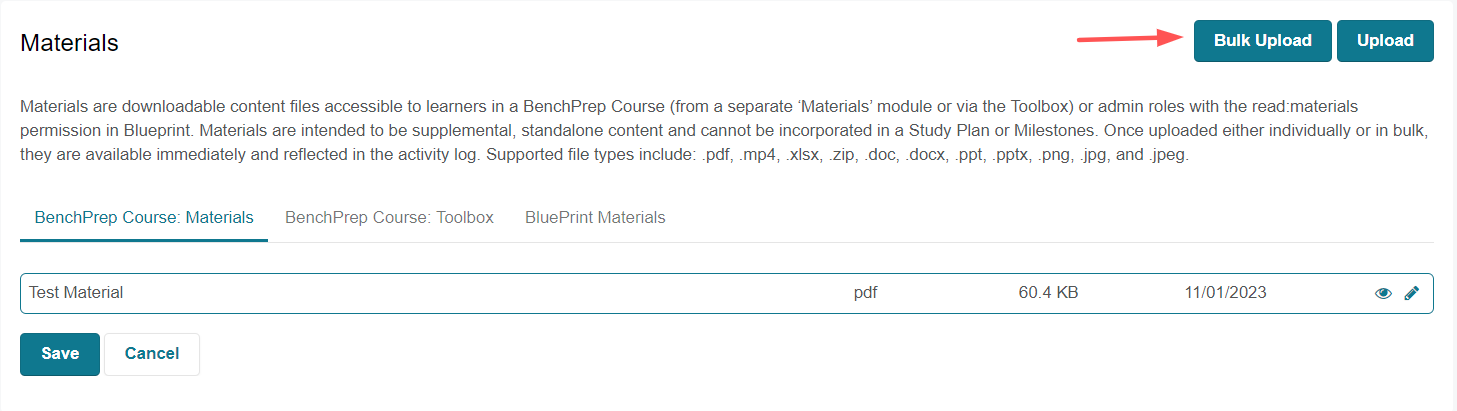
Bulk Uploading Materials
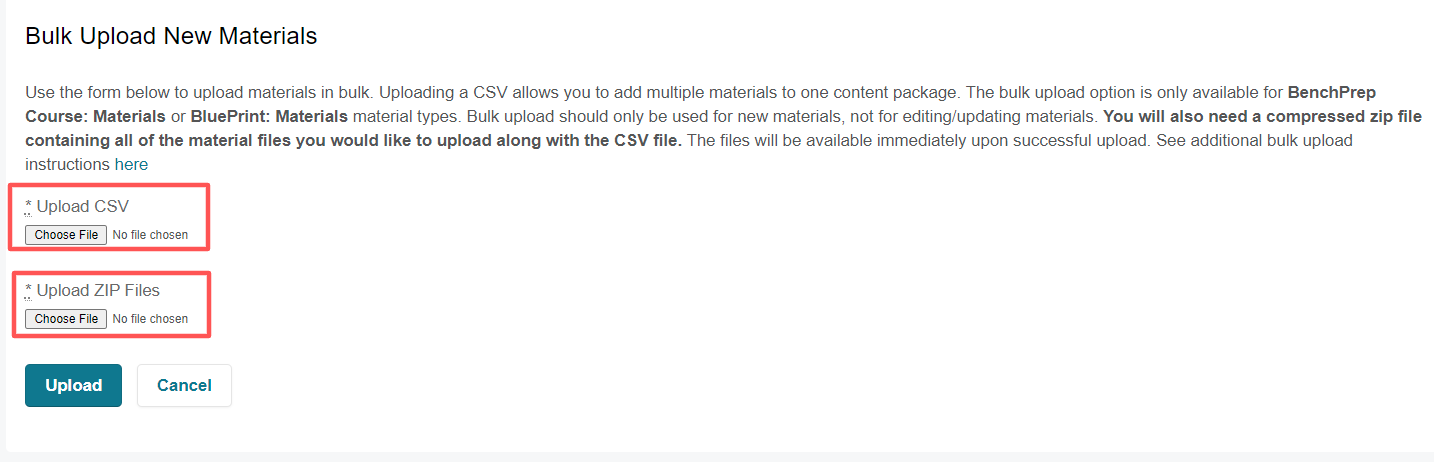
Bulk upload functionality allows you to add multiple materials to one course. The bulk upload option is only available for BenchPrep Course: Materials or BluePrint: Materials material types. Bulk upload should only be used for new materials, not for editing or updating materials. In order to bulk upload Materials you will need a compressed zip file containing all of the material files you would like to upload along with a CSV file.
To bulk upload materials follow these steps:
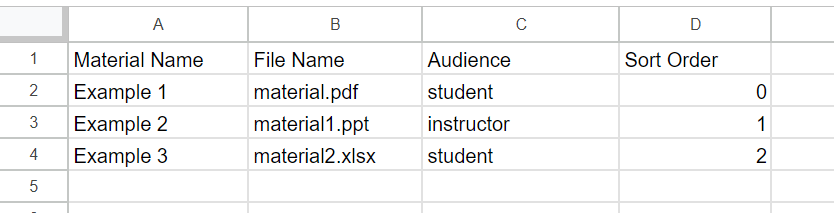
- First, create a CSV with the following headers.
1. Material Name (required) - The name of the material as it will appear to end users.
File name (required) - The actual name of the material file.
Audience (required) - “Student” (for BenchPrep Course: Materials) or “Instructor” for
BluePrint: Materials.
Sort Order (required) - The order in which materials will appear (0, 1, 2).
2. Next, fill out the CSV for each material you would like to add as shown below.
3. Save the spreadsheet as a CSV-UTF-8 (not as an .xls file).
4. Next, create a Zip file containing all the resources you want to upload. - Next, access BluePrint and select the course to upload materials to.
- Next, click Bulk Upload in the top right-hand corner.
- On the Bulk Upload screen choose what CSV file and Zip File you want to upload for materials. Then click Upload to upload the materials to the course
The upload instructions can also be found within BluePrint, to open click the link at the end of the description section.
NOTE: You do not need to build the course in BluePrint for Materials to display within the course. Once uploaded the materials will be immediately available in the course. The Enable Student and Instructor Materials feature access needs to be enabled to ensure the uploaded materials are visible to the targeted audience. This feature access is controllable at the Tenant, Course, and Branch level. More info on the feature access can be found here.

Editing Materials
Occasionally, you may need to edit the material details, replace the file within the material or delete the materials. All changes can be made via BluePrint.
To edit a material follow these steps:
- Access the course in BluePrint for the Material you wish to update.
- Click on Materials on the left side navigation.
- Next, click on the pencil icon to edit the Material or click on the eye icon to view the details of the material.
- Next, edit the name, description, or the type of material. To update the file click on Choose File and select the new file to upload.

- After all changes have been made click Save.
- A successful message will display when the Materials have been updated.

Deleting Materials
To delete materials follow these steps:
- Access the course in BluePrint for the Material you wish to update.
- Click on Materials on the left side navigation.
- Next, click on the eye icon to view the details of the material.
- Next, click Delete and confirm your selection.
- A successful message will display when the Materials have been deleted.

Change Sort Order of Materials
You can easily update the order of the uploaded materials by following these steps:
- Access the desired course in BluePrint.
- Click on the Materials icon to view materials in the course. The materials are displayed in the order they appear, from top to bottom. (0, 1, 2, etc.)
- Next, drag and drop the order in which you would like the Materials to display.
- After making changes click Save. A banner message will appear confirming the Material order has been updated.