 1196
1196
Adding Users to Branch Plans
Adding users to a branch plan provides them with access to courses, events, resources, and learning paths (referred to as Learnables) on the branch plan for the defined duration of the plan. If members of the same branch should have access to different learnables, you can create multiple branch plans and add members to different branch plans based on their needs. You'll also be able to add members to the same branch plan and choose what learnables they should have access to. The only requirement to join a branch plan is to be a member of the associated branch. Members of a child branch cannot be added to a branch plan associated with the parent branch - users can only be part of branch plans associated directly with their branch.
To add users to branch plans, follow these steps:
- Open Console and go to the Plans section.
- Select the Branch Plans tab.
- Select the branch plan that you want to work with.
- Switch from the Overview tab to the Users tab, then select the Add Users button.
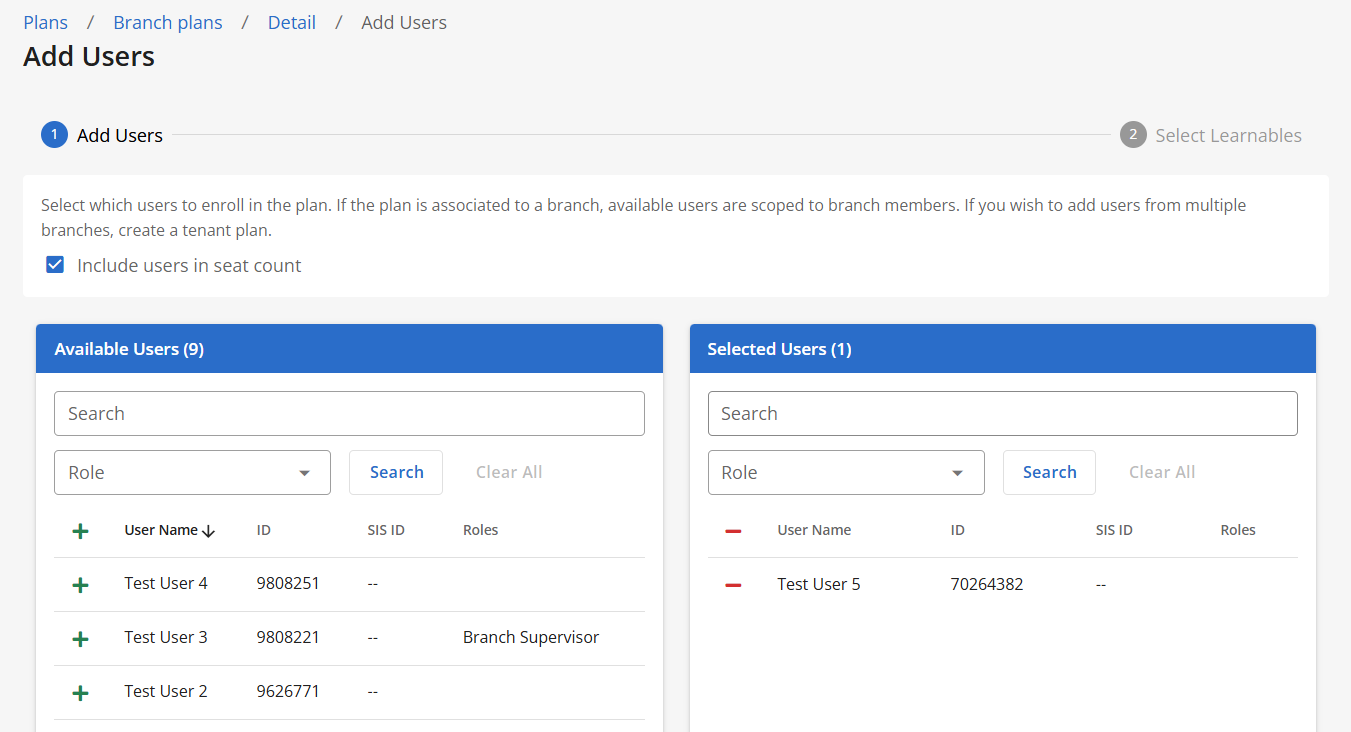
- On the next page, select the + icon next to all users that you want to add to this branch plan. You can use the search bar or navigation arrows to find specific users quickly. Note that only members of this branch will appear on this page - if you want to add a user to this plan who is not already a branch member, add them to the branch first, then return to this step.

- You’ll see an “Include users in seat count” checkbox above the branch member listing. This box is checked by default. If you do not want the users you’re adding to the branch plan to count against the plan’s seat count, uncheck this box before continuing. Note that your role must have the “remove:licenses” permission for this box to appear.
- Click on Next.
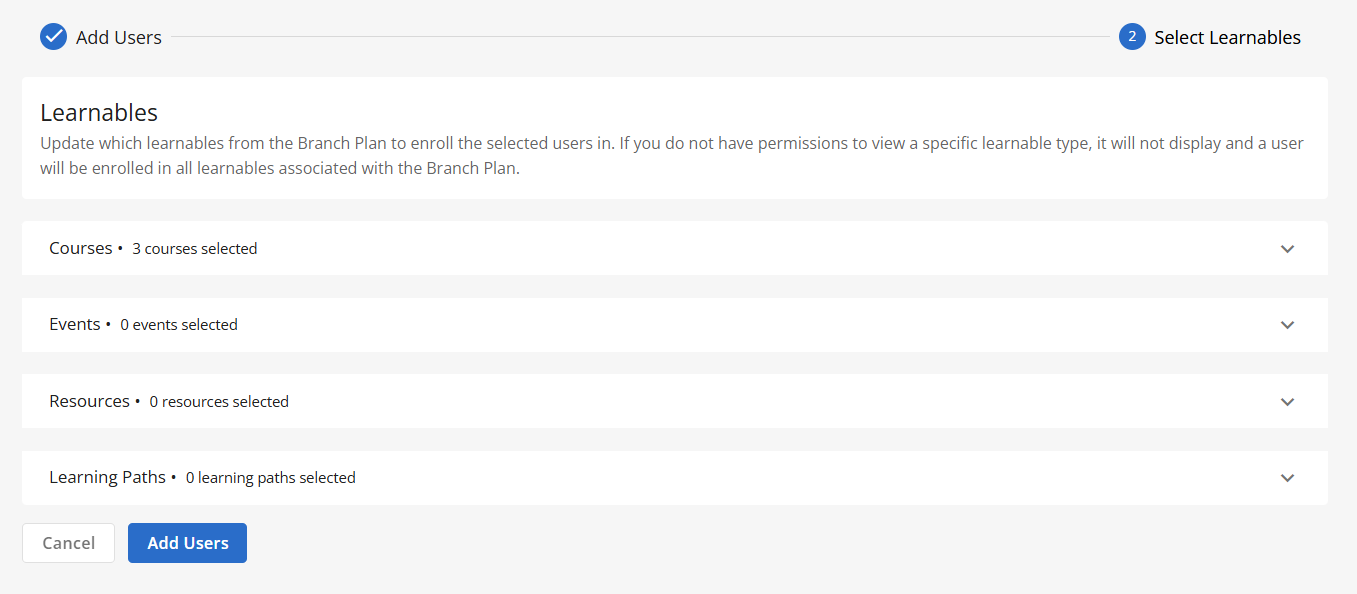
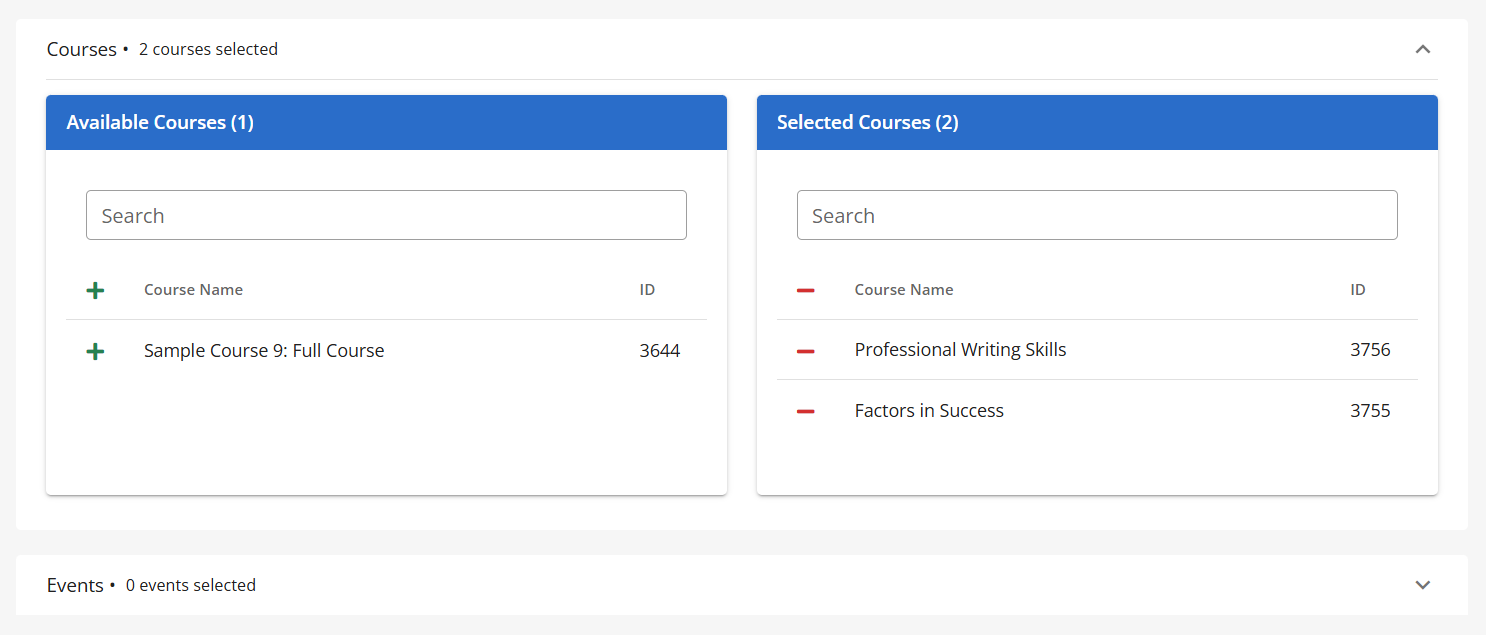
- Update which learnables from the branch plan the selected users should be enrolled in. All learnables will be selected by default. If you do not want the users to have access to a specific learnable, expand the appropriate section and select the - icon next to the item to remove it from the selected list. If you do not have permissions to view a specific learnable type, it will not be displayed here.


- Click on Add Users to finalize your selections. Note that users on this branch plan who have not activated their account will be listed under the branch plan as “inactive” until they activate their account.
Removing Users from Branch Plans
Removing a user from a branch plan will revoke their access to all learnables they have via this branch plan. It will not remove the user from the branch itself.
To remove users from a branch plan, follow these steps:
- Open Console and go to the Plans section.
- Select the Branch Plans tab.
- Select the branch plan that you want to work with.
- Switch from the Overview tab to the Users tab.
- Select Remove next to any user you want to remove from this branch plan.
- You will be prompted to confirm you want to take this action–select “Confirm” to remove the user.
The “seat” on the branch plan previously held by this user will now be available again, allowing you to add a different user to the branch plan if desired.


