The Public Discussions feature allows users to leave and reply to public comments within:
-
Lessons
-
Questions
-
The Discussions page
Configuring Public Discussions
Public Discussions can be managed at multiple levels, allowing you to control where the feature is available. Keep the following in mind when configuring the feature:
- Public Discussions must first be turned ON at the Tenant level.
- By default, Public Discussions is OFF at the Tenant level and ON at the Course and Branch levels.
- After Public Discussions is turned on for the Tenant, the feature will be available across courses and branches unless it is turned off for a specific Course or Branch.
- Use the Course-level setting when Public Discussions should be unavailable for a particular course. See Course Configuration for instructions on managing course-level feature access.
- Use the Branch-level setting when Public Discussions should be unavailable for a particular branch. See Managing Branch Features for instructions on managing branch-level feature access.
Additional behavior:
Discussions submitted by learners that contain certain "trigger" words are automatically deleted. The learner receives a success message after submitting the discussion to discourage them from resubmitting the content. The applicable trigger words are maintained internally by BenchPrep and can be updated at the request of the client.
Starting a Public Discussion
The easiest way to start a public discussion is to type it in the 'Discuss' field at the bottom of any Lesson page. This discussion will be linked to the individual lesson and visible to all other learners on that lesson page, and they can respond to it publicly if they wish.
You can also start a public discussion by following these steps:
-
Open Discussions from the left-hand navigation bar.
-
Select Public.
-
Initiate a discussion by either:
-
Selecting an appropriate Lesson or Question Category.
-
Selecting General if the discussion is unrelated to specific content.
-
-
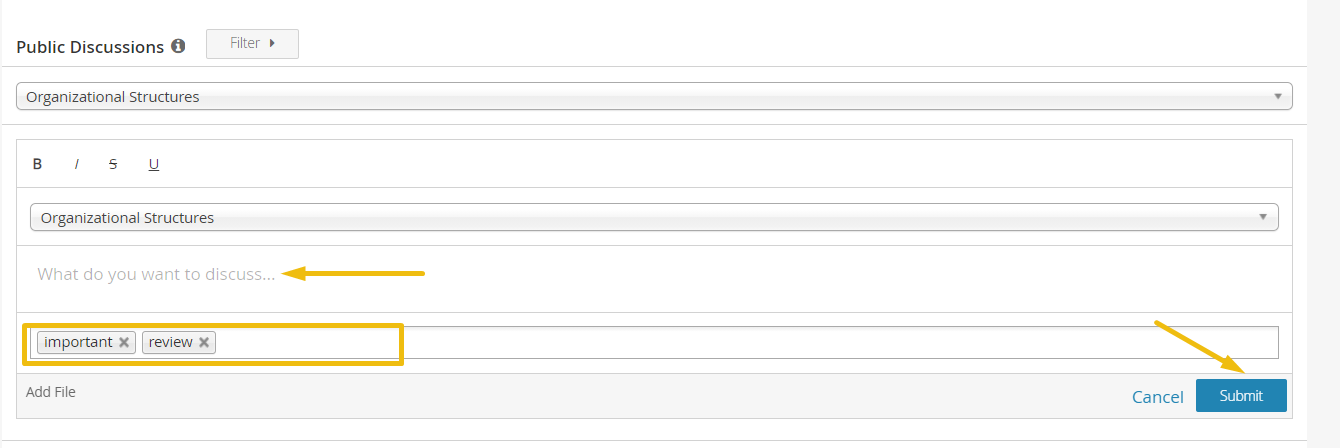
Type your message in the space provided.
-
Add a new tag or select an existing tag to categorize your discussion.
-
Note the tag requirements:
-
Between 3 - 15 characters
-
No special characters, spaces, or numbers
-
No more than 5 tags
-
-
-
Optional: You can add an image or PDF attachment along with your comment by following these steps:
-
Select the Add Images/PDFs button.

-
Find the appropriate saved file, select the file name, and select Open to add it.
NOTE: Only jpg, jpeg, png, gif, and PDF files are accepted by the system.
-
-
Select Submit to post your message.

Interacting With Public Discussions
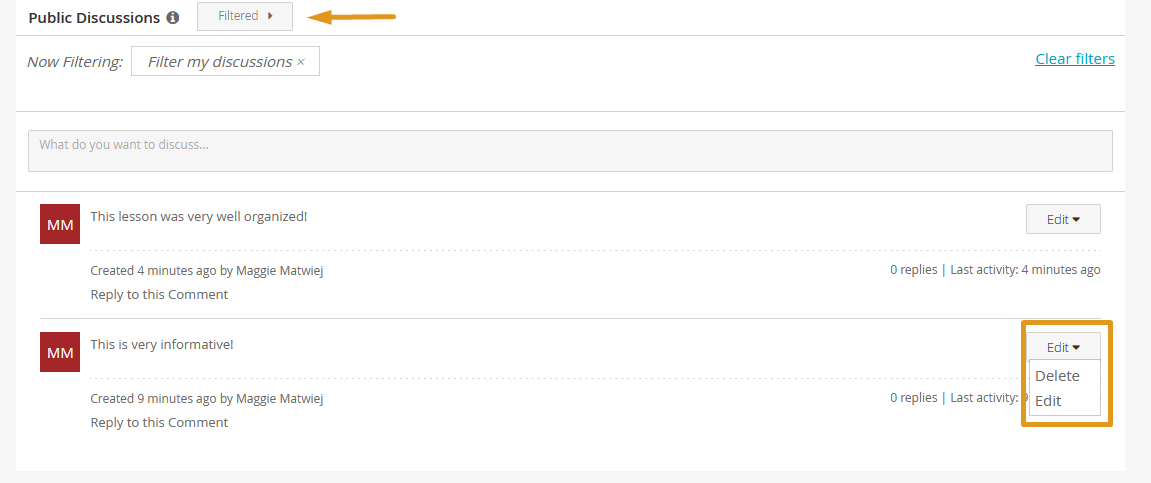
You can easily filter discussions by:
- Your posts
- Messages with attachments
- Lesson or Question category
- Tags
You can modify your posted messages by selecting Edit or Delete from the drop-down menu on the right-hand side of the message.