
 2402
2402
In a typical classroom, a teacher may want to pull students aside to have a private discussion, or they may invite students to group up for private discussions themselves. The Private Discussions feature emulates that experience on our platform, and allows users to set up private discussion groups and invite other users to the group.
Notes:
- There is no limit to how many discussions you can create.
- There is no limit to the number of users you want to include in a private discussion.
- Private Discussions can be turned On or Off at both the Institution and Group level.
- Private messages can only be used between members of the same Institution.
- By default, only instructors can create private discussion groups. If you would like to give students the ability to create private discussion groups, please reach out to BenchPrep.
- Discussions made by students that feature certain "trigger" words will be automatically deleted as soon as they're submitted. The user will receive a false success message to dissuade them from resubmitting the offending comment. The applicable trigger words are maintained internally by BenchPrep and can be updated at the request of the client.
- The feature must first be enabled at the Tenant level, in the Manage Features section of Tenant Dashboard.
Starting a Private Discussion
An instructor can initiate a private discussion message by following these steps in a course:
-
Open Discussions from the left-hand navigation bar
-
Select Private
-
Click Create Group
-
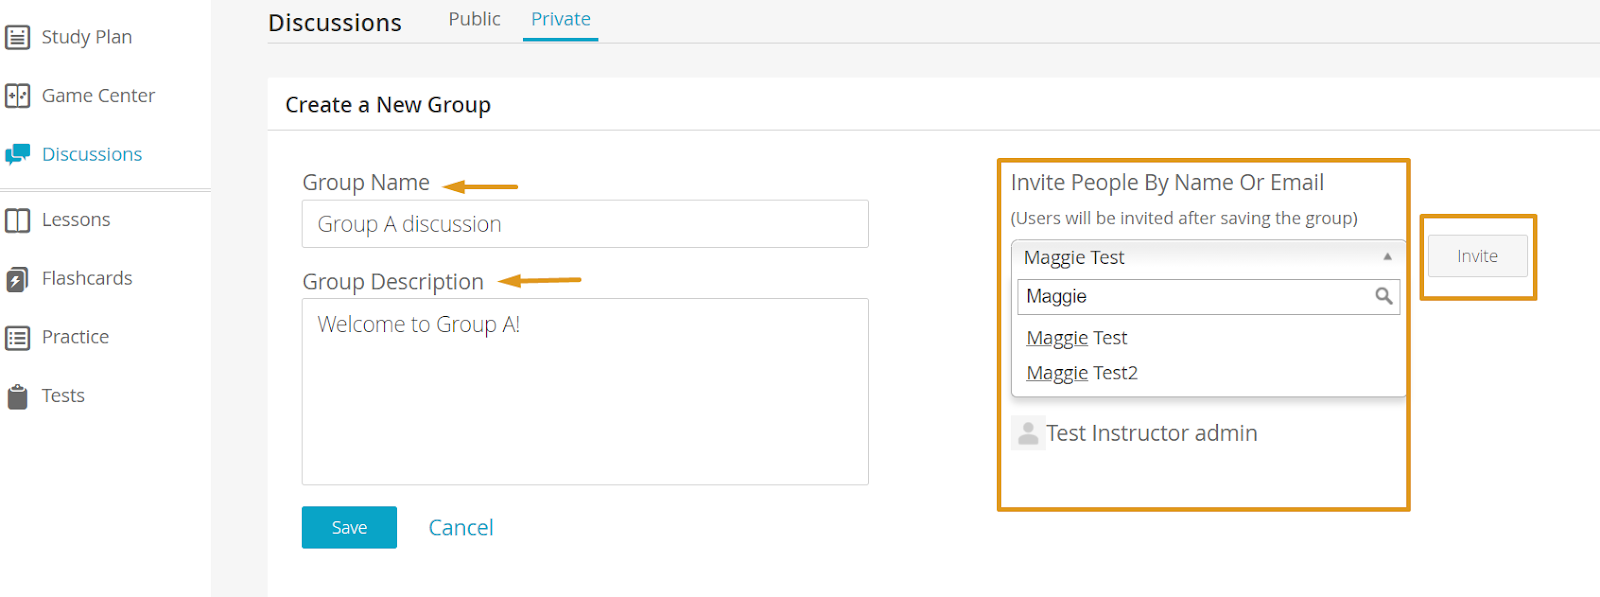
Fill out a group name and description, and invite users to join, then click Save to send invitations.

Users will receive a message in their Notifications Center informing them they have been invited to a discussion. This will take them to the private discussion and show them how to join it.
As the administrator, you can modify any group by selecting Manage. From there, you can rename the group, change the description, and add or remove members.


