
 1057
1057
To configure Learning Hub Events in Console, you will need to be an admin or have a custom role with the permissions Create:Learning Hub Events, Read:Learning Hub Events, Update:Learning Hub Events, and Delete:Learning Hub Events.
Adding a Learning Hub Event
To add a Learning Hub Event, follow these steps:
- Navigate to Console, expand the Learning tab, and click on Events.

- Click on Add Event and select Learning Hub Event.

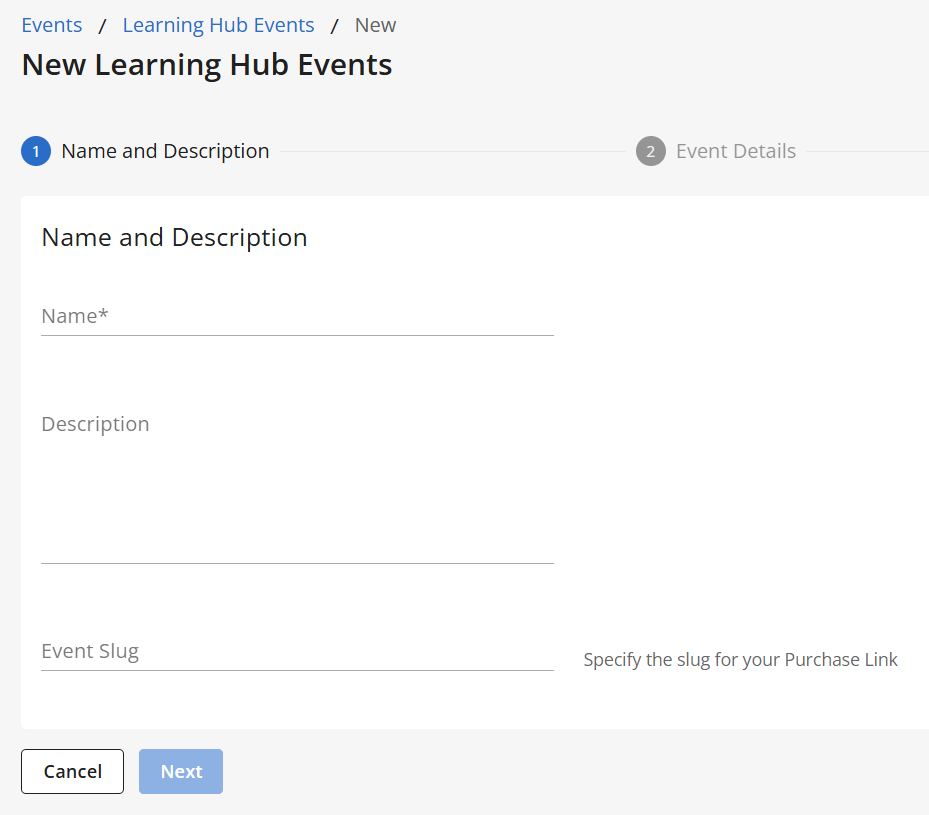
- Type in your event’s name, description (optional), and event slug.
- Click on Next.
- On the Event Details page, input and select the appropriate options.

- Video URL - Input the streaming URL for your event (i.e. Zoom link). Be sure to include https:// at the beginning of your link.
- Date and Time - Select a date and time for when your event will start and end. Once selected, it will display the selected time in your local time zone and in UTC.
- Add Contact Email - Input an email address to provide a point of contact for attendees. The email will be displayed on the Events Details page in the Learning Hub for questions or inquiries.
- Click on Next.
- On the Learning Hub Configuration page, select the appropriate options.

- Purchase Type - Select how learners will be able to access your event.
- Free - A user has direct access to this content without any additional steps.
- External Link - A user will be directed to an external site to claim or purchase this content.
- Display on Browse page - Toggle the option to ON if your event should display on the Browse page in Learning Hub so that it’s discoverable by learners. Otherwise, learners will still see it on their My Learning page if they are enrolled in the event.
- Display Recognitions - Toggle the option to ON if learners should be able to see recognitions related to your event in the Learning Hub. You will be able to add recognitions after the event is created. More information about Recognitions can be found in our articles here.
- Purchase Type - Select how learners will be able to access your event.
- Click on Create to finish creating your event.

Viewing All Learning Hub Events
To view all existing Learning Hub Events, follow these steps:
- Navigate to Console, expand the Learning tab, and click on Events.
- Click on the Learning Hub tab.

- From here, you’ll be able to see a list of all Learning Hub Events and the following details for each event:

- ID and name
- Registrants count
- Start date and time (UTC)
- Duration in hours and minutes
- Status (scheduled, active, or completed)
- Actions (delete)
- Use the search bar to search for a specific event.

- Click on the name of an event to view more information.

Editing a Learning Hub Event
To edit a Learning Hub Event, follow these steps:
- Navigate to Console, expand the Learning tab, and click on Events.
- Click on the Learning Hub tab.
- Click on the name of your event.

From here, you’ll be able to view all of your event’s details including:- Name, ID, and event slug
- Status (scheduled, active, or completed)
- Date created
- Invitation URL
- Recording link
- Start and end dates
- Hover over the dates to see them in your local time zone.
- Contact email
- Depending on the status of your event, you will be able to edit the following:

- Scheduled - Click on the Edit buttons to update the event’s name, slug, invitation URL, recording link, start and end dates, and/or contact's email. Click on Save after making changes.
- Active or Completed - Click on Edit to update the event’s name, slug, and/or recording link. Click on Save after making changes.
- Navigate to the other tabs to update more event information:
- Configuration - Set configurations for how your Learning Hub Event should display in the Learning Hub.

- Marketing Info - View and edit the event’s description, cover image, and assign a product category. More about the product catalog can be found here.

- Registrants - View, search, and export learners registered to your event. You will be able to see what time they joined your event (UTC) and manually award recognitions to those that have attended.

- Recognitions - View, add, and remove recognitions associated with your event. See our article Configuring Recognitions for Learning Hub Events to learn more.

- Configuration - Set configurations for how your Learning Hub Event should display in the Learning Hub.
Deleting a Learning Hub Event
To delete a Learning Hub Event, follow the steps below. Only events with a status of Scheduled can be deleted.
- Navigate to Console, expand the Learning tab, and click on Events.
- Click on the Learning Hub tab.
- Click on Delete next to the event you’d like to remove.

OR - Click on the name of your event, and click on Delete near the top-right.

- Click on Confirm to delete your event.

Enrolling Learners in a Learning Hub Event
If you’d like to directly enroll learners in your Learning Hub Event, you can add them to a plan or branch plan that includes the event similar to how you would enroll learners in a course. If the option Display on Browse page is enabled for your event, learners will also be able to register themselves on the Learning Hub Browse page.
Enrolling via a Plan
- Create a new plan by following the steps here under the section called “Creating Plans.” When you get to the last step called Learnables, you’ll be able to select what event(s) you’d like to include in the plan.

- After creating your plan, follow the steps under the section called “Adding Users” to add learners you want to register for your event. If your plan has vouchers, learners can also redeem vouchers in order to be registered.

- Once your learners are registered, they’ll be able to view the event in their My Learning page in the Learning Hub. See our article Attending and Viewing Events for more information.
Enrolling via a Branch Plan
- Create a new branch plan by following the steps here under the section called “Creating Branch Plans.” When you get to the last step called Learnables, you’ll be able to select what event(s) you’d like to include in the branch plan.
- After creating your branch plan, follow the steps here under the section called “Adding Users to Branch Plans” to add learners you want to register for your event. If your branch plan has vouchers, learners can also redeem vouchers in order to be registered.
- Once your learners are registered, they’ll be able to view the event in their My Learning page in the Learning Hub. See our article Attending and Viewing Events for more information.

