


Profile Fields allow you to collect additional information from learners. Using Console, you can configure Profile Fields to capture information such as a learner's school, year in school, professional status, or other data relevant to your organization.
Once configured, these fields can be presented to learners during registration or account set up and also appear on the learner's My Account page in Learning Hub, where learners can view, provide, or update their information. Administrators and instructors can also view and edit these values directly from the learner's profile in Console, ensuring learner information remains accurate and up to date.
Configuring Profile Fields
To configure a profile field, follow these steps:
- In Console, navigate to Experience tab and click on Profile Fields.
- Click on the Add New Field button on the right-hand side.
- Complete the field details:
- Input Label - required. The label displayed to learners during registration and on the My Account page.
- Input Name - required. An internal identifier used by the system. This value can only contain lowercase letters and underscores and cannot be changed after the field is created
- Select the Field Type:
- Text - Allows learners to enter free-form text.
- Email - Allows learners to enter an email address and validates the format.
- Checkbox - Allows learners to select a checkbox.
- Dropdown - Allows learners to select from a predefined list of options.
- If you select Dropdown, enter the first option, then click Add Option for each additional value.
- If the field should be mandatory during registration, select Required. Learners must provide a valid value for required fields before they can complete registration or account setup.
- Acknowledge the PII disclaimer and click Save. The PII acknowledgment is required to save the profile field. By acknowledging the disclaimer, you confirm that you understand your organization's responsibility for determining whether information collected through the field contains personally identifiable information (PII) and for meeting any applicable legal or compliance requirements.
After the field is saved, it is accessible to the learner during applicable registration and account set up flows and on My Account page in Learning Hub. If you later turn the field OFF, it will no longer be visible or editable by learners, but administrators and instructors can continue to view and update the field from Console.
Profile Fields During Account Setup
NOTE: This applies to non-SSO registration and account setup.
Learner-visible Profile Fields are also presented when a learner:
- Follows the link in an account activation email to finish setting up their account.
- Redeems a voucher and registers for an account.
The fields presented during registration and account setup follow the Field Type and Required settings configured in Console. If a field is configured as Required, the learner must provide a valid value before completing registration or account setup.
After registration is complete, learners can continue to view and update these fields from the My Account page in Learning Hub.
Editing Profile Fields
To edit an existing profile field, follow these steps:
- In Console, navigate to Experience tab and click on Profile Fields.
- Select the custom field you want to update.
- Click Edit.
- Update the desired settings:
- Input Label
- Required setting
- Reacknowledge the PII disclaimer. The PII acknowledgment does not remain selected after a profile field is saved. Each time you edit a profile field, you must select the PII acknowledgment again before you can save your changes.
- Click Save.
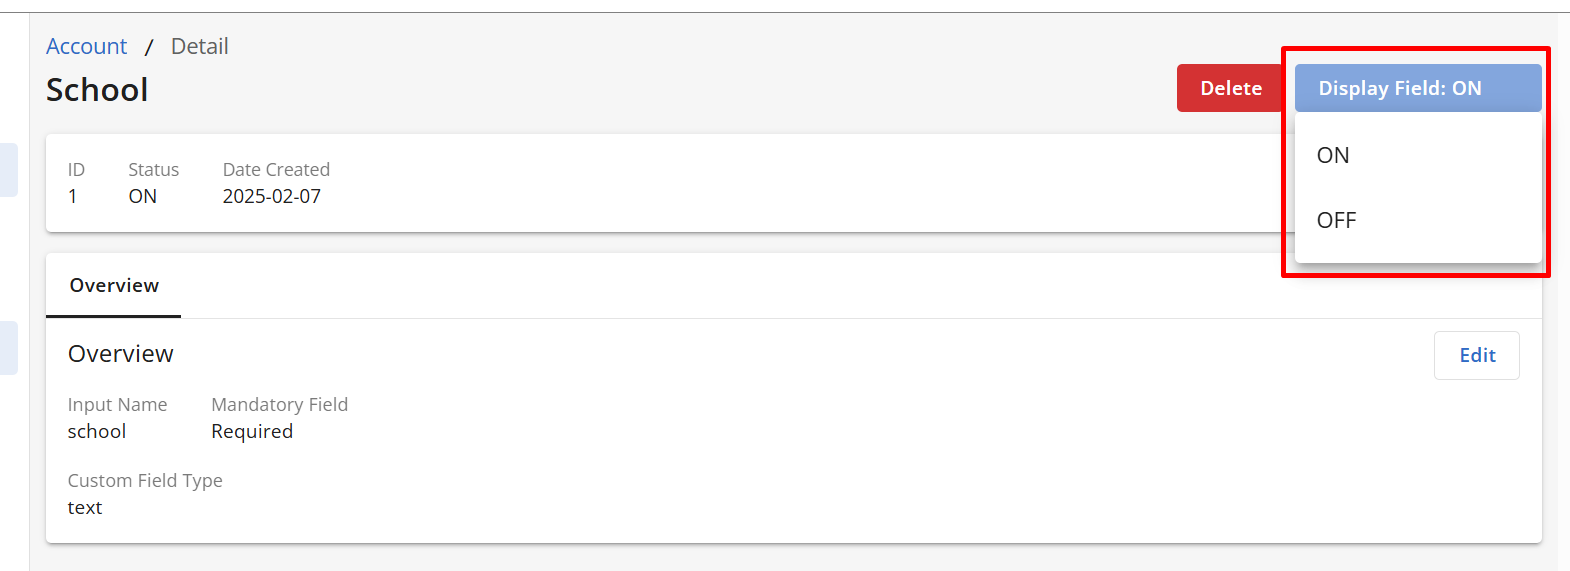
- You can also use the Display Field toggle to control whether learners can view and edit the field:
ON -The field is displayed on the learner's My Account page and during applicable registration and account setup flows.
OFF -The field is hidden from learners but remains visible and editable by administrators and instructors in Console.
Rearranging Profile Fields
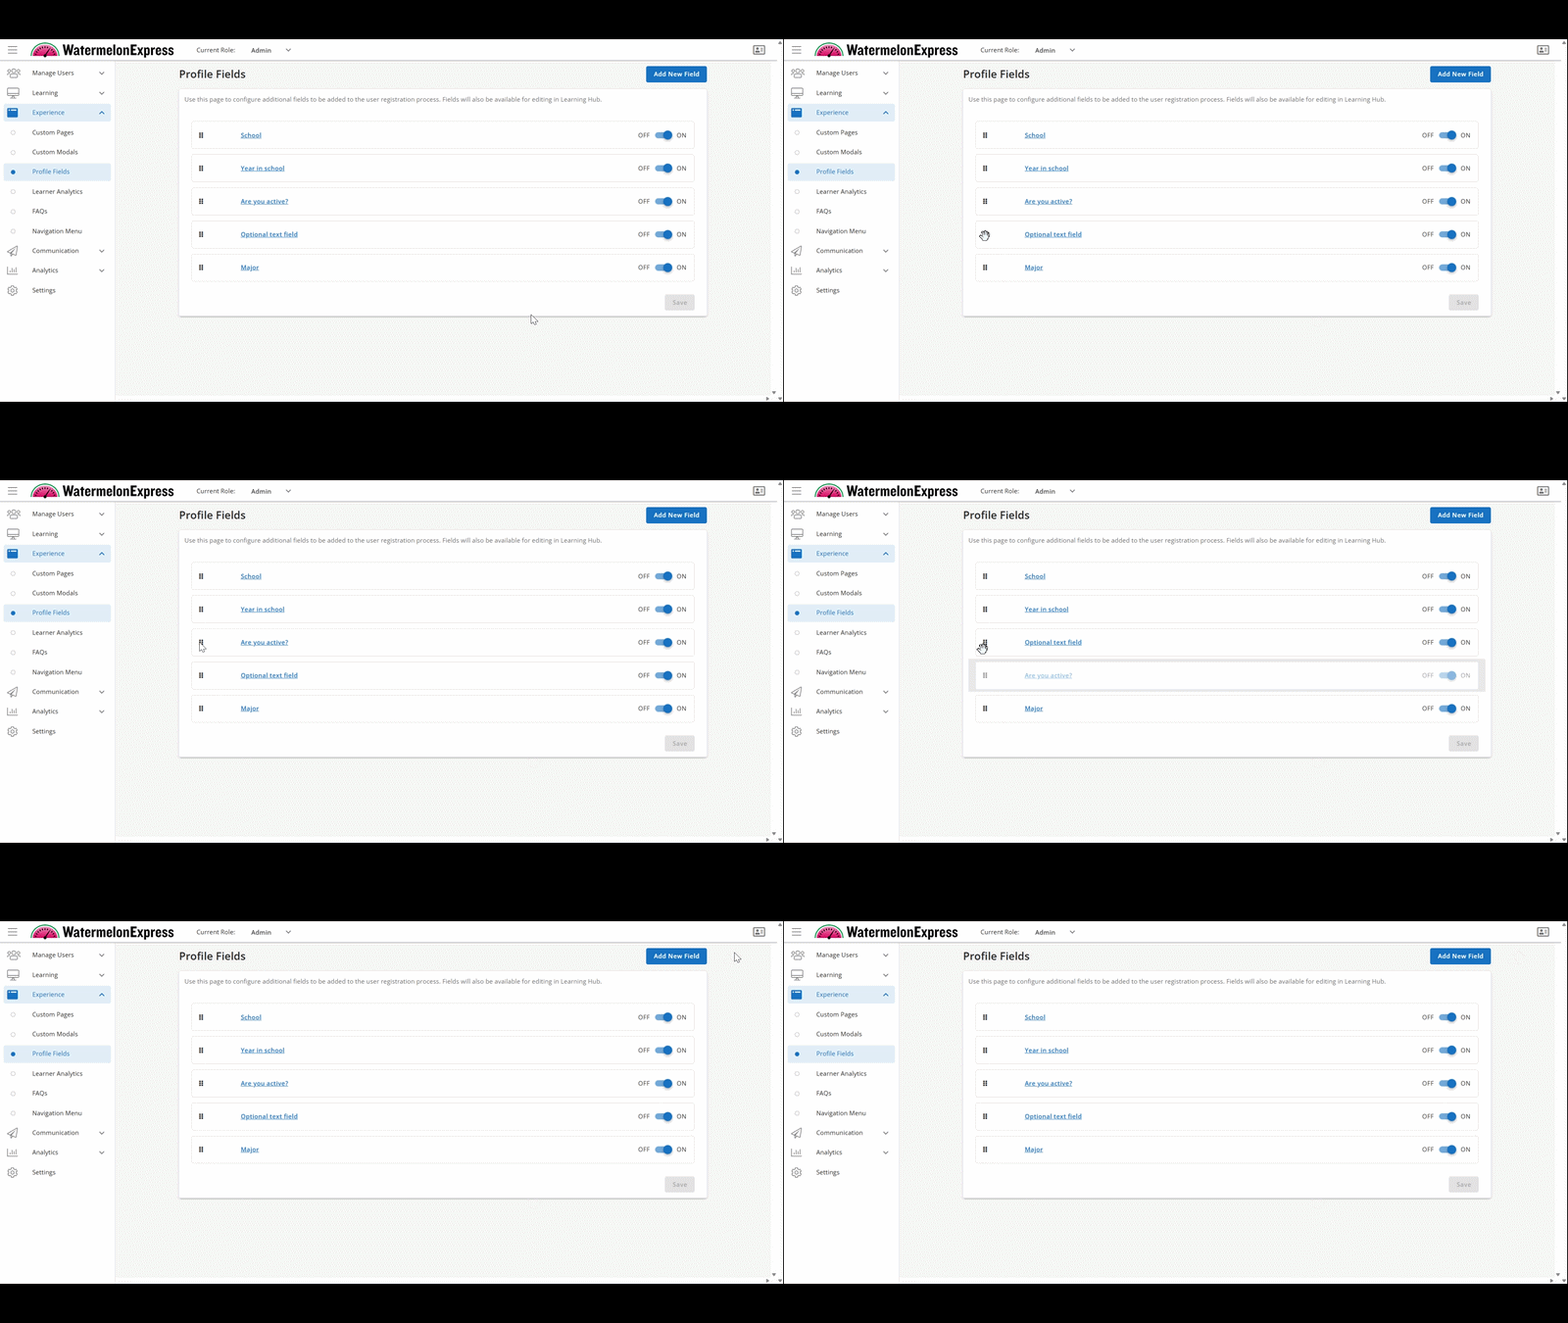
Drag and drop fields to change their order. The fields will appear in the same top-to-bottom order on the My Account page in Learning Hub.
Deleting Profile Fields
To delete a profile field:
- In Console, navigate to Experience tab and click on Profile Fields.
- Select the custom field you want to update.
- Click Delete.
- Confirm the deletion.
Viewing and Editing a Learner's Profile Fields in Console.
To view a learner's profile fields follow these steps:
- In Console, navigate to Users tab under Manage Users.
- Locate a learner you would like to view or edit and click on the Name.
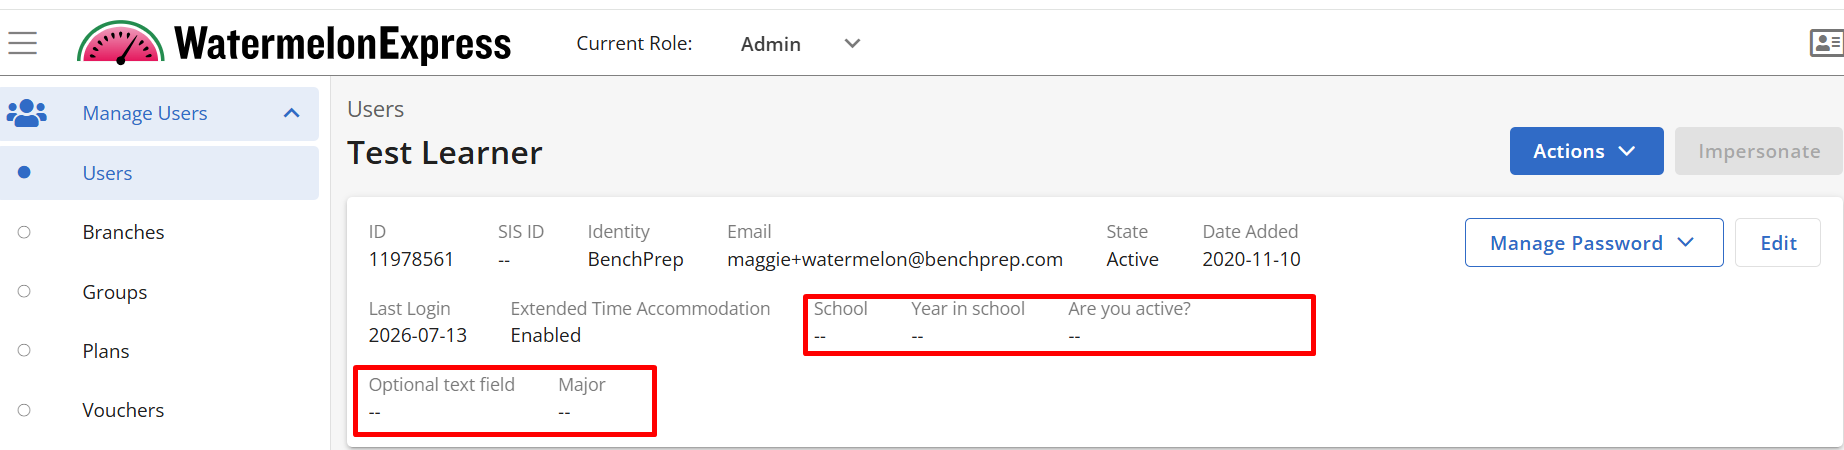
- The learner's custom field values are displayed at the top of the User Detail page, alongside the learner's other profile information.
- Click Edit.
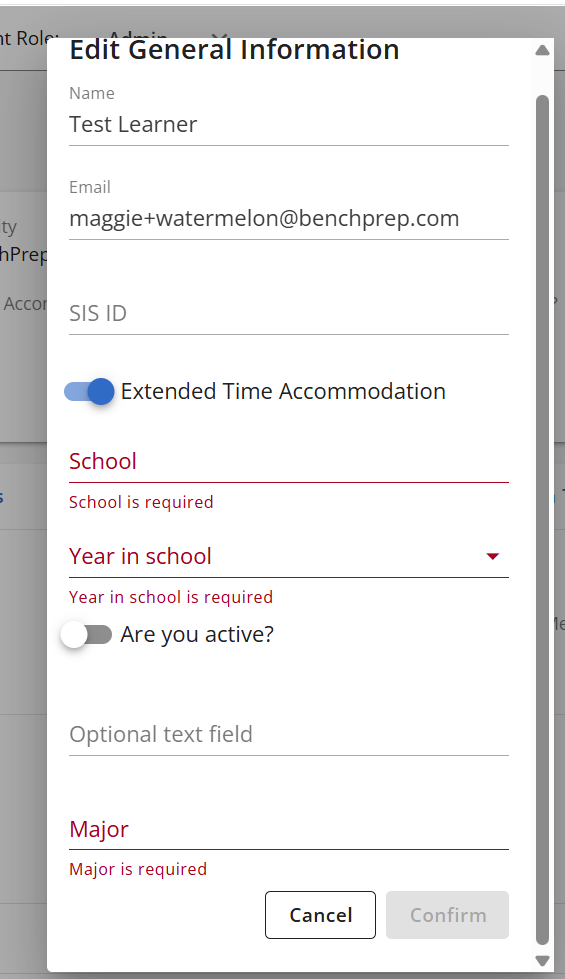
- Update the desired profile field values and click Save.
Using Profile Fields as a Learner
Once an administrator configures and enables custom profile fields, learners may be prompted to complete these fields during registration or account set up. Learners can also view and update these fields at any time from the My Account page in Learning Hub, provided the field is configured to be displayed. For information on accessing My Account, see the My Account article.

