
 811
811
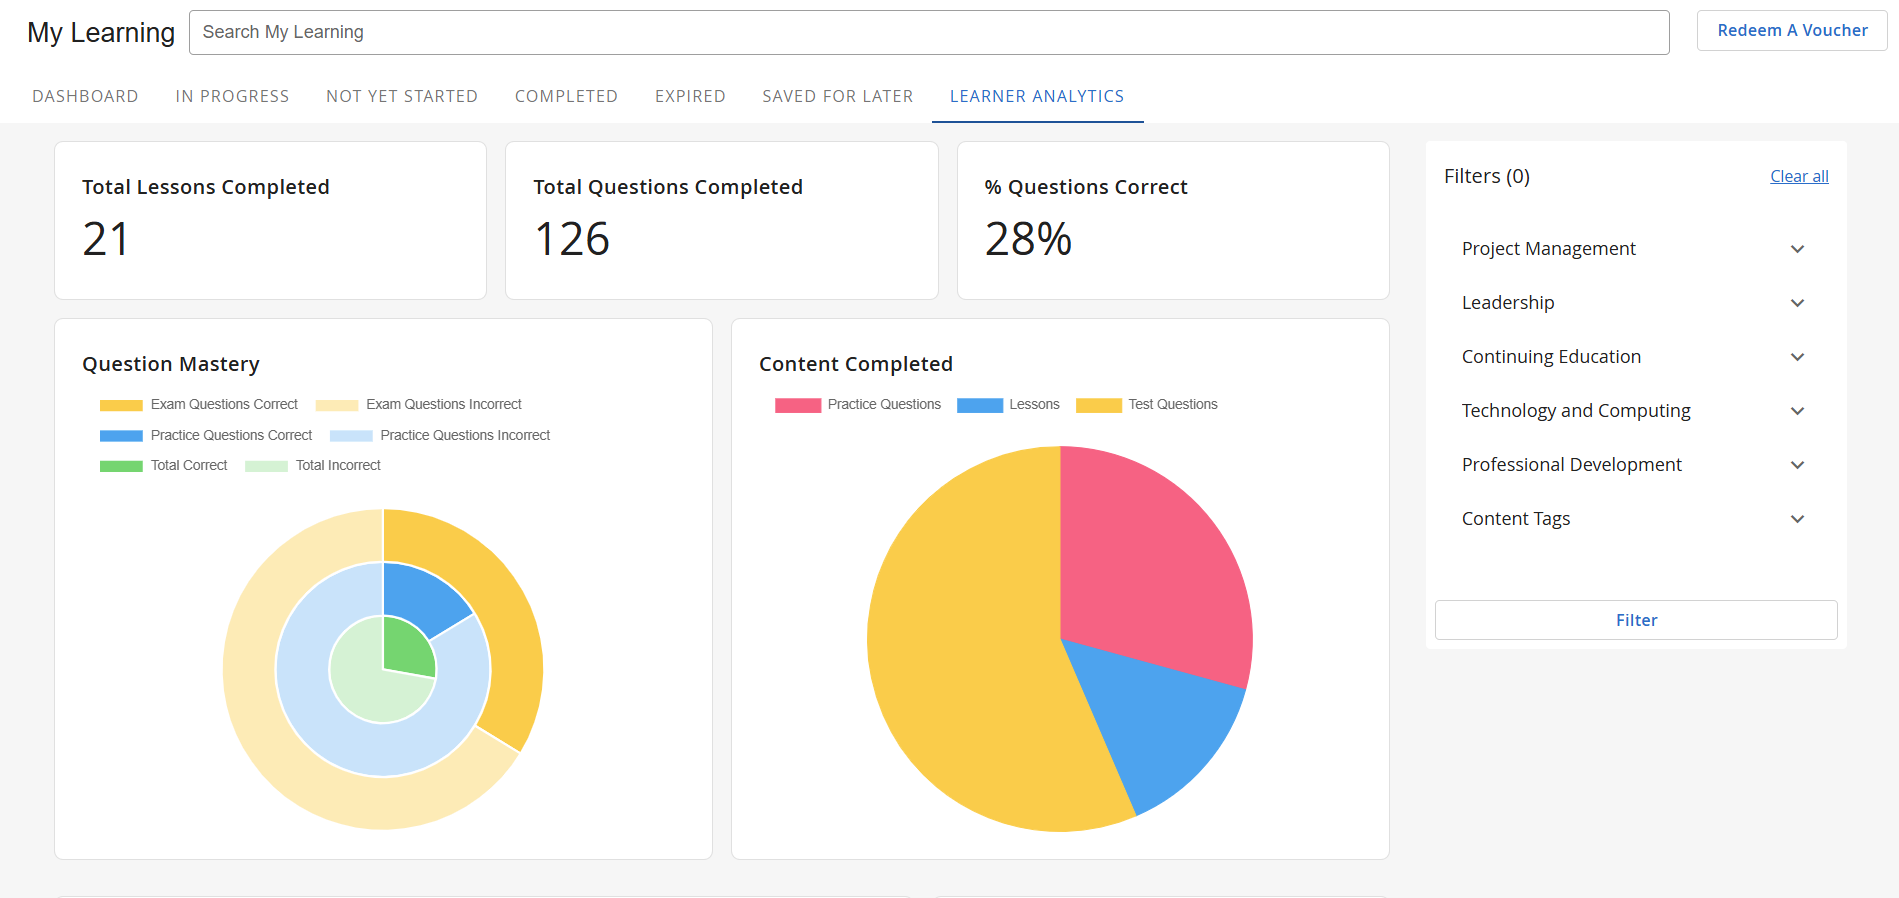
Learner Analytics is a Dashboard in Learning Hub that provides learners with clear, visual insights into their course performance. It helps learners track their activity, measure their progress, and focus their efforts where it matters most. The dashboard includes interactive charts and filters that give users a personalized view of how they’re doing—making it easier to stay engaged and on track.
The Learner Analytics dashboard shows a summary of performance data, such as:
- Lessons completed
- Questions answered
- Accuracy by topic or content tag
- Activity over time
By reviewing this data, learners can better understand their strengths and learning gaps, adjust their study strategy, and monitor their growth over time.
Learner Analytics is designed to support better outcomes by:
- Encouraging learner motivation and ownership through clear feedback
- Helping learners identify areas for improvement using targeted filters
- Making it easier for learners to stay focused and self-directed in their study
- Supporting long-term engagement by showing visible progress
These insights not only enhance the learning experience but can also improve completion and success rates.
Configuring Learner Analytics in Learning Hub
To use Learner Analytics in the Learning Hub, this feature will need to be enabled for your tenant by BenchPrep. If you’d like to have it enabled, please reach out to Support for further assistance.
Once enabled, you can configure which data widgets will be displayed to your learners using the steps below. You will need to be an admin or have a custom role assigned with the permission Manage:Analytics Dashboard.
- Navigate to Console, expand the Experience tab, and click on Learner Analytics.
- Toggle off and on the data widgets that you’d like to display to learners.
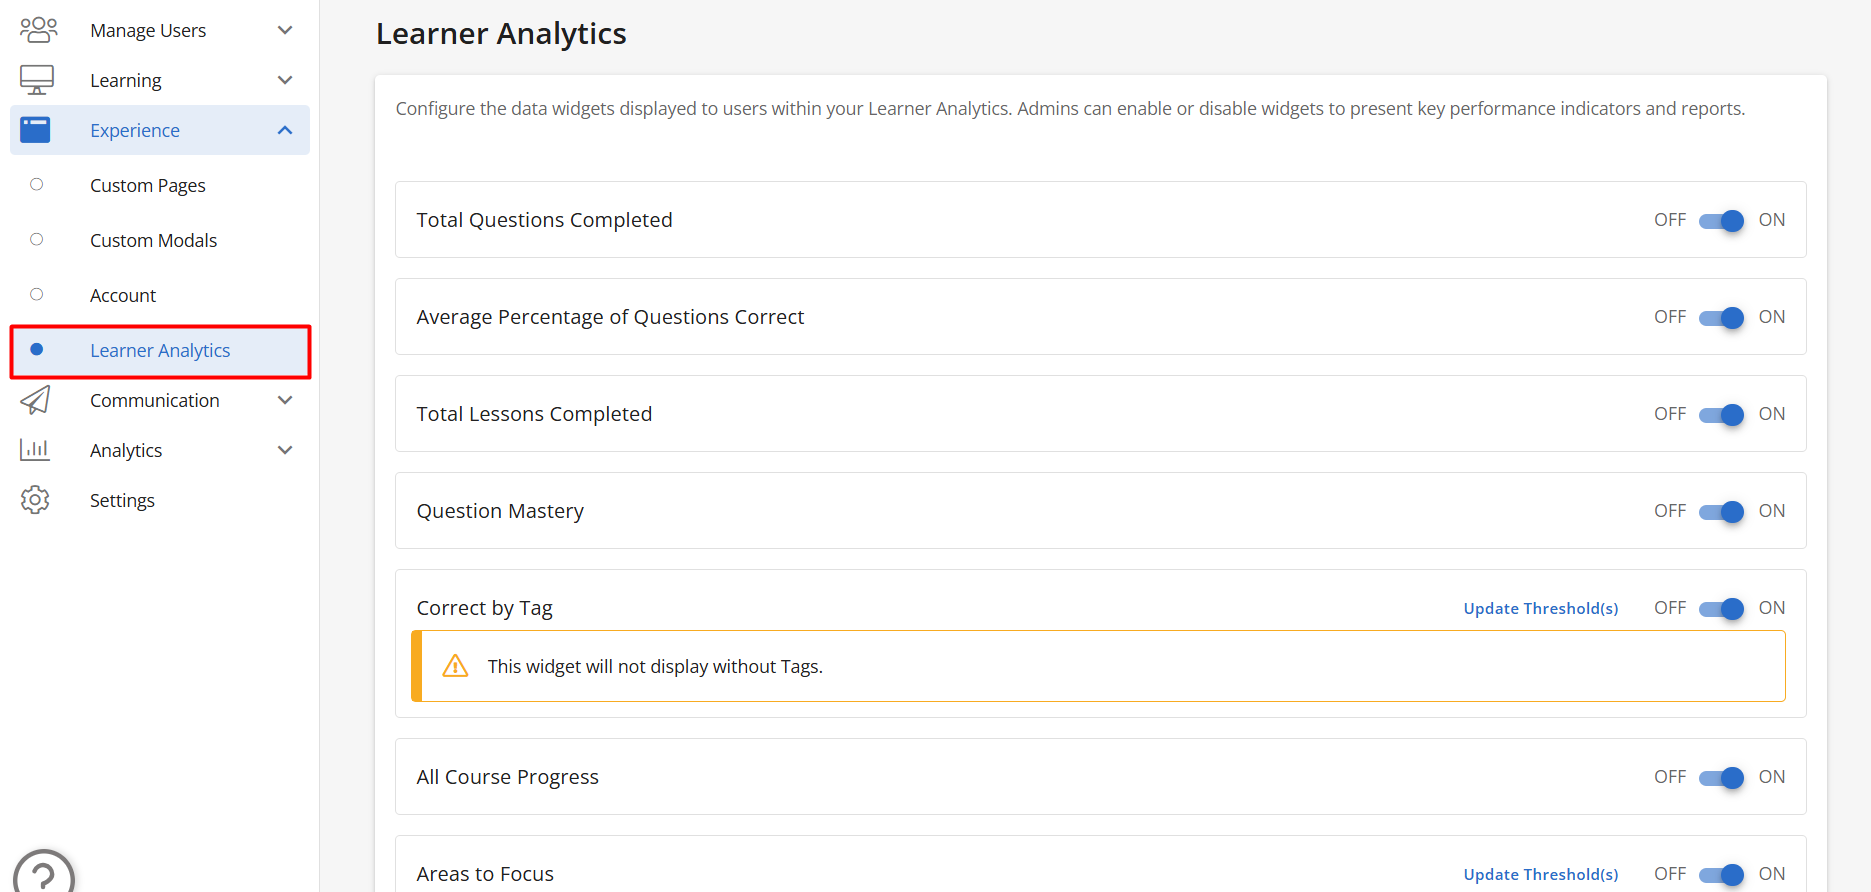
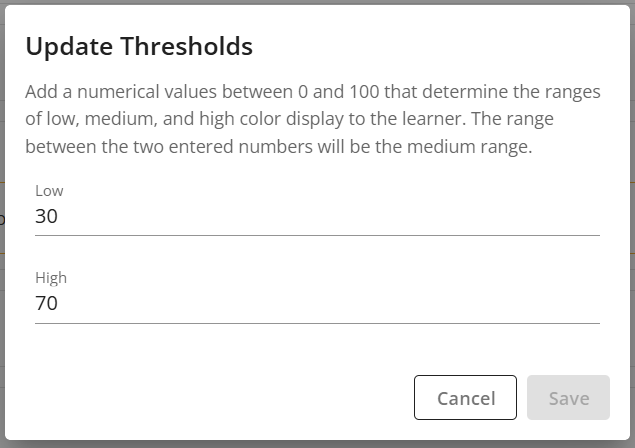
NOTE: Data widgets that need tags in order to populate data will have a message displayed. To learn more about tags, check out our articles here. - Data widgets that use thresholds to display data can also be reconfigured. Click on Update Threshold(s) next to a widget for more information, update the threshold value(s), and click on Save.

- For the Course Detail Breakdown data widget, you'll be able to configure what columns appear to learners. Click on Update Column(s), toggle on or off the columns you'd like to display, and click on Save.

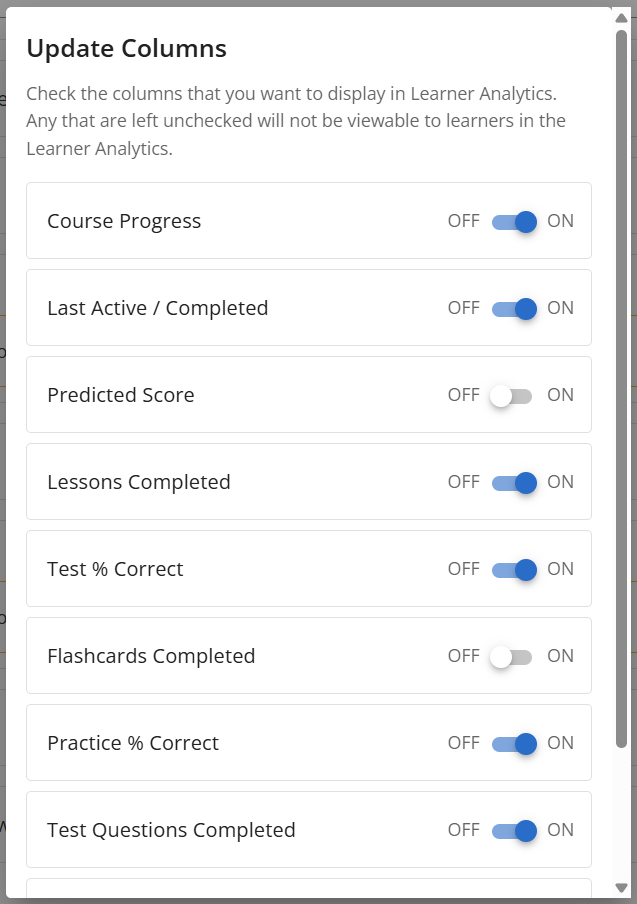
- The columns include:
- Course Progress
- Last Active / Completed
- Predicted Score (if applicable)
- Lessons, Flashcards, Practice Questions, and Test Questions Completed
- Practice % Correct and Test % Correct
- The columns include:

