
 1179
1179
To use Recognitions for your courses, the Recognition Issuance feature access must first be enabled for your tenant. Click here to learn how to toggle the feature on.
Once the feature access is enabled, you’ll then be able to add Recognition Types to your tenant in Console. To do so, you will need to be an admin or user with a custom role that has the permissions Create:Recognition_Types, Read:Recognition_Types, Update:Recognition_Types, and Delete:Recognition_Types.
Adding a Recognition Type
To add a new recognition type to your tenant, follow these steps:
- Navigate to Console, and click on Settings.
- Click on Tenant Details and then the Recognition Types tab.


- Click on Add Recognition Type.

- Type in the name for your recognition, and select an Award Type. The type can be a Credit Unit, a Credly Badge, an Accredible Badge, or a Certificate.
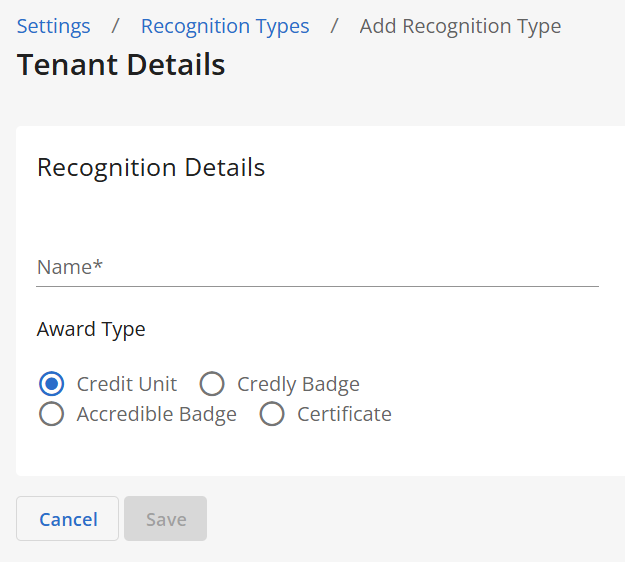
NOTE: If you have multiple Credly badges for your organization, you will only need to create one recognition type for Credly Badges. The same applies to Accredible Badges. - Click on Save.
After setting up your recognition types, you can now add recognitions to your courses in BluePrint. For more information, check out our article here.
Editing a Recognition Type
To edit a recognition type in your tenant, follow the steps below. You’ll be able to edit the name of your recognition type, but the Award Type cannot be changed.
- Navigate to Console, and click on Settings.
- Click on Tenant Details and then the Recognition Types tab.
- Next to the recognition you’d like to edit, click on Edit.

- Edit the name of your recognition.

- Click on Save.
Deleting a Recognition Type
To delete a recognition type in your tenant, follow these steps:
- Navigate to Console, and click on Settings.
- Click on Tenant Details and then the Recognition Types tab.
- Next to the recognition you’d like to delete, click on Delete.

NOTE: If a lock icon appears instead of the Delete button, the recognition cannot be deleted because it’s utilized in one or more courses. - Click on Delete to confirm.


