
 2083
2083
To manage product categories, you will need to be an admin or have a custom role assigned with the Read:Product_Categories and Manage:Product_Categories permissions.
To help you organize your products effectively, our system uses two levels of categories:
Category Group (Parent Category): This is the main or "umbrella" category.
Category (Child Category): These are the specific subcategories nested under a Category Group.
For example, if you want to create a product category for Mathematics, you would set it up as follows:
Category Group: Mathematics
Categories: Algebra, Geometry, Calculus
In this case, Mathematics is the parent (Category Group), and Algebra, Geometry, and Calculus are the child categories nested beneath it.
Once you have an idea of how you would like to structure your Product Catalog you can create them manually or via bulk upload.
When building your catalog manually, we recommend following these steps:
- Create Product Category Groups first - Category Groups act as your main, top-level categories. They will display in the order you create them (the first one created will appear at the top).
- Add Product Categories under each Group - Once your Category Groups are set, create the child Categories that belong within them. This ensures your catalog is neatly structured and easy to navigate.
Adding Product Category Groups
- Navigate to Console, click on Settings and then Tenant Details.
- Click on the Product Categories tab.
- Click on the Add Product Category button.
- Select Category Group option, input the Category Group Name.
- Review Display on Analytics Dashboard and Display on Browse based on your needs.
Display on Learner Analytics - Makes this category available to learners as a filter when they view the Learner Analytics in Learning Hub.
Display on Learning Hub - Makes this category available to learners on My Learning, Browse (if enabled) and Learner Analytics tab (if enabled) in Learning Hub.
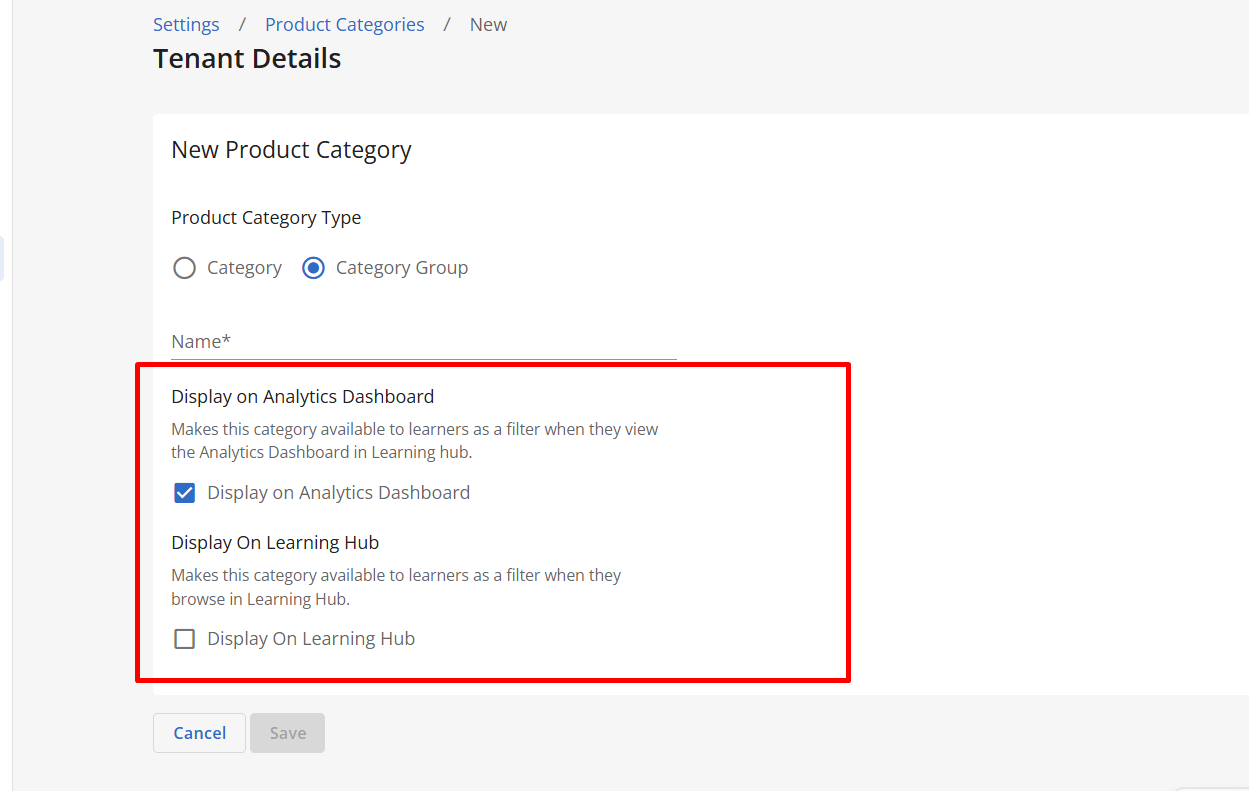
- Click on Save.
- Repeat steps above to create other Category Group names.


Adding Product Categories
Once your Category Group Names have been created you can create individual Categories by following the steps below:
- Navigate to Console, click on Settings and then Tenant Details.
- Click on the Product Categories tab.
- Click on the Add Product Category button.
- Select Category option, input the Category Name. Note that categories inherit configuration settings from their category group.
- Select the appropriate category group from the Category Group dropdown to associate the category to its parent.
- Click on Save.
- Repeat steps above to create other categories.


Bulk Importing Product Categories
If you'd like to bulk import your categories versus creating them individually, follow these steps:
- Navigate to Console, click on Settings, and then Tenant Details.
-
Click on the Product Categories tab.
-
Click on the Import Product Categories button.
-
Upload your CSV file. Click on See upload instructions to see what columns need to be included and download a template.
-
Click on Import.
-
You will receive an email with the results of your import.


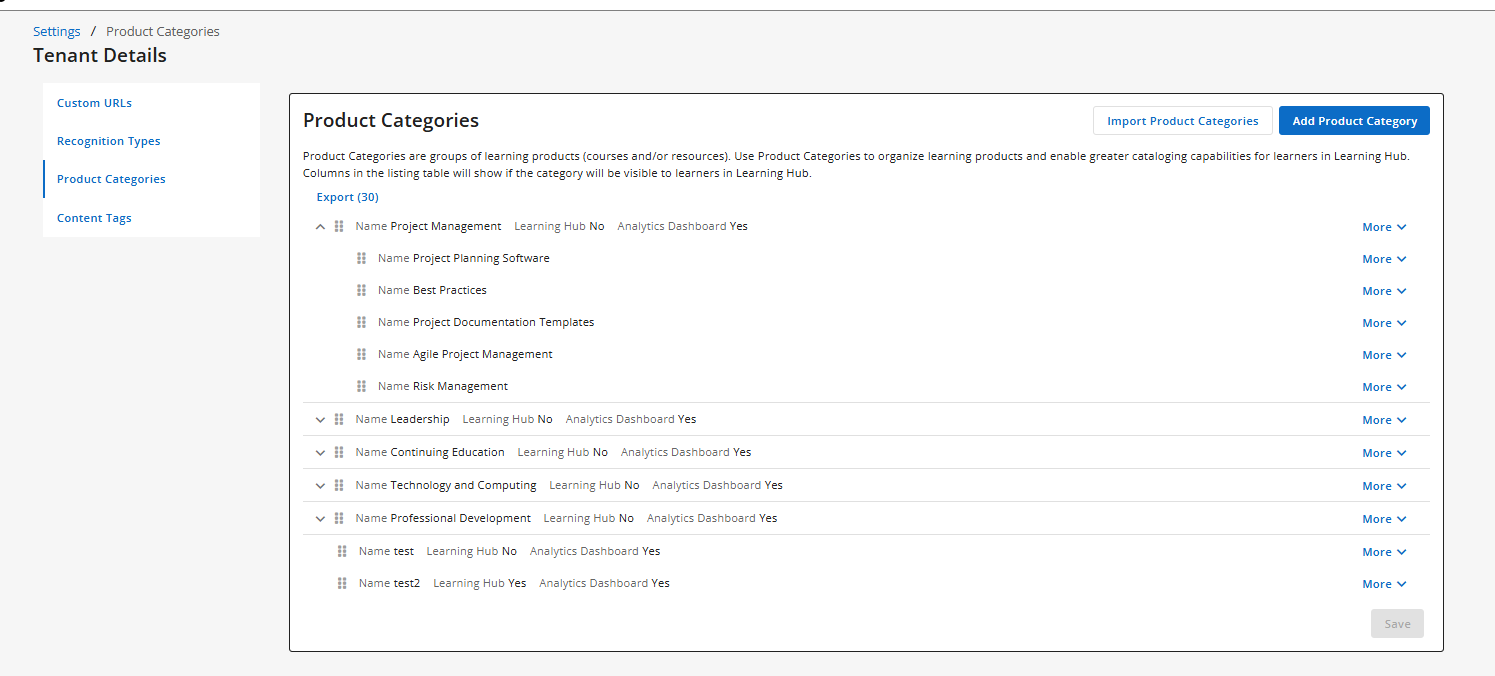
After creating your product categories you can review them in Console. Admins or users with a custom role with the read:product_categories permission can view uploaded categories.
Editing Product Categories
- Navigate to Console, click on Settings, and then Tenant Details.
- Click on the Product Categories tab.
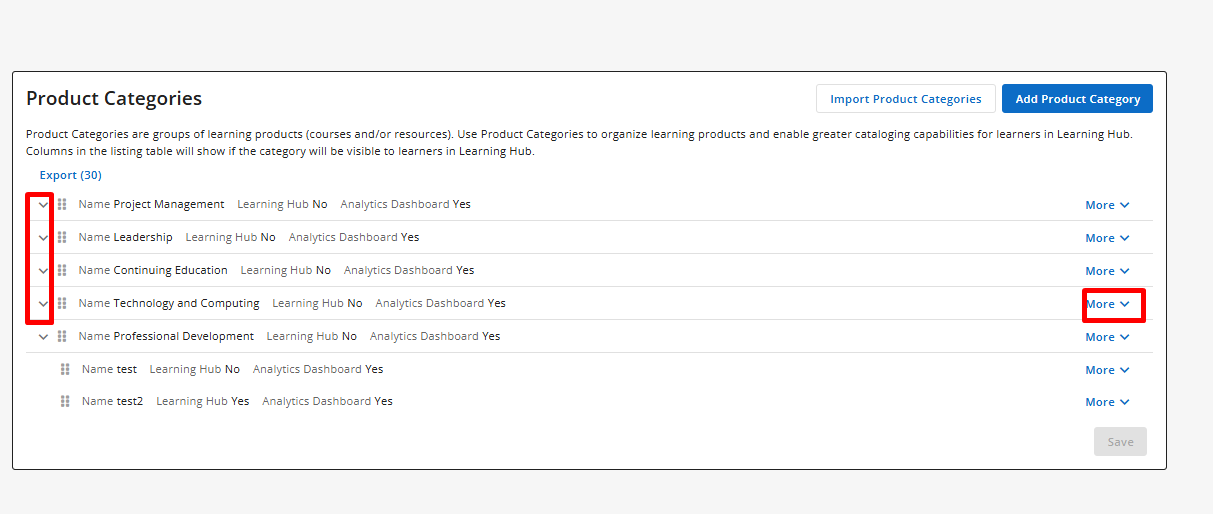
- Locate the Group Category or Category you need to modify; expand the category view to see both Group Names and Category names.
- Click More on the right-hand side.
- Select Edit.
- Make desired updates and click Save.
Reordering Product Categories
You can rearrange product categories by using dragging and dropping them. The order of the product categories will be reflected in Learning Hub and Learner Analytics (if enabled). When rearranging product categories keep in mind:
You can:
- Drag and drop a child category within the same parent category
- Drag and drop a child category to a different parent category
You can't:
- Drag and drop a parent category
- Drag and drop a parent category under a child category
- Drag and drop a child tag under a category without its parent

Deleting Product Categories
- Navigate to Console, click on Settings, and then Tenant Details.
- Click on the Product Categories tab.
- Locate the Group Category or Category you need to delete; expand the category view to see both Group Names and Category names.
- Click More on the right-hand side.
- Click Delete.
- A confirmation modal will appear, select the Delete option if you’d like to proceed.

