5309
5309
The Navigation Menu for BenchPrep courses can be configured within BluePrint. You’ll be able to add custom quick links, display, hide, and rearrange the order that learning modalities appear in, add dividers, and choose the course’s landing page (the page that learners will see first after logging in) in the Learning Platform at the course-level. This allows you to configure a flexible, customized and tailored learning experience for each BenchPrep course.
Updates can be made by users with the BluePrint Admin or Owner role. Any updates will immediately be visible upon saving, so a course build is not required in order for updates to take effect. For courses that have navigation customizations in place, these will be reflected in BluePrint and you’ll still have the ability to make updates.
BluePrint:

Learning Platform:
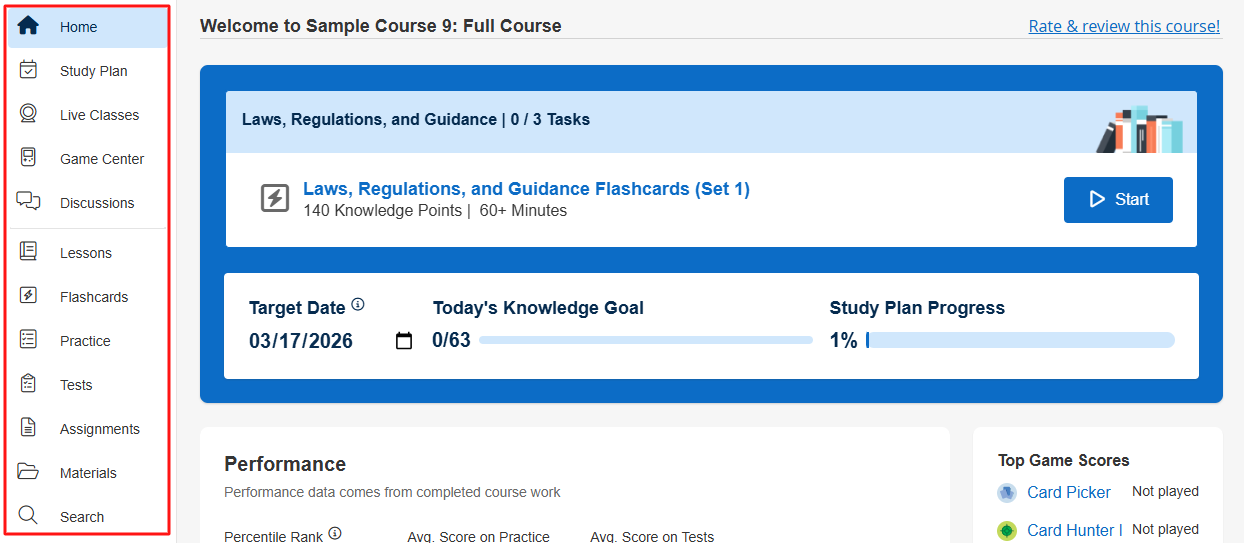
To access a course’s menu settings, navigate to your course in BluePrint, and under Course Details, click on Navigation Menu.

Adding Quick Links
You can add quick links that direct learners to any external URLs with external tools or resources. Within the Navigation Menu, follow the steps below to add a quick link:
- Click on the Add Navigation Item button.

- Fill out the details including:
- Name of the navigation item - the name is max 15 characters with a maximum of 2 short lines.
- Quick Link - ensure the URL contains https:// or http:// prefix.
- Open in - select if you would like the link to open up in existing window or a new window.
- Select an Icon to display in BluePrint and in the Learning Application within the course. Note that the icon might look slightly different within the Learning Application.
- Click Save to save the new quick link.

Click Update near the top-right to update the navigation menu. The course does not need to be built in order for updates to take effect.

Rearranging Learning Modalities
To change the order of your course’s learning modalities, drag and drop them to their desired order.

NOTE: If there is no content within a specific modality in BluePrint, the item will not show up within the navigation in the Learning Platform.
Managing Dividers
To separate learning modalities into sections for a more organized user experience, you can add dividers to your menu. Dividers will appear as a line in-between each section.
To add a new divider, click on Add Divider at the bottom of the page.
To delete a divider, click on the X on the right-hand side.
Drag and drop your dividers to their desired order.

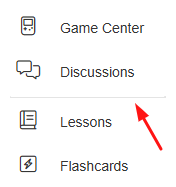
Hiding Learning Modalities
To hide a learning modality so that it doesn’t appear to learners, click on the eye icon next to the modality you’d like to hide.

In this example, Discussions and Flashcards have been hidden, so they do not appear in the Learning Platform.

NOTE: If an item is grayed out and has no option to show/hide, then it’s been disabled and needs to be turned on via Course Configuration in order to use it for your course.

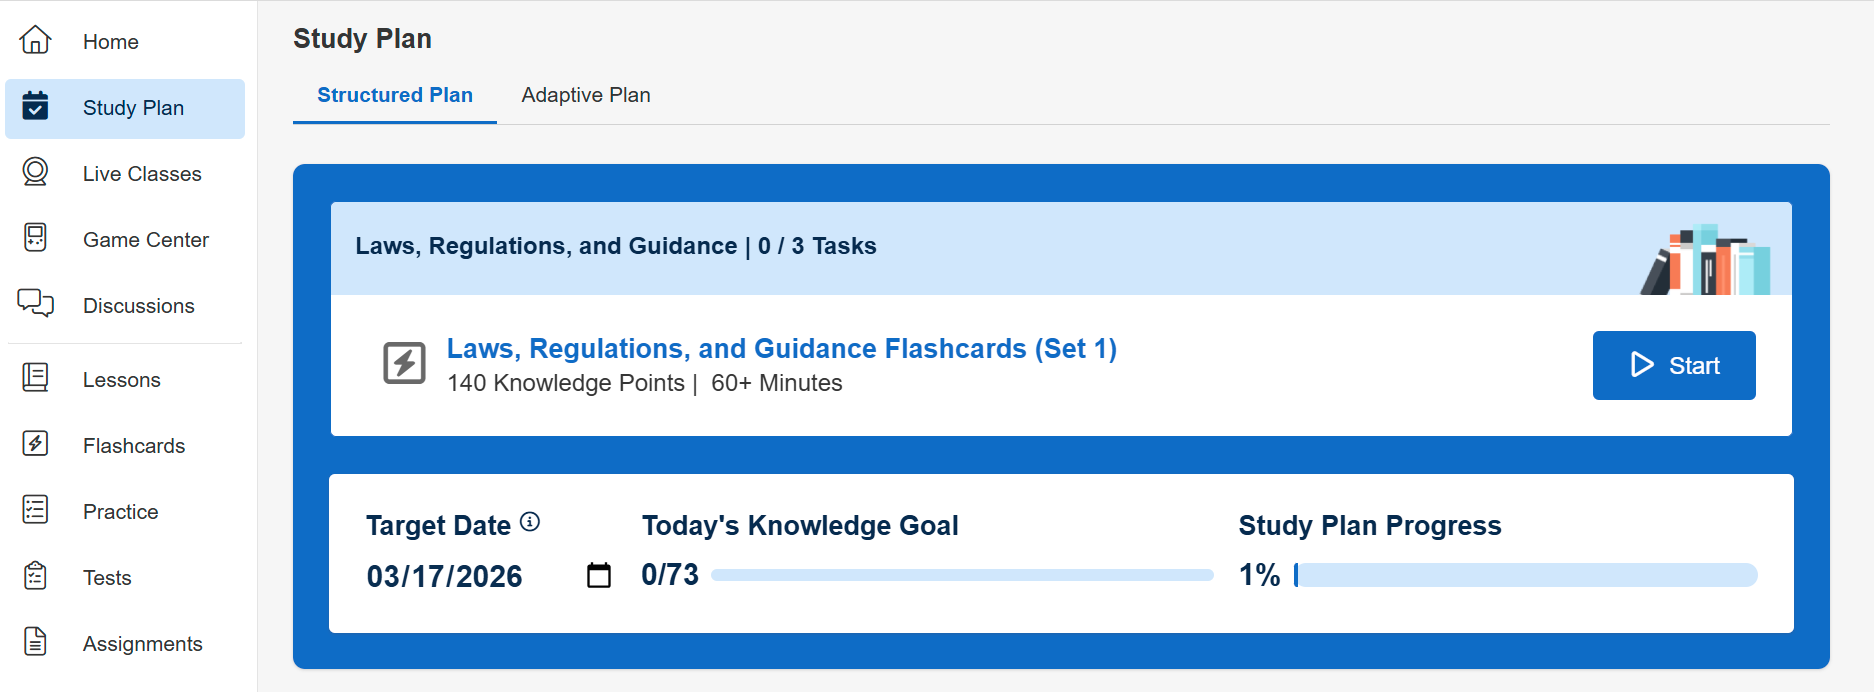
Configuring a Landing Page
Once learners login and access their course, they will be brought to the course’s landing page. To choose a landing page, select the star icon next to a learning modality. If no star is selected, “Home” will be the default landing page.

NOTE: If there is no content within a modality in BluePrint that is indicated as the course’s landing page, the landing page will default to Home. When Practice is selected as a learning modality, the course landing page will change based on which practice options are enabled:
-
Only Category Practice enabled
-
The landing page opens the Practice Dashboard.
-
-
Only Custom Practice enabled
-
The landing page opens the Start a New Custom Practice Session page.
-
-
Both Category Practice and Custom Practice enabled
-
The landing page opens the Practice Selection Page, where learners can choose which type of practice session to start.
-
Updating the Navigation Menu
After you’ve completed making changes, click on Update near the top-right to update the navigation menu. The course does not need to be built in order for updates to take effect.

Viewing Changes
To view your changes, click on Course Details on the left-hand side, and click on the WebApp URL to open the course in the Learning Platform.

You can also click on the menu at the top-right of the page and open the User Portal or Learning Hub, depending on which one your tenant is using, and launch your course from there.

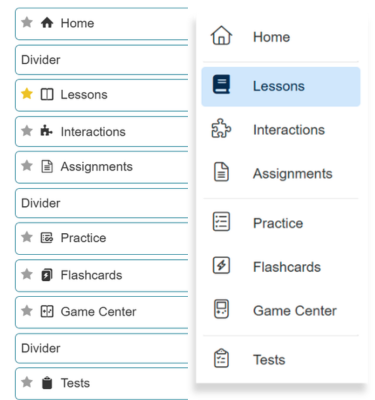
Once you’re in your course, on the left side will be your updated navigation menu. Below is an example of how the Navigation Menu in BluePrint (left) will appear in the Learning Platform (right) for comparison.