Customizing Embedded Video Thumbnails

Dec 08, 2022
 2220
2220
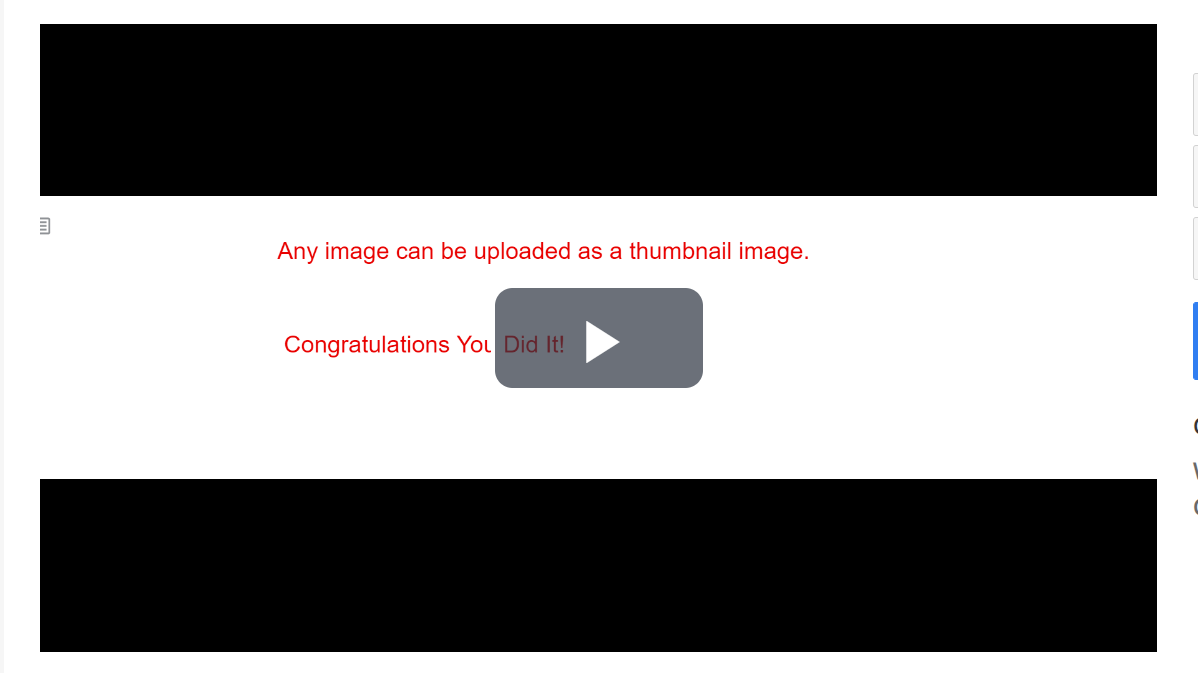
When you upload/embed a video within a lesson, typically frame of the video is set as the “thumbnail” or image that shows up before you hit play. Often, this is simply a blank black or white screen (as shown in screenshot below) and is dependent on the content of the video.

You can customize the thumbnail by inserting any thumbnail image of your choice to be displayed. To modify the video thumbnail image follow these steps:
- In Blueprint, navigate to the course and appropriate lesson contianting the video.
- Select Edit on the upper-right hand side.
- Locate Image icon within the WYSWYG table.
- Choose the image file you would like to use as the thumbnail for the video and select Upload button.
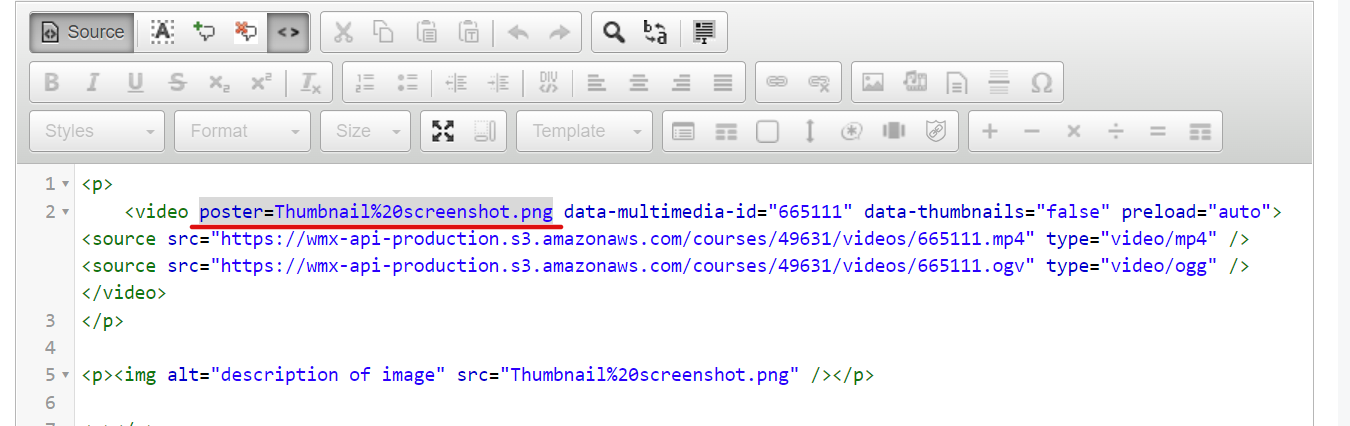
- Select Source button within the WYSWYG table and copy the image's screenshot link located within the editor.
- Add poster=image.png attribute inside the <video> tag using the copied screenshot link (replace image.png with the copied image link).
- Delete the video image link.
- Select Save.
- Click Publish changes when ready.
The thumbnail within the lesson will be replaced with the uploaded image!