
 2387
2387
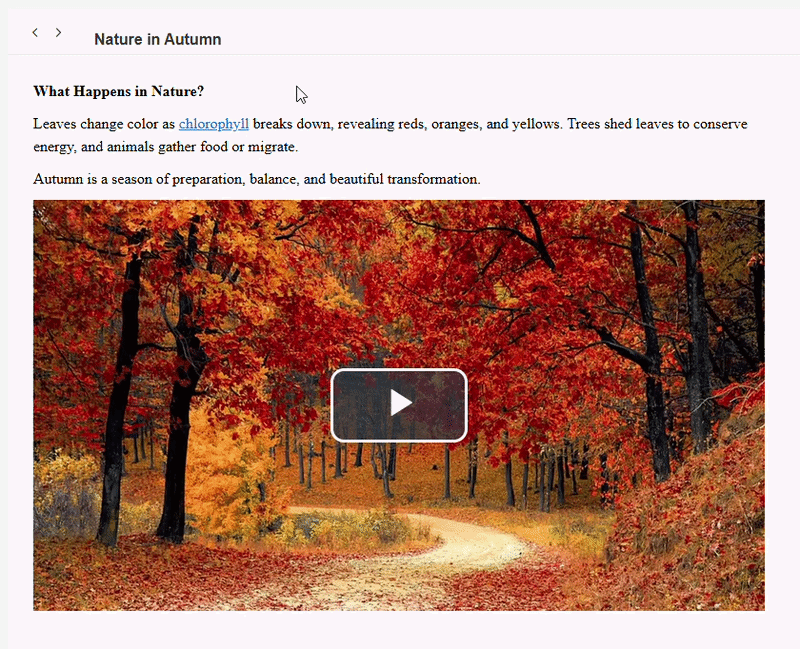
What is a Popover?
A popover is an inserted text or audio/media file that may be added to any text within a content type (lessons, questions, passages etc.) The Popover tool functions by clicking on the word or phrase that is a popover can be used on Titles, Headers, Expanders, or any word(s) you choose. Popover can add an extra layer of interaction within the course and provide learners with additional information that is not included in the material. Popovers are also useful for helping to define words the learner may not be familiar with.
Adding a Text popover
Popover can be added to various content types (lessons, questions, passages etc). Here are instructions to add a popover into a Lesson:
- In BluePrint, select the appropriate course.
- Navigate to Lessons on the left-hand navigation and select the lesson you would like to add a popover to.

- Select the Edit button on the top right-hand side of the screen.
- Scroll down to the Reading Content section. Within the section, highlight the content (word or phrase) you would like to add a popover to. Any word, header or expander can be used for a popover.
- Once highlighted, select the Insert Popover icon in the WYSIWYG.
- Within the pop-up box, insert the text you want in the Popover/HTML box and click OK.
- Click Save button.
- When ready, select Publish Changes to build the course.


You can view the popover in Webapp by navigating to the Lesson and selecting View in Webapp link.

Adding an Audio/Multimedia Popover
In addition to adding text, you can include audio/multimedia files popovers, as helpful visual and audio tools to enhance the learning experience. An audio/multimedia Popover can be added to various content types (lessons, questions, passages etc). Here are instructions to add it popover into a Lesson:
- In BluePrint, select the appropriate course.
- Navigate to Lessons on the left-hand navigation and select the lesson you would like to add a popover to.

- Select the Edit button on the top right-hand side of the screen.
- Scroll down to the Reading Content section.
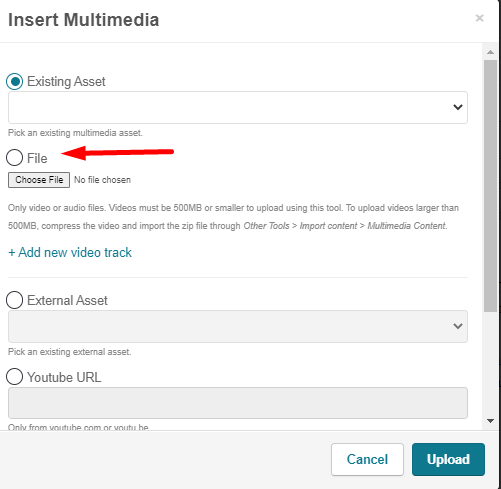
- Select Insert Multimedia icon within the WYSIWYG to add your audio/multimedia file to the lesson.
- Select File option and click on Choose File button to locate the appropriate file from your computer to upload. Once the file name appears next to the Choose File button, select the Upload button at the bottom of the pop up.
Alternatively, you can select Existing Asset if you would like to use a file that has been uploaded in BluePrint in Assets. Follow the Importing the multimedia Assets Singly step-by-step instructions found here if you would like to upload an Asset into a course.
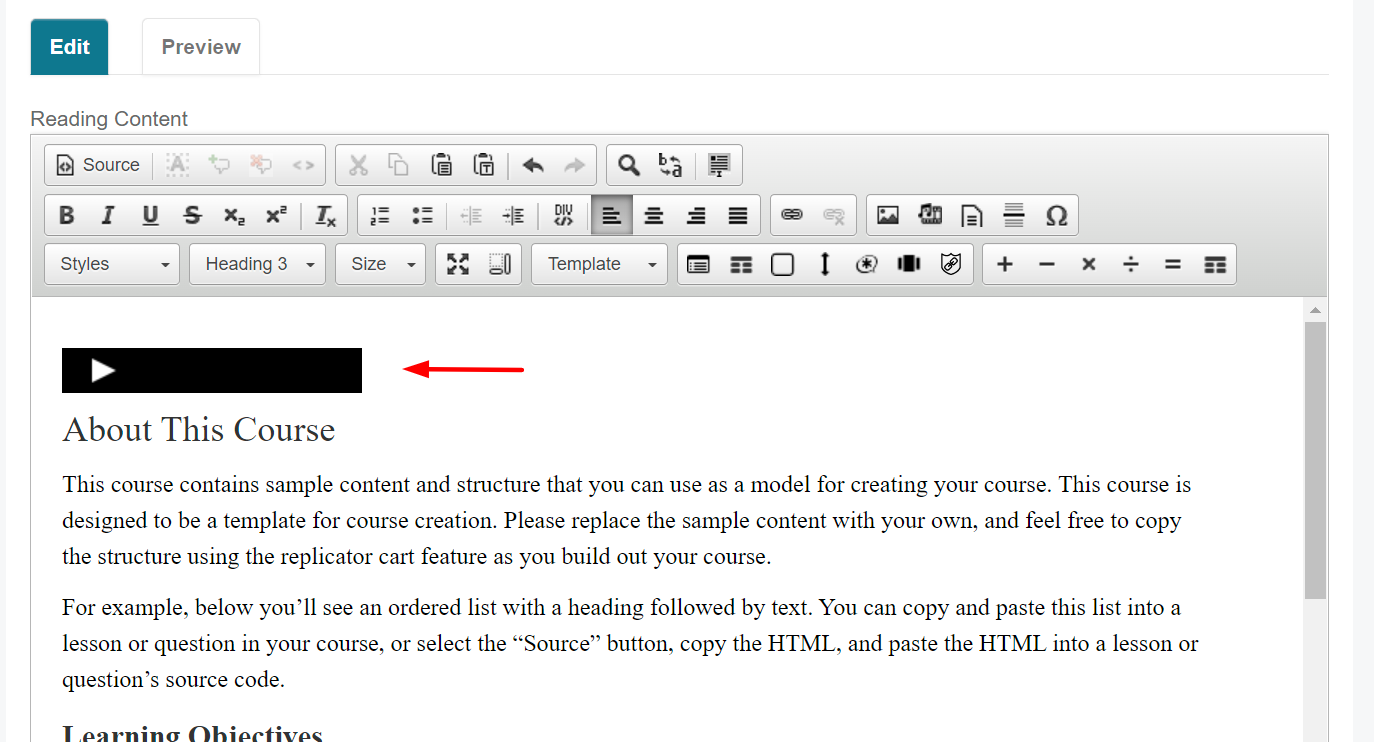
- Once the file has been uploaded, it will be displayed within the Reading Content section.
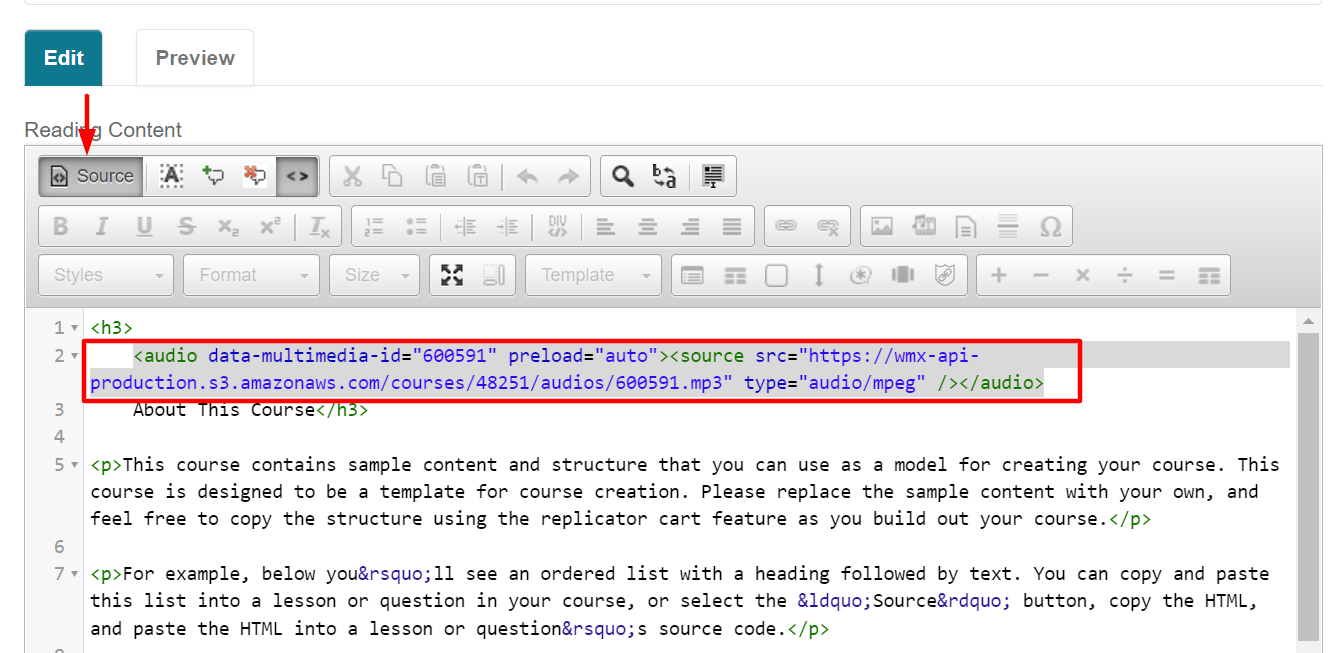
- Select the Source button to locate and copy the HTML code for the uploaded file. NOTE: Exclude the <p> tags if present.
- Click on the Source button again to return to the regular content view.
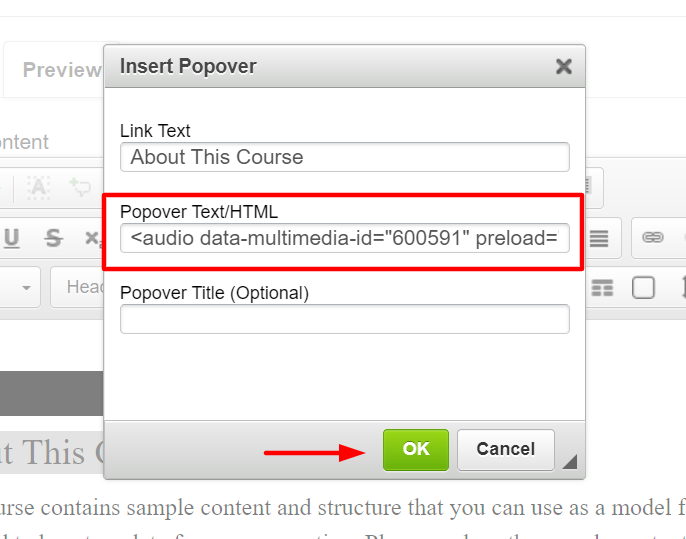
- Highlight the content (word or phrase) you would like to add a popover to. Any word, header or expander can be used for a popover.
- Once highlighted, select the Insert Popover icon in the WYSIWYG.
- Within the pop-up box, paste the copied HTML code in the Popover/HTML box and click OK.
- Remove the original audio/media file inserted into the lesson content by highlighting and selecting the backspace button.
- Click Save button.
- When ready, select Publish Changes to build the course.

You can view the popover in Webapp by navigating to the Lesson and selecting View in Webapp link.


