
 3012
3012
This article covers creating and editing a webhook. Note: Managing Webhooks is done via Console, check out Who Can Set up Webhooks? to learn more.
Creating a Webhook
To create a webhook in the BenchPrep platform follow these steps:
-
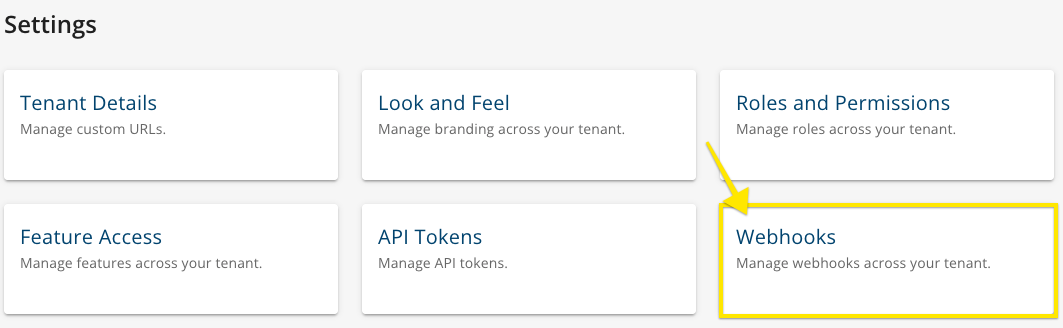
Open Console and use the left-hand navigation to go to the Settings section.

- Select Webhooks.
- Select the Add Webhook button in the upper right-hand corner of the page.
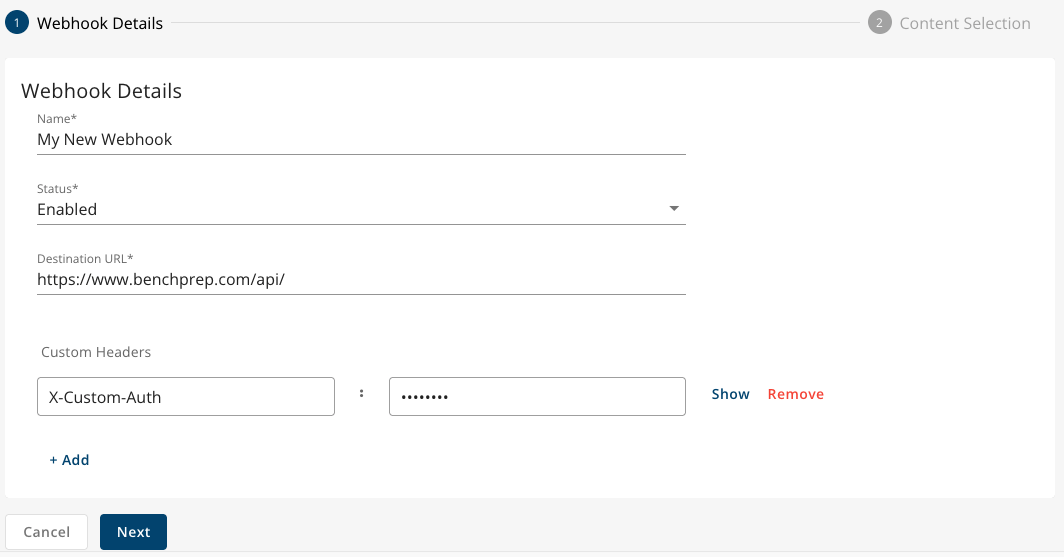
- On the Webhook Details page, fill out the name, status, and destination URL of your new webhook.
- Name: A descriptive name for this webhook. This name is internal only, so learners will not see it.
- Status: Select Enabled or Disabled. If you select Enabled, the webhook will begin responding to triggers and delivering data immediately after you finish creating it. If you select Disabled, the webhook will not respond to triggers until you enable it (you can enable a webhook at any time).
- Destination URL: The URL of the endpoint that will receive the webhook deliveries. If you do not have an endpoint set up to receive webhooks from BenchPrep, we strongly recommend engaging an engineer or technical resource from your organization to help you with this process before continuing.
- Custom Headers (optional): A custom header allows you to send additional information to the destination URL when this webhook is triggered. The most common use for custom headers is to provide the destination URL with authorization information. Most endpoints will use an authorization method to verify the posts they receive so that they aren’t vulnerable to security threats. Add the name of the header to the “key” field, and its value to the “value” field.
- Select the Next button.
-
On the Content Selection page, define this webhook’s trigger event.
A trigger event is the action that triggers the webhook to send data to the destination URL. The trigger event also defines the data that the destination URL will receive. As an example, imagine that you want to send a marketing email to anyone who completes Practice Test Y in Prep Course Z, so you set up a webhook to send your CRM data whenever this event happens. You would define this webhook’s trigger event as follows:
Trigger Event Type: Completion of an Exam
Course: Prep Course Z
Exam: Practice Test YThe destination URL will receive data whenever a learner completes this test. From here, you can use your CRM’s tools to send this learner marketing communications.

-
First, select the trigger event type from the drop-down – note that you cannot change this field later. There are nine trigger event types:
-
Completion of an Asset-Based Course: The learner completes a certain Asset-Based Course.
-
Issuance of a Certificate: The learner receives a certificate.
-
Completion of an Exam: The learner completes a certain exam.
-
Start of an Exam: The learner starts a certain exam.
-
Completion of an External Package: The learner completes a certain external package within their course, such as a SCORM package or lab.
-
Completion of a Milestone: The learner completes a milestone in their course.
-
Creation of a Custom Score: The learner creates a custom score of an exam in their course.
-
Completion of a Study Plan: The learner’s Study Plan progress is 100%.
-
Completion of a Study Task: The learner completes a certain Study Task.
-
-
Select the course where this trigger event will occur. You can also select Any Course if this webhook should be triggered when this trigger event happens in any course.
-
If your trigger event type is Completion of a Study Task, Completion of an Exam, Start of an Exam, Creation of a Custom Score, Completion of an External Package, or Issuance of a Certificate, select the Study Task/exam/external package/certificate that should trigger the webhook. You can also select Any if, for example, completing ANY Study Task should trigger this webhook.
-
-
Select the Create Webhook button.

Editing a Webhook
Editing a Webhook's Name
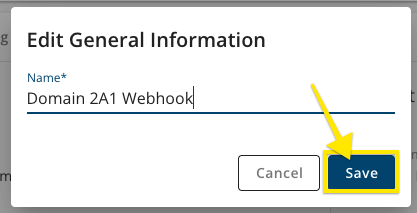
To edit a webhook's name, follow these steps:
- In the Settings section of Console, select Webhooks.
- Select the webhook you would like to edit.
- Select the Edit button next to the Enable/Disable Webhook button.
- Type in the new webhook name and select the Save button.


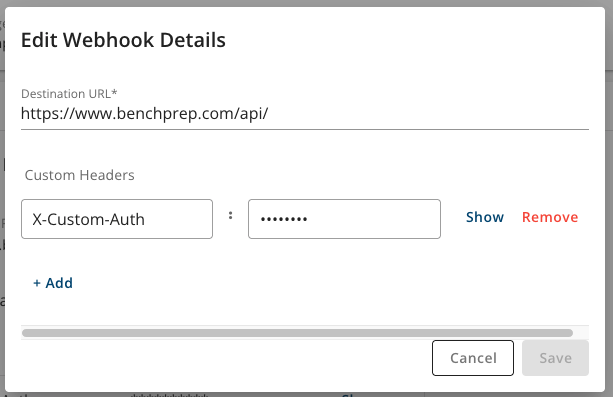
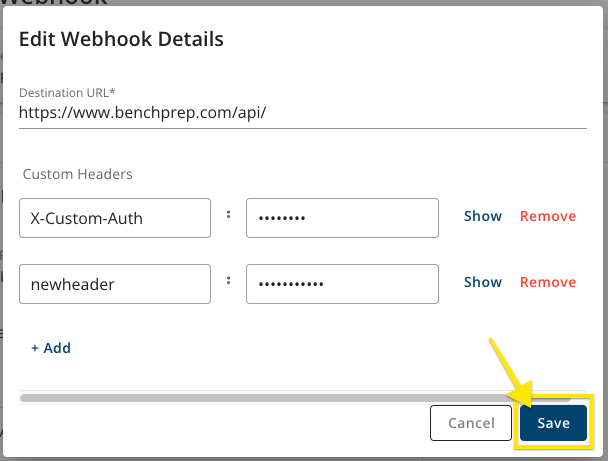
Editing A Webhook’s Destination URL or Custom Headers
To edit a webhook’s destination URL or custom headers, follow these steps:
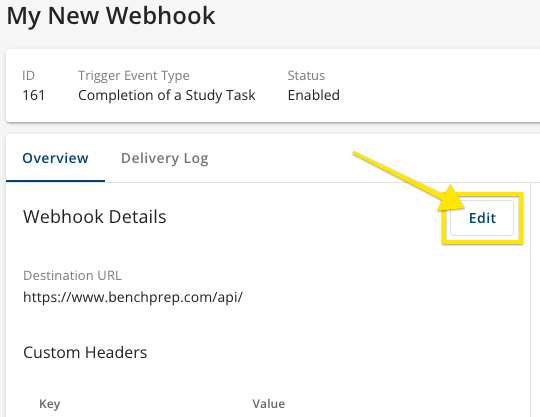
- In the Settings section of Console, select Webhooks.
- Select the webhook you would like to edit.
- Select the Edit button next to Webhook Details.
- To change the destination URL, type in the new destination URL.
-
To change an existing custom header, edit the key and value fields.
-
To remove an existing custom header, select Remove.
-
To add a new custom header, select Add, then populate the key and value fields.
-
-
Select the Save button.

Editing A Webhook’s Trigger Event
- In the Settings section of Console, select Webhooks.
- Select the webhook you would like to edit.
- Select the Edit button next to Content Selection.
- The fields available for you to edit will depend on this webhook’s trigger event type (remember - you cannot change an existing webhook’s trigger event type!). For example, if your webhook’s trigger event type is Completion of a Study Task, you can change the course and Study Task here.
- Select the Save button.


