 2569
2569
Table Entry question types provide an extremely versatile way of setting up questions with multiple layers of answers. Within a single question, a student/learner is able to answer multiple questions using a single set of data.
Question content is formatted similarly to other questions types. Answers and all necessary information should be listed in the question content. Answer content should contain explanations for the multiple answers that can exist within a “Table Entry” question.
When building your answers, insert a “table” into the question content field and answer bubbles will populate accordingly to those selections. In the “Danger Zone”, you can add rows and columns to account for the possible answers (so long as you have a corresponding table).

If this has been executed correctly, you’ll see your answer table populate accordingly. Notice how all the different columns account for different scenarios/instances as the single question requests.
This can be a daunting question type to set up accordingly, so feel free to reach out to BenchPrep directly should you need additional assistance configuring this question type.
NOTE: Table Entry question types are supported in Side by Side courses. For more information about Side by Side, check out our article here.
Creating Table Entry Questions
- Navigate to the Questions tab of your course, and click on New Question.
- Add your question content. Then, click on the Insert Choices Template button.


- Select one of the following options:
- Multiple Choice - Same as a “Multiple Choice - One answer allowed” type question but displays differently in WebApp

- Table Options - Gives multiple options for a single answer choice (i.e. true/false questions)

- Inline - Lists answer choices within a dropdown menu

- Vertical Choices - Gives multiple answer choices for a specific criteria

- Multiple Choice - Same as a “Multiple Choice - One answer allowed” type question but displays differently in WebApp
- If you selected “Multiple Choice”:
1. Input the “Number of Choices.”
2. Type in each answer choice option.
3. Click on OK.
If you selected “Table Options”:1. Skip the “Number of Choices” field, and type in the answer choice options that will appear for each column (i.e. Choice 1 is “True” and Choice 2 is “False”).
2. Input the “Number of Rows.”
3. Click on OK.
4. Click on the Show Blocks button.
5. In the empty “div” containers, type in the answer text for each row.

If you selected “Inline”:1. Go back and type in your question content first. Then, place your cursor where the dropdown menu should appear, and click on the Insert Choices Template button.
2. Input the “Number of Choices.”
3. Type in each answer choice option.
4. If you’d like for a number to display next to each dropdown menu, select “Include Numbered Label.”

5. Click on OK.
If you selected “Vertical Options”:1. Input the “Number of Choices.”
2. Click on OK.
3. Relabel the criteria headers, and type in the answer choices in the rightmost column.

- Add your answer explanation content.
- Select the type as “Table Entry.”

- Select the appropriate answer choices. If you need more rows/columns to match what’s in your question content, click on Add row or Add column.

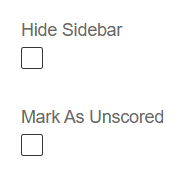
Table Entry Number of Rows Number of Columns Multiple Choice 1 One for each answer choice Table Options One for each answer choice 2 Inline One for each dropdown menu One for each answer choice Vertical Choices 2 One for each answer choice - If you'd like to hide the answer choices sidebar from learners in the Learning Platform, as in some cases it is not needed (learners will still be able to see your question and answer content), check the box Hide Sidebar. If this question should not be scored, check the box Mark As Unscored.

- Select a question category and distribution.

- Click on Create to finish creating your new question.
NOTE: Firefox browser is not compatible with CKEditor when editing an inline table entry option. We recommend using Google Chrome (preferred browser) when making these types of updates. If using Firefox, try left-clicking on the 'select' component and right-clicking on an empty editor space next to the component, then choose "Selection Field Properties" to trigger the editing pop-up.


