


 32
32
Coming Soon: This functionality will be available after 8/13. We're currently updating this Knowledge Base article with step-by-step guides to help you create and manage this functionality. Please check back soon for the latest updates.
Assignment Templates give instructors a faster way to build out assignments by starting from a pre-built structure instead of creating one from scratch every time. Templates can be adopted as-is, customized to fit a specific class, or used as a starting point before adding or removing content.
Assignment Groups work alongside templates as an optional organizational layer. Groups let you organize the tasks inside an assignment, for example by exam section, modality, or week, so that both the template itself and the assignment a learner sees are easier to navigate.
Together, templates and groups make it possible to:
- Standardize how assignments are structured across classes, instructors, or branches
- Reduce the time it takes to build a new assignment from scratch
- Organize larger assignments into clear, logical sections for learners
- Maintain consistency while still allowing instructors to customize where needed
Console Admins or users with a custom role including: create:assignments, read:assignments, update:assignments, delete:assignments and create:assignment_tasks can manage assignment templates and groups in BluePrint. Additionally, the course has to have assignments feature access enabled.
Creating an Assignment Task
- Navigate to Assignments in BluePrint.
- Click on Assignments on the left hand side.
- Click on the Create Assignments button and choose Create with New Assignment Tasks.
- On the New Assignment page, fill out the following information:
- Select the Course you would like to create the assignment for from the dropdown. Only courses with the assignment feature access enabled will be displayed. The dropdown excludes courses with milestones. Additionally, you will need to have access to the course.
- Assignment Name (required) - name of the assignment displayed to learners within the Learning Application in the assignment tab (if displayed).
- Assignment Description (optional) - description of the assignment displayed to learners within the Learning Application.
- Role Scope Context - The scope of the custom role containing the assignment creation permissions determine the options shown in this dropdown menu. Select the appropriate context to pick desired learners you would like to assign this assignment to.
- Learners can be assigned to a assignment task either individually through the Learners tab or dynamically through the Group tab:
- Select an appropriate Role Scope Context - The scope of the custom role containing the assignment creation permissions determine the options shown in this dropdown menu. Select the appropriate context to pick desired learners you would like to assign this assignment to.
- The Learners tab lists learners of the selected context, such as a branch, as well as any child branches, who have an active enrollment. Select the checkbox next to each learner you would like to assign this assignment task. You can also narrow your search by selecting an appropriate branch or group, if applicable, to display desired learners and make your selection from the provided list. Learners in Active and Inactive states can be added.
- The Group tab lists assignable groups. You can search for a group and click the group name to expand a list of users within that group. Selecting a group will automatically assign all existing users in the group to the assignment task. Any users added to the selected group after the assignment task is assigned will also be automatically enrolled in the assignment task.
- Assignment Access - You can list additional instructors that have access to this assignment task. Instructors in your context will be listed. Search for instructor(s) you would like to add. You can multi-select instructors by checking the box next to their name. Once appropriate instructors are selected, you can:
- Check Can Edit Assignment if you would like them to be able to edit this assignment task.
- Check Can Duplicate Assignment if you would like them to be able to duplicate this assignment task.
- Click the Add Instructor button. The instructors will be listed below, you can still check/uncheck Can Edit Assignment and Can Duplicate Assignment options if you need to make any modifications.
- If you are not ready to assign users yet or provide assignment access, you can skip the steps above. You can return back to this assignment to assign users or provide assignment access to instructors later by editing the assignment.
- Click Next.
Creating Study Tasks and Groups
- On the Create Study Tasks page, click New Group in the top-right corner to create a group for organizing related study task into a group.
- A new group will appear. In the Group Name field, enter the name for the group. This name will be visible to learners.
- Click one of the content buttons within the group (Add Lessons, Add Practice Questions, Add Question Categories, Add Tests, or Add Flashcards) to select the content type you would like to add:
- Lessons: Click the + icon next to the desired lesson to move the tasks from Available to Selected Tasks section. You can also drag and drop the lesson into the Selected Tasks section. To remove a lesson from the assignment, either drag and drop it into the left column, or select the - icon next to the name. You can drag and drop individual lessons within the Selected Tasks section to easily rearrange the order.
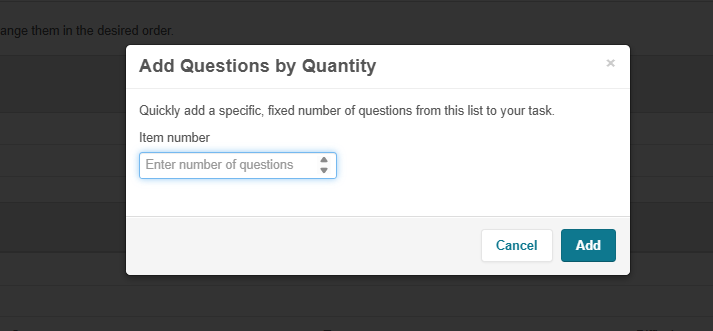
- Practice Questions: Click the + icon next to the desired practice to move the tasks from Available to Selected Tasks section. You can also drag and drop the practice question into the Selected Tasks section. To remove a practice question from the assignment, either drag and drop it into the left column, or select the - icon next to the name. You can drag and drop individual question within the Selected Tasks section to easily rearrange the order. Instead of selecting questions individually, use Set Question Count to enter the number of questions you want. The system will randomly select that number of questions from the available questions and add them to Selected Questions.
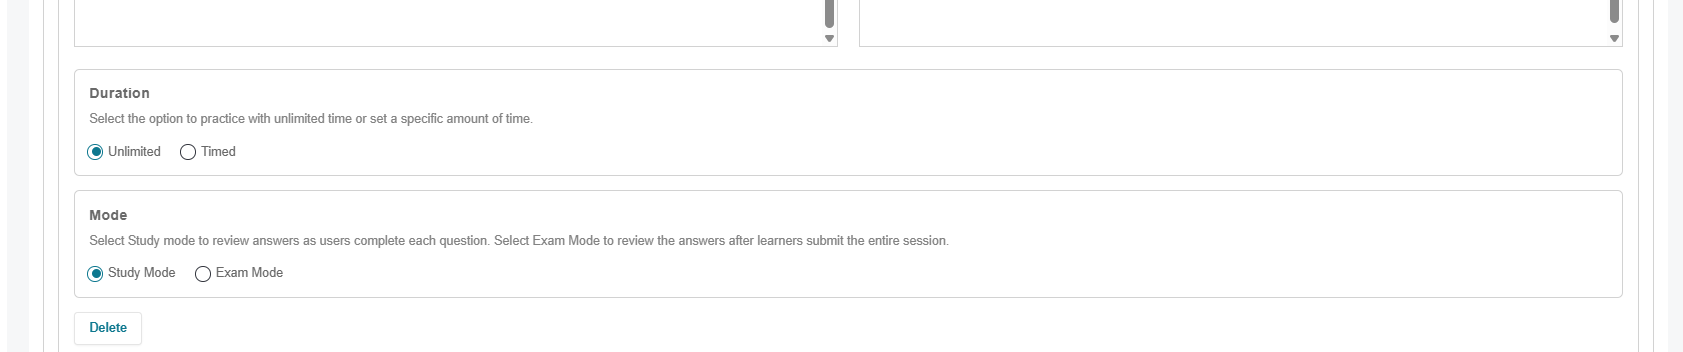
You can further configure the practice experience by configuring the Duration and Mode options. The questions will display in a custom practice question taking experience.
- Question Categories
- Tests:All content of the selected type available in the course will be listed, displaying:
- ID
- Name
- Visibility (hidden or standard - the column will be shown if at least 1 item is hidden)
- Actions - Click on the eye icon to see the details of the item.
- Flashcards: Click the + icon next to the desired flashcard to move the tasks from Available to Selected Tasks section. You can also drag and drop the flashcard into the Selected Tasks section. To remove a flashcard from the assignment, either drag and drop it into the left column, or select the - icon next to the name. You can drag and drop individual flashcard within the Selected Tasks section to easily rearrange the order.
- Select the checkbox next to each item you would like to add to the group.
- Click Manage Dates to set the release and completion dates - the timeframe in which you want the content to be available for the selected learners. Select Restrict access outside these dates to lock the assignment task.
- Repeat the steps above to add additional content to the same group.
- To create an additional group, click New Group again. Enter a name for the new group and repeat the steps above to add content to it.
- Select Next to continue.
Review and Finalize
- On the Review and Finalize page, review the details before creating. To edit, click above to navigate to the appropriate page.
- The page displays:
- Assignment Name
- Assignment Description
- Associated Course Name
- Below this, you can review the assignment's configuration across four tabs: Learners, Groups, Tasks, and Assignment Access. The count next to each tab reflects the number of items configured (for example, "0 Groups" or "1 Tasks").
- Click Assign to finalize and create the assignment.
Learner Experience
Editing an Assignment Task
To edit an assignment follow these steps:
- In BluePrint, click on Assignments on the left-hand side.
- Locate the assignment task you would like to edit under My Assignments or Shared Assignments tab.
- Select the pencil icon next to the assignment you'd like to work with or click on the assignment name and click on the Edit button. NOTE: If you don't see the pencil icon under the Action(s) column under Shared assignments the assignment creator did not grant you the ability to edit this assignment.
- The editing process will take you through all three original assignment task creation steps - navigate to the page you would like to edit by selecting the appropriate step in the creation process.
- On the Set Up & Assign Learners page, edit the assignment's name or description, add/remove learners from the assignment task and modify assignment access. You will not be able to change the course the assignment is part of or update the Role Scope Context.
- On the Create Study Tasks page, add new content items if desired, click on the existing task to edit its components. Existing Groups can also be renamed, or new Groups added, from this page. Click Next. On the Review & Finalize step, review your changes and select Update to update the assignment task.

