
 2375
2375
Assignments are built in BluePrint. To enable assignments in the Learning application, toggle the Assignments feature ON at the desired course via Configuration module in BluePrint. Click here to learn how to enable the feature access.
A user with a custom role containing the following permissions can access BluePrint to manage assignments:
- Create curriculums
- Read curriculums
- Update curriculums
- Delete curriculums
Once an appropriate role has been assigned to you, you will see Assignments on BluePrint’s left-hand navigation module.
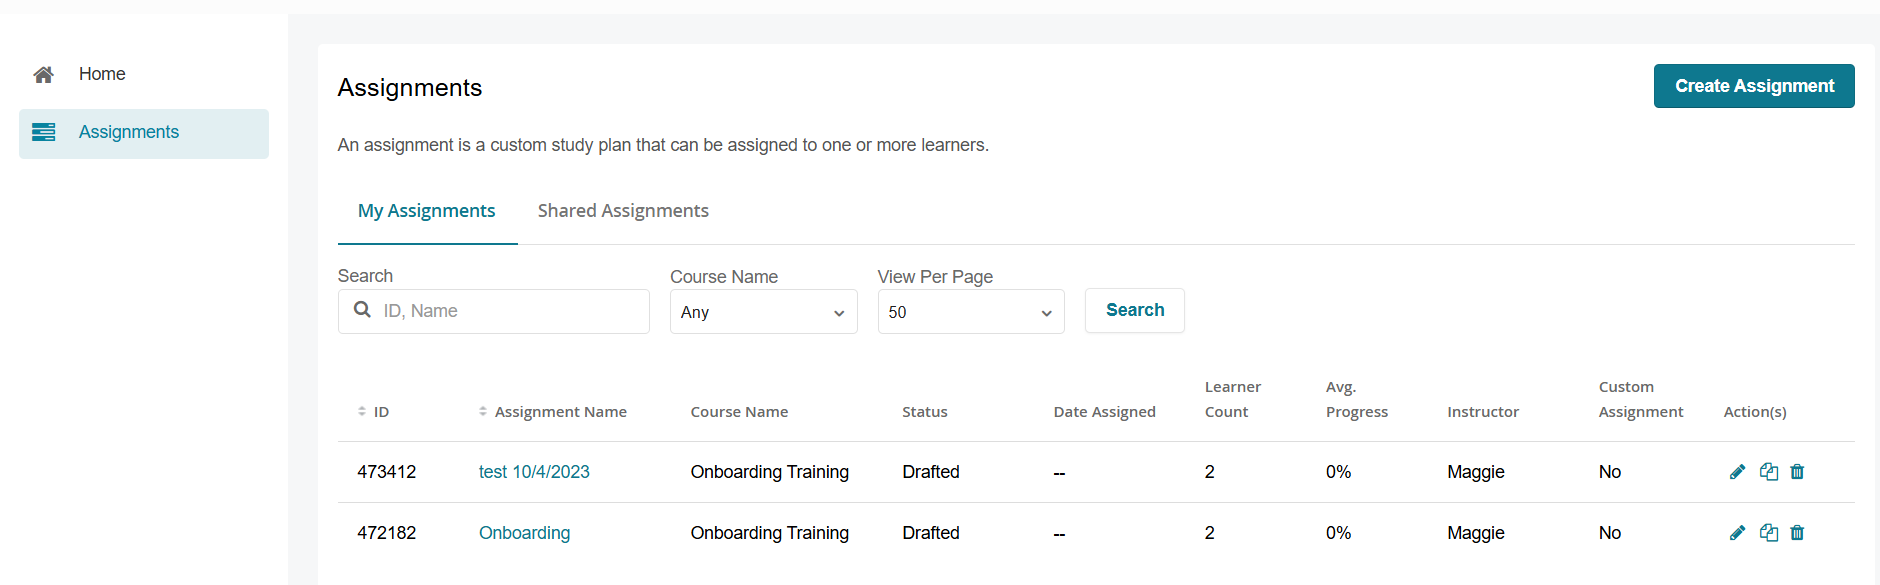
The Assignments page displays:
1. My Assignments - assignments created by you
2. Shared Assignments - assignments that have been shared with you
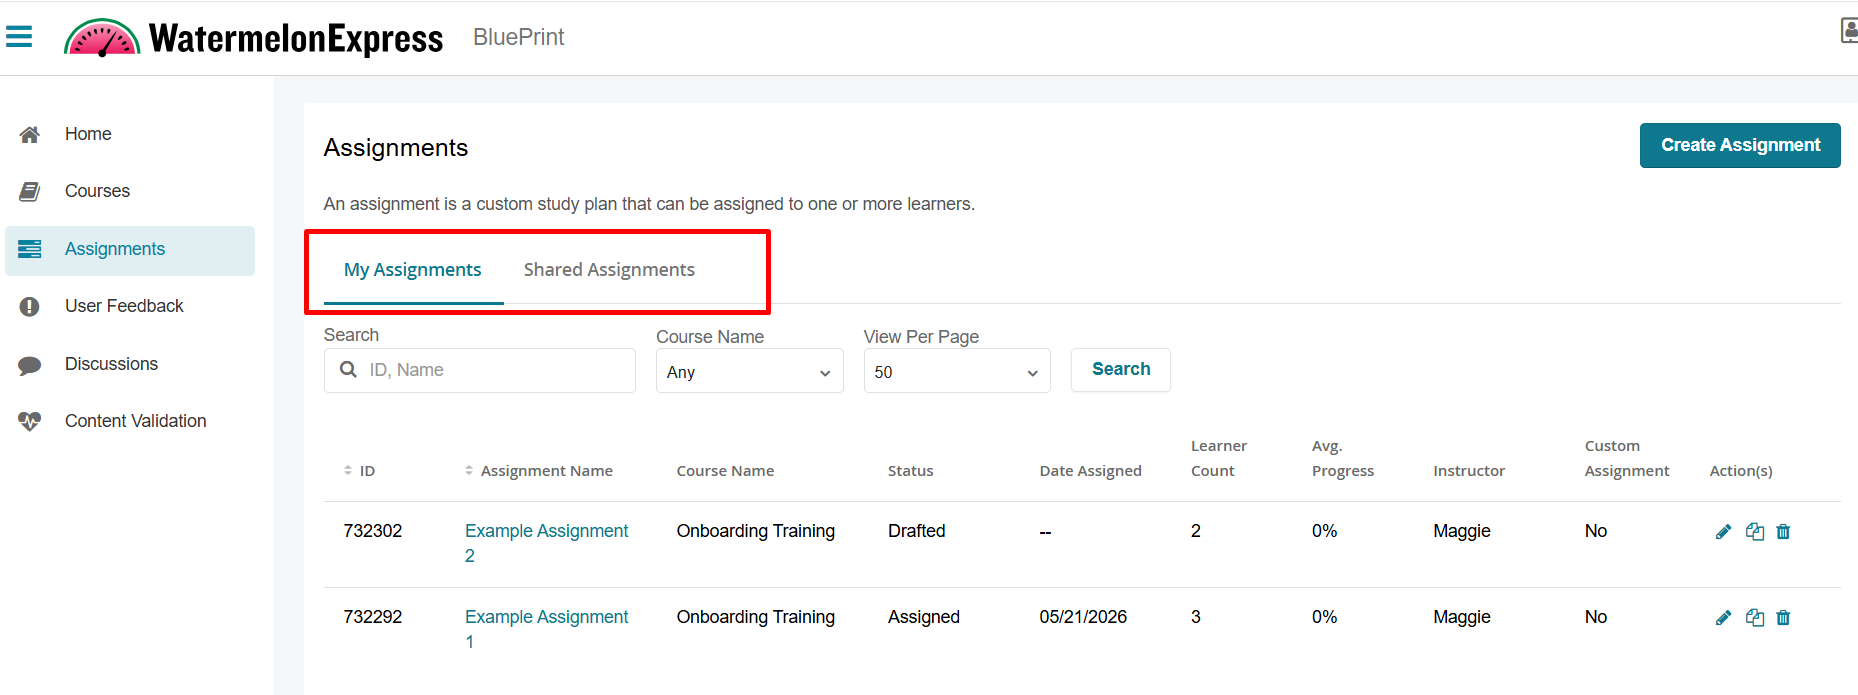
Both tabs include the following:
- ID
- Assignment Name
- Course Name
- Status - either Draft or Assigned
- Date Assigned
- Learner Count
- Avg Progress
- Instructor
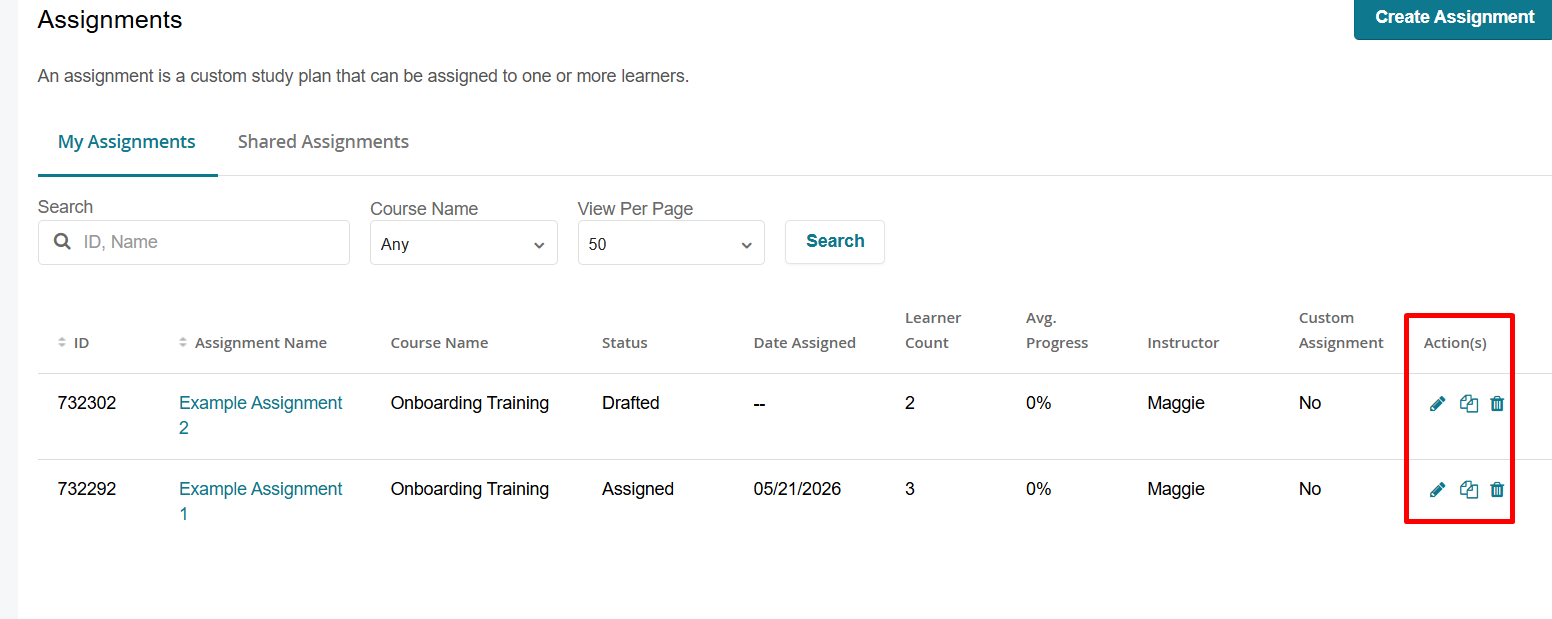
- Custom Assignment
- Actions - click the edit icon to edit the assignment, click duplicate icon to duplicate, click the trashcan icon to delete. NOTE if you don't see edit or duplicate icons under the Action(s) column under Shared Assignments the assignment creator did not grant you the ability to perform these actions.
Use the search bar to locate a specific assignment by ID or name.
Use the Course Name dropdown to filter assignments created for a specific course.
Creating an Assignment
To create an assignment follow these steps:
- In BluePrint, click on Assignments on the left-hand side.
- Select the Create Assignment button.

- On the New Assignment page, fill out the following information:
- Course Name (required) - pick a course you would like to create an assignment for.
- Only courses with the Assignment feature access enabled will be displayed. The dropdown excludes courses with milestones. Additionally, you will need to have access to the course.
- Assignment Name (required) - name of the assignment displayed to learners within the Learning Application.
- Assignment Description (optional) - description of the assignment displayed to learners within the Learning Application.
- Role Scope Context - The scope of the custom role containing the assignment creation permissions determine the options shown in this dropdown menu. Select the appropriate context to pick desired learners you would like to assign this assignment to.
Learners can be assigned to an assignment either individually through the Learners tab or dynamically through the Group tab. - The Learners tab lists learners of the selected context, such as a branch, as well as any child branches, who have an active enrollment. Select the checkbox next to each learner you would like to assign this assignment. You can also narrow your search by selecting an appropriate branch or group, if applicable, to display desired learners and make your selection from the provided list. Learners in Active and Inactive states can be added.
- The Group tab lists assignable groups. You can search for a group and click the group name to expand a list of users within that group. Selecting a group will automatically assign all existing users in the group this assignment. Any users added to the selected group after the assignment is assigned will also be automatically enrolled in the assignment.
- Assignment Access - You can list additional instructors that have access to this assignment. Instructors in your context will be listed. Search for instructor(s) you would like to add. You can multi-select instructors by checking the box next to their name. Once appropriate instructors are selected, you can:
- Check Can Edit Assignment if you would like them to be able to edit this assignment.
- Check Can Duplicate Assignment if you would like them to be able to duplicate this assignment.
- Click Add Instructor button. The instructors will be listed below, you can still check/uncheck Can Edit Assignment and Can Duplicate Assignment options if you need to make any modifications.
- If you are not ready to assign users yet or provide Assignment Access, you can skip this steps. 5 and 6. You can return back to this assignment to assign users or providing assignment access to instructors later by editing the assignment.
- Course Name (required) - pick a course you would like to create an assignment for.
- Once ready, select Next to proceed to the Select Study Tasks step. After moving to the next screen you will not be able to update the Course Name or Role Scope Context fields - these selections are locked in as you continue to configure this assignment. This assignment is saved as a draft even if you exit the assignment creation wizard.
- On the Select Study Tasks page, the Available Tasks section on the left hand side lists all Study Tasks in the course’s Structured Study Plan.
Use the Filter button to search Study Tasks by keyword or filter them by content type or time.
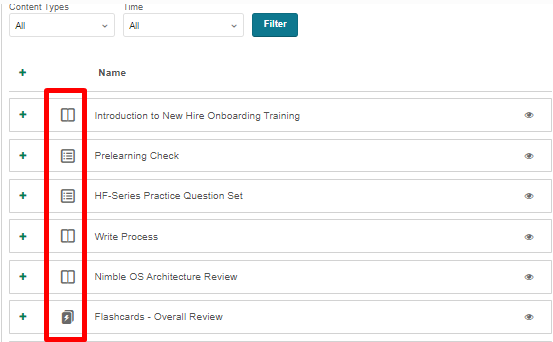
The icon to the left of each task name indicates the type of Study Task it is (lessons, flashcards, etc.), and selecting the eye icon to the right of the task name will provide high-level information about the task.
- Click the + icon next to the desired study task to move the tasks from Available to Selected Tasks section. You can also drag and drop the tasks into the Selected Tasks section.
- To remove a task from the assignment, either drag and drop the task into the left column, or select the - icon next to the task name.
You can drag and drop individual tasks within the Selected Tasks section to easily rearrange the order.
Importing Study Tasks
Instead of manually selecting Study Tasks, you can streamline the process by importing tasks from an existing assignment (in drafted or assigned state) you have already created in this course. This is especially useful when building assignments that follow a shared structure. To Import Study Tasks from another assignment use the search bar to find and select the existing assignment you want to copy tasks from. Next, click the Import Tasks button. The Study Tasks from the selected assignment will be added to the Selected Tasks section.
When using the Import Tasks function, please note that an assignment can only be imported once. Once tasks are imported, the selected assignment will be grayed out to prevent duplicate imports. Release and completion dates from the original assignment are not carried over. If needed, refer to the next section to configure these settings manually.
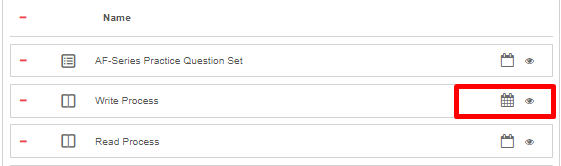
- Select Manage Dates if you would like to specify Release and Completion dates for Selected Tasks. NOTE: All dates are set in the local time zone.
- Release Date - determines when learners can access a study task via the assignment.
- Completion Date - suggested target date for learners to finish a study task.
You can specify dates for individual tasks or select 1 date for all. Tasks with set dates will be indicated by a filled out calendar icon. Hover over the icon to see the details:
- Select Next to move to the Review and Finalize step. Review the details and when ready, click on the Assign button to release the assignment you created!

If you don't want students to see the assignment yet, skip this step by clicking Cancel or navigating away from the page. The assignment will be saved as a draft and accessible via Assignments page in BluePrint. When you’re ready to assign the assignment, edit the assignment and select the Assign button on the Review and Finalize step.
Duplicating an Assignment
If you want to quickly replicate a new assignment based on an existing one, you can use the duplicate functionality. This is useful when creating similar assignments, while making adjustments to assigned learners and delivery times. The Course and Role Scope Context fields from the original assignment are locked and cannot be modified in the duplicated version. You can duplicate an assignment from the following pages:
1. From the Assignment page, by locating the assignment under My Assignments or Shared Assignments tab. Next, click the Duplicate icon next to the assignment you wish to copy:
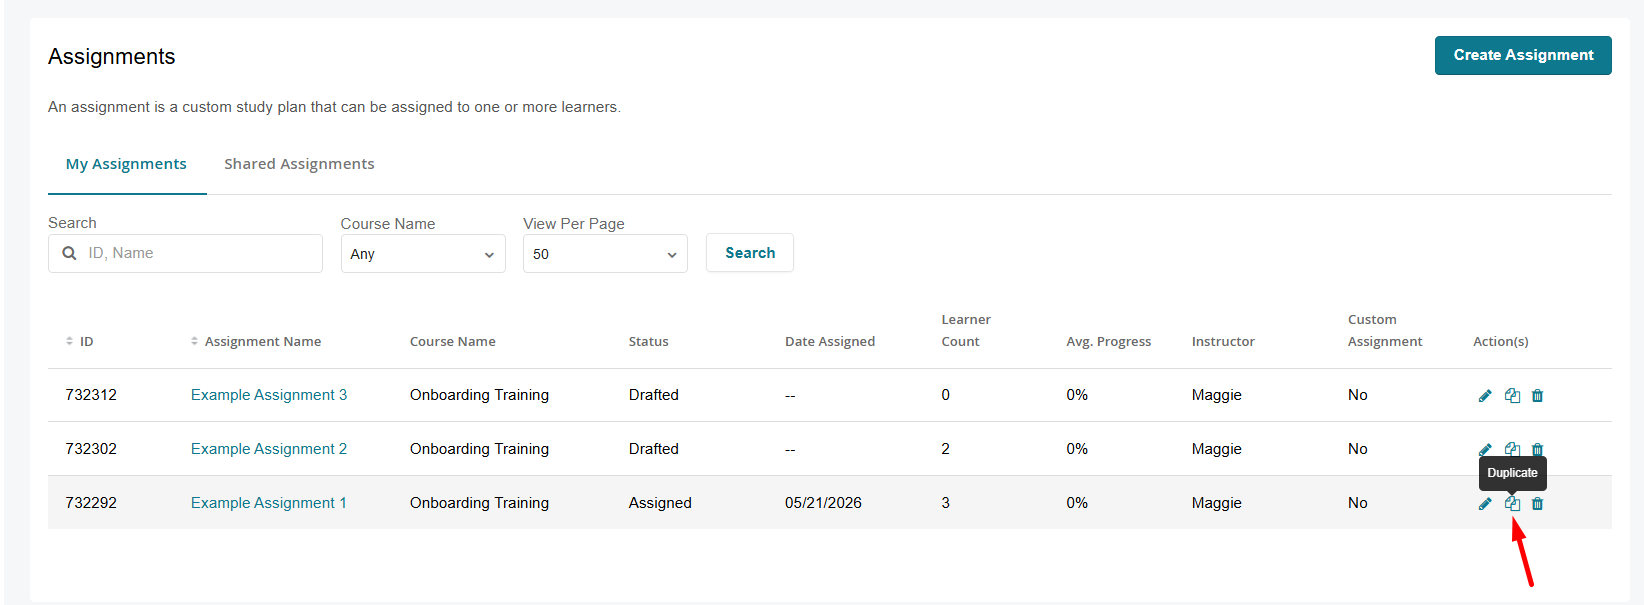
NOTE: If you don't see the duplicate icon under the Action(s) column under Shared Assignments the assignment creator did not grant you the ability to duplicate this assignment.
2. From the Assignment Details page, by clicking the Duplicate button:
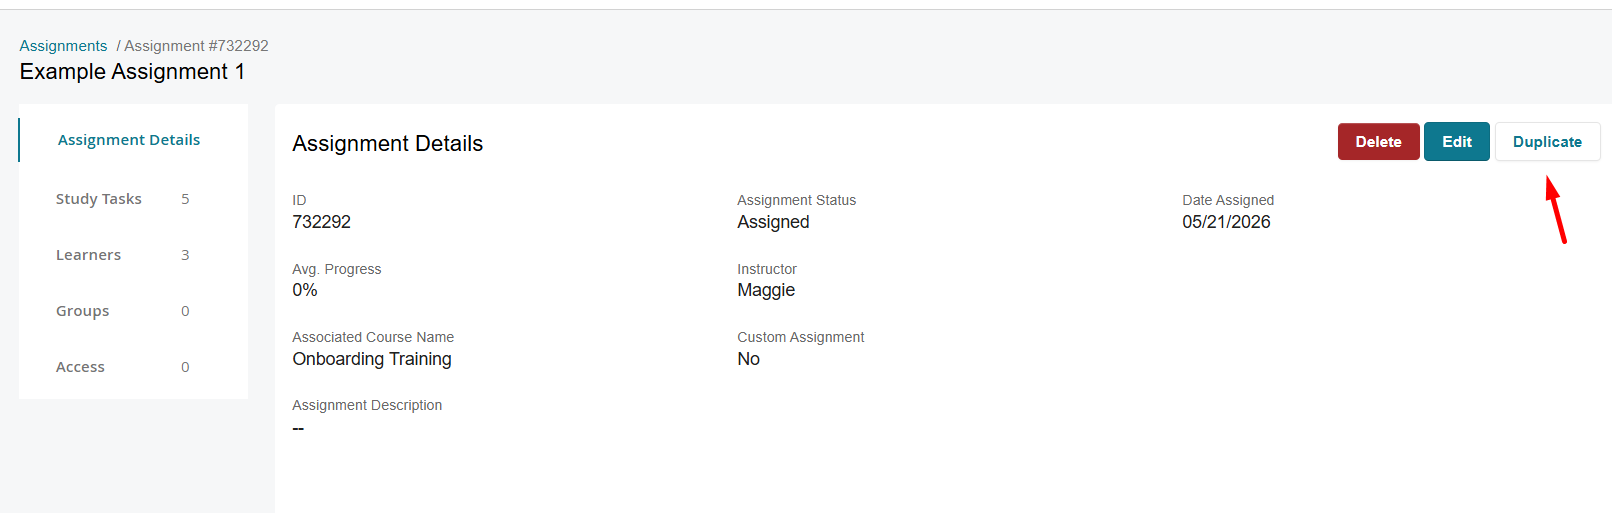
NOTE: If you don't see the duplicate icon under the Action(s) column under Shared Assignments the assignment creator did not grant you the ability to duplicate this assignment.
To edit an assignment follow these steps:
- In BluePrint, click on Assignments on the left-hand side.
- Locate the assignment you would like to edit under My Assignments or Shared Assignments tab.
- Select the pencil icon next to the assignment you’d like to work with or click on the Assignment Name and click on the Edit button. NOTE: If you don't see the pencil icon under the Action(s) column under Shared Assignment the assignment creator did not grant you the ability to edit this assignment.
- The editing process will take you through all three original assignment creation steps - navigate to the page you would like to edit by selecting the appropriate step in the creation process.
- On the Set Up & Assign Learners page, edit the assignment’s name or description add/remove learners from the assignment and modify assignment access. You will not be able to change the course the assignment is part of or update the Role Scope Context.
- On the Select Study Tasks page, add or remove Study Tasks from the assignment (see step 5 from Creating an Assignment section above) or rearrange the order of the Study tasks.
- On the Review & Finalize step, review your changes and select Update to update the assignment.
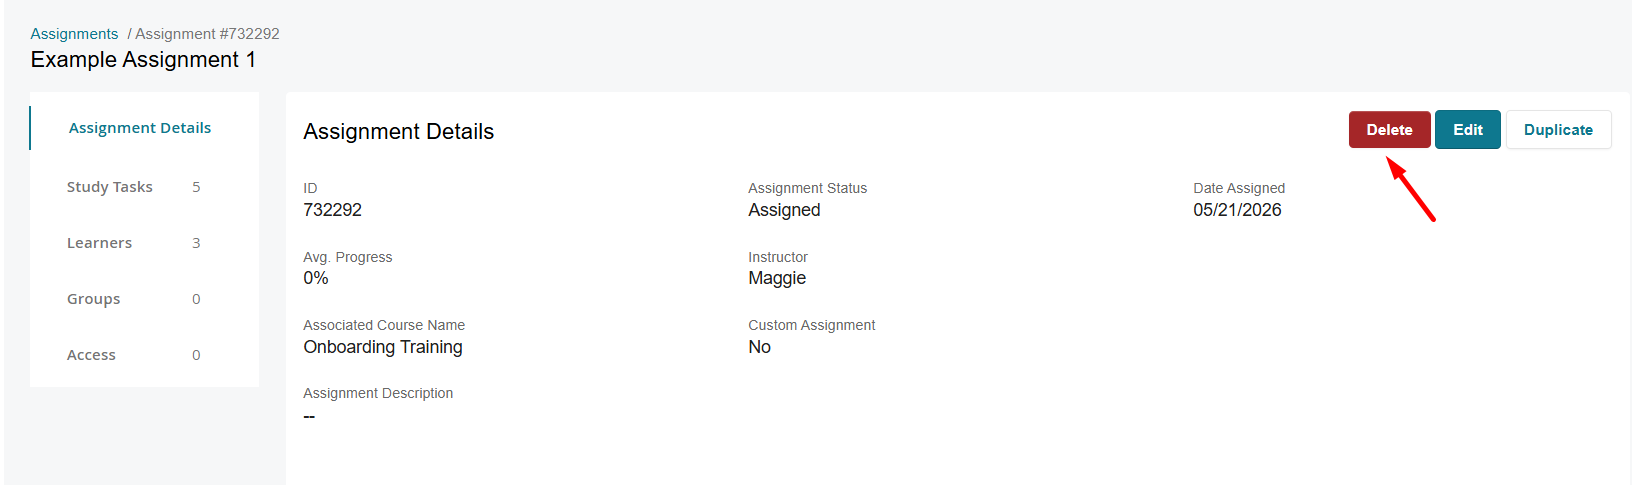
Deleting an Assignment
To delete an assignment follow these steps:
- In BluePrint, click on Assignment on the left-hand side.
- Locate the assignment you would like to edit under My Assignments. You can only Delete assignments created by you.
- Click on the Assignment Name you would like to work with.
- Review the Assignment Details sections on the left-hand side and when ready, click on the Delete button to remove the assignment.
Deleting the assignment will remove it from the learner’s curriculums page. Learners will still be able to access the Study Tasks that were part of this assignment via the Structured Study Plan.
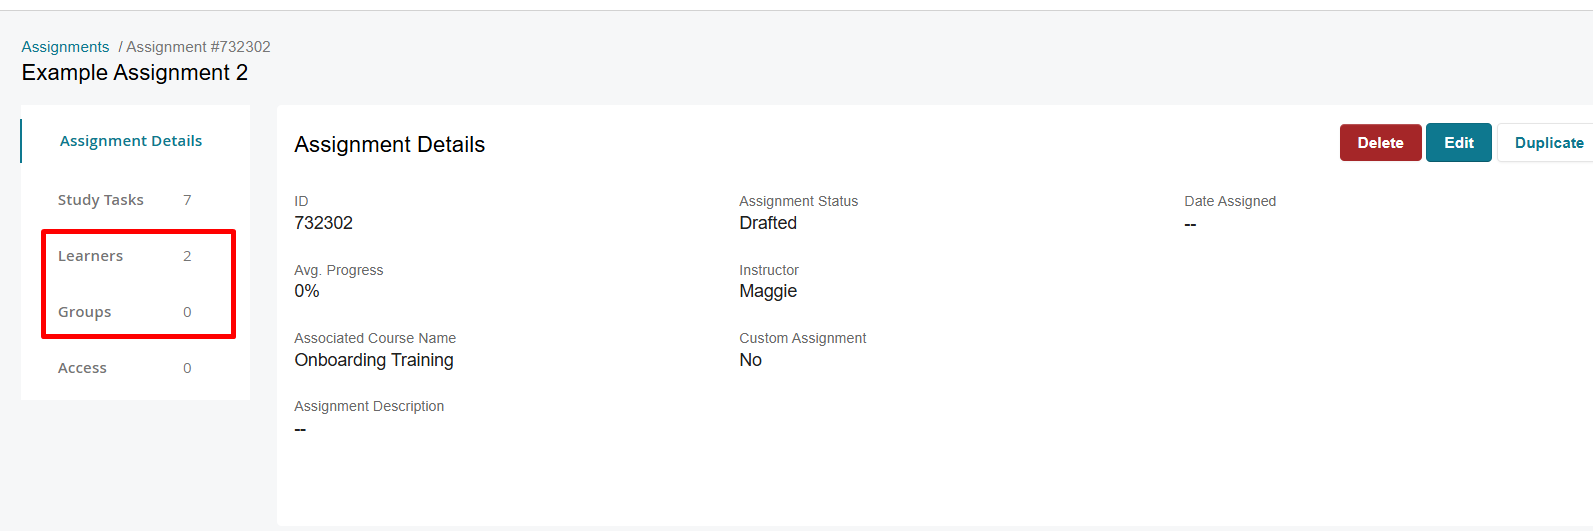
Managing an Assignment
Once an assignment has been drafted, created or shared with you, you can view additional details by clicking on an Assignment Name from the Assigments Page.
The Assignment Details page displays:
- ID
- Assignment Status - either Draft or Assigned
- Date Assigned
- Avg Progress
- Instructor
- Custom Assignment
- Associated Content Package
- Assignment Description
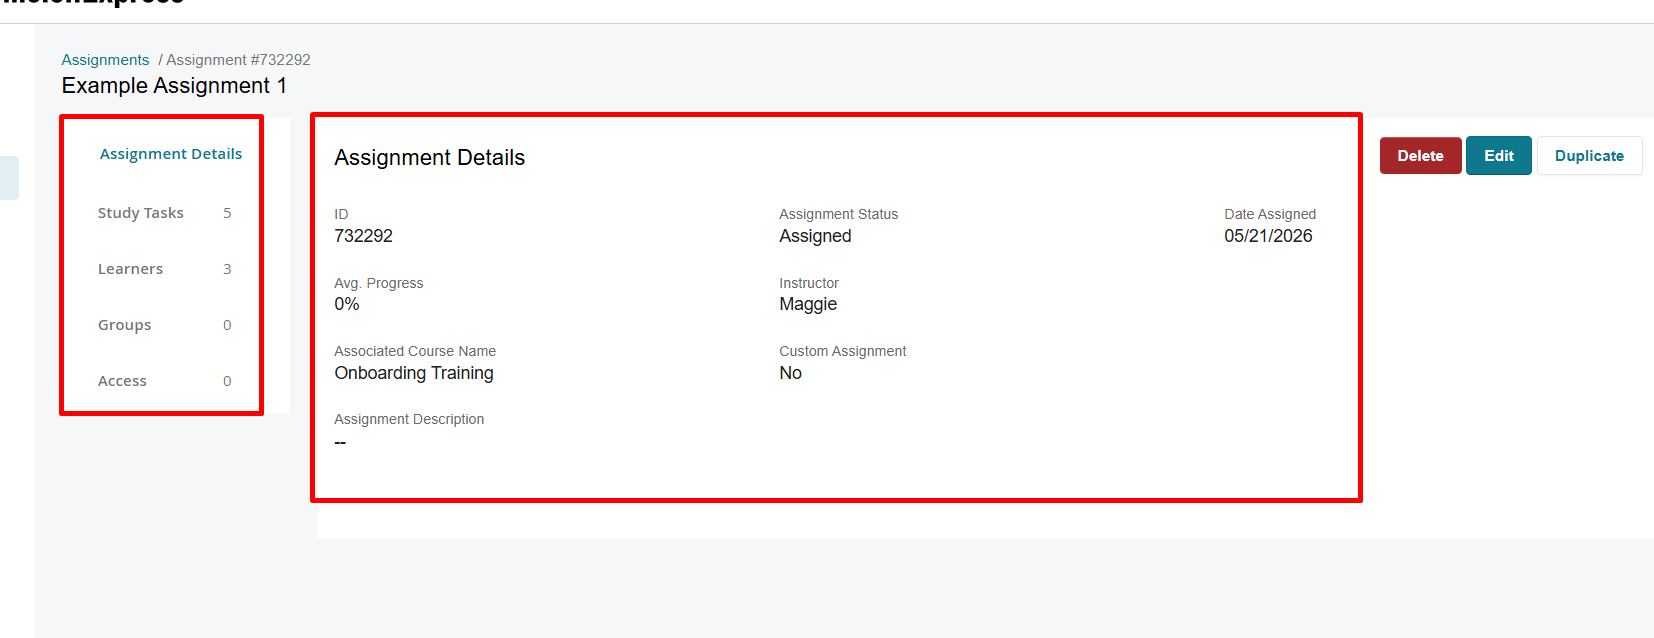
Navigate to Study Tasks, Learners or Groups on the left-hand side, to see the details of this assignment.
The Study Tasks tab displays all study tasks that have been added to the assignment, the Content Type, Knowledge Points of each task, and Release & Completion Dates (if set).
Click the Assign Tasks button if you would like to add/remove study tasks. Then, select Next to navigate to Review & Finalize assignment step and click Update to assign the updated assignment.

The Learners tab displays all learners assigned to this assignment, their progress within each Study Task, the Practice & Test % Scores, as well as Start, Completion and Last Active dates.
The Groups tab displays groups that have the assignment assigned. Use the down arrow to expand and see the list of learners who have been assigned this assignment.
Click the Edit button if you would like to add/remove learners. Then, select Next to navigate to Assign Study Tasks step, then select Next to navigate to Review & Finalize assignment step and click Update to assign the updated assignment.
To view more specific information about a learner’s progress within the assignment, select that learner’s name to access Console (NOTE: you have to have a custom role with appropriate console permissions). Then, select the Impersonate button in the upper right-hand corner. While impersonating the user, go to the Study Plan section of the applicable course and select the Curriculum tab.
Impersonating a student will show you exactly how many Study Tasks they have completed in the assignment, as well as which Study Tasks are complete, incomplete, and not started.

