1692
1692
When learners view and unlock Premium Content within their courses, they will see different custom modals. These modals include:
Alert Modal - Displays a Premium Content message and links to where the learner can unlock or purchase the content.
Success Modal - Displays when the learner returns to their course after successfully unlocking their Premium Content.
Admin Granted Success Modal - Displays when the learner returns to their course after an admin has granted them access to Premium Content from Console.
These custom modals can be managed from Console and will need to be created before you can add Premium Content to your courses in BluePrint.
To configure custom modals, you will need to be an admin or have a custom role assigned with the Read:Custom Modals, Create:Custom Modals, Update:Custom Modals, and Delete:Custom Modals permissions.
Creating a Custom Modal
To create a custom modal, follow these steps:
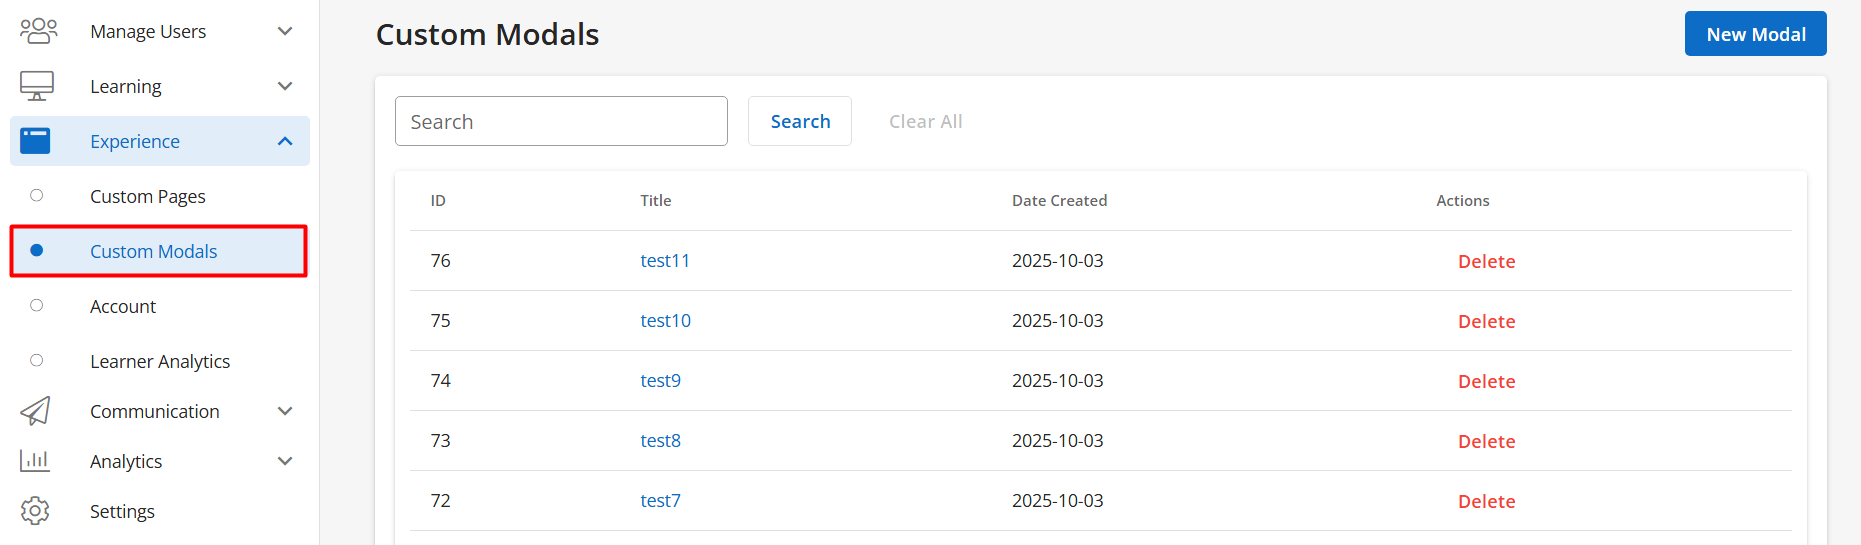
- Navigate to Console, and under the Experience tab, click on Custom Modals.
- Click on New Modal.

- Input a name, description, and the content for your custom modal.
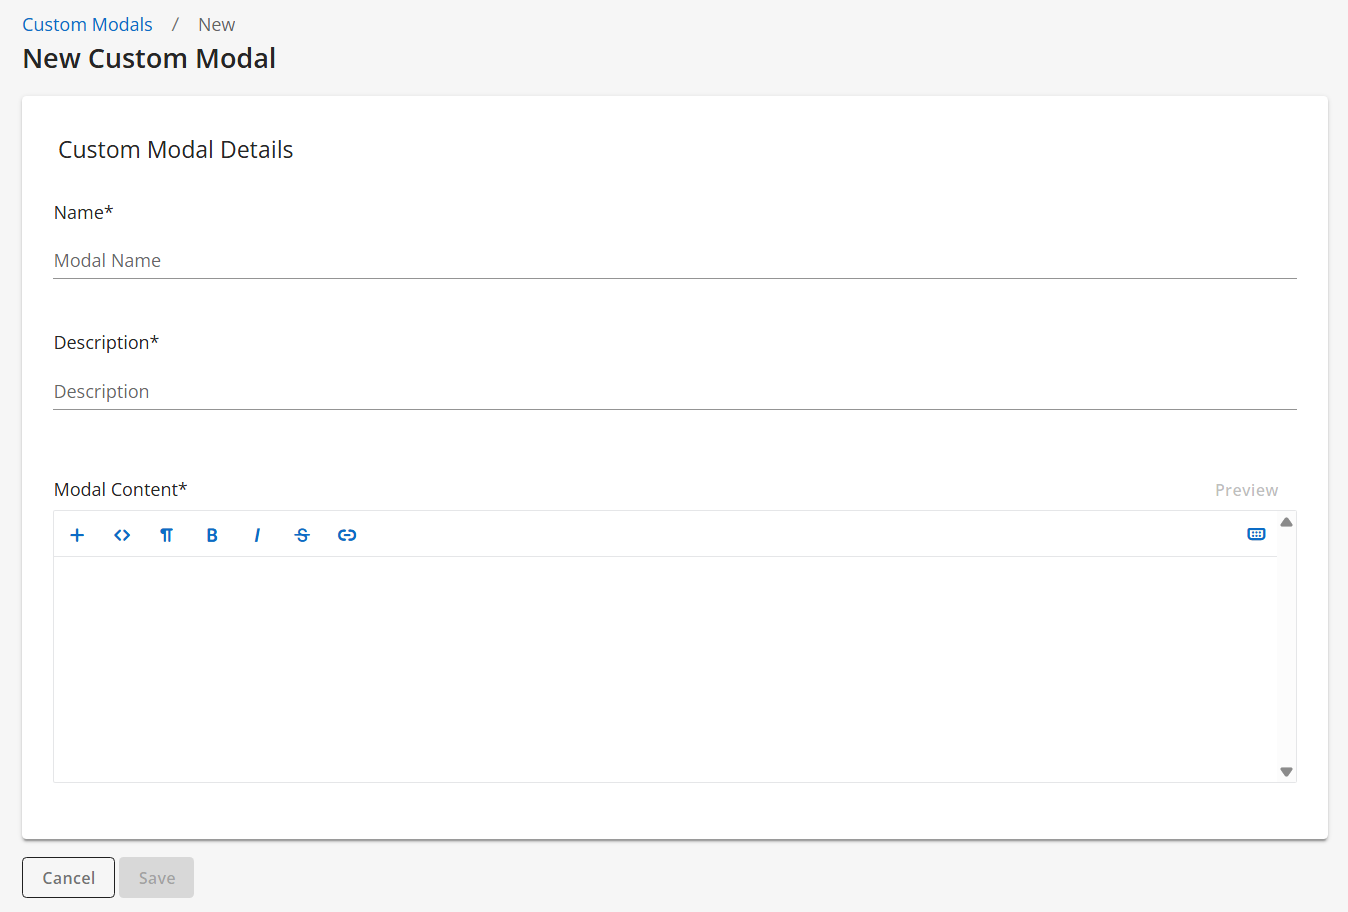
NOTE: We recommend to include in the name what type of modal this will be used for (e.g. Alert Modal, Success Modal, Admin Granted Success Modal). This way you’ll know which modals to choose from when adding Premium Content in BluePrint.
To preview your custom modal, click on Preview.

- Click on Save.
- After creating all of your custom modals, you can now add Premium Content to your courses. Our article here will have further steps.
Viewing a Custom Modal
Once you’ve created a custom modal, you’ll be able to view its details and what Premium Content it’s associated with.
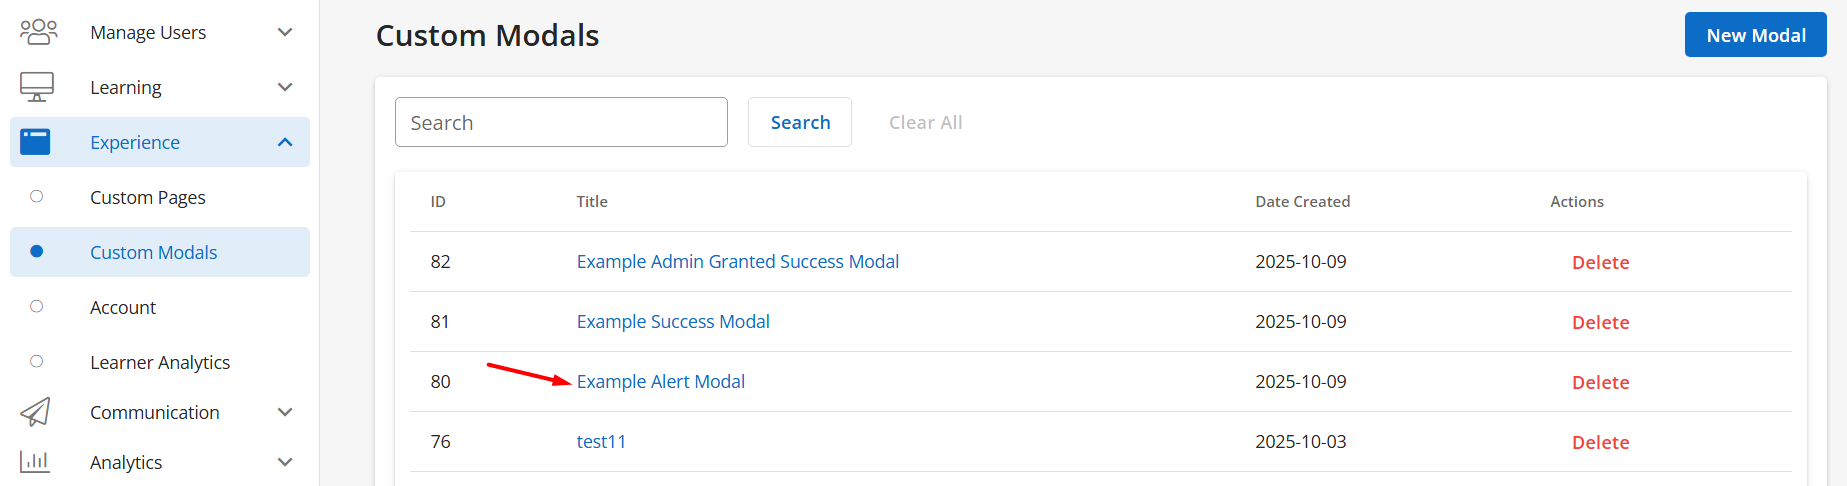
- Navigate to Console, and under the Experience tab, click on Custom Modals.
- Click on the name of the custom modal you’d like to view.
- On the overview page, you’ll be able to see the modal’s ID, title, description, and when it was created.
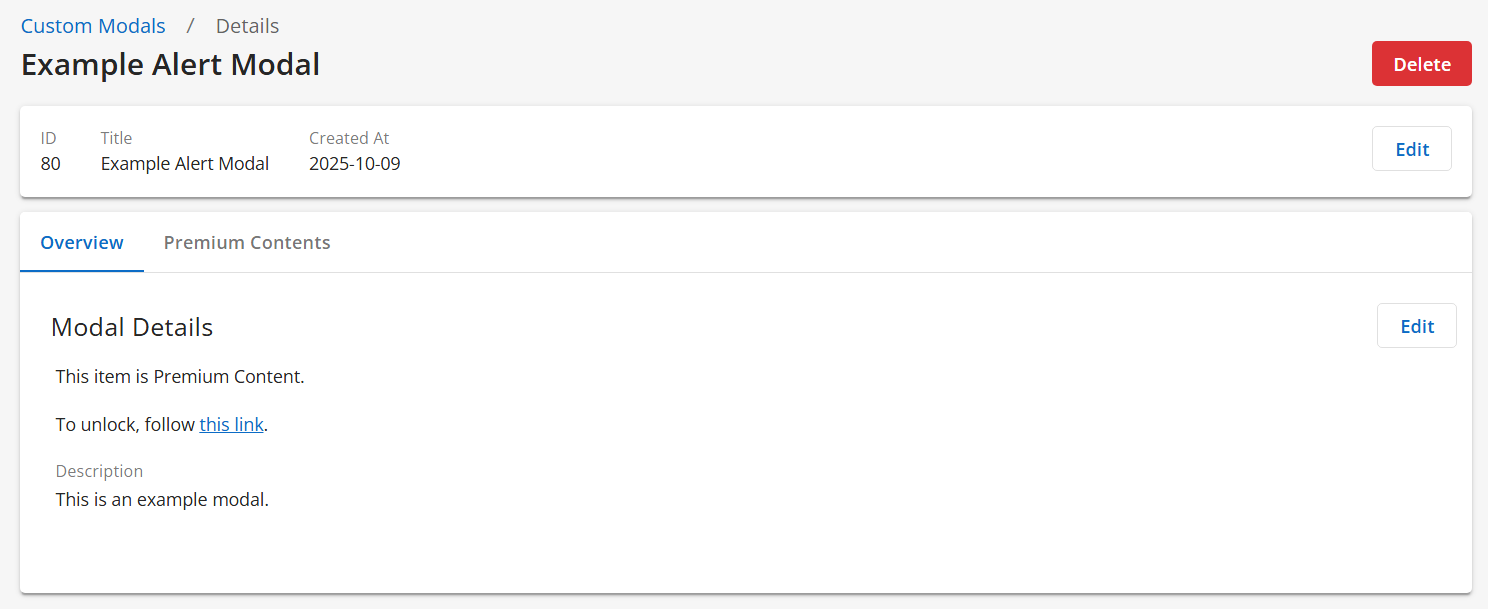
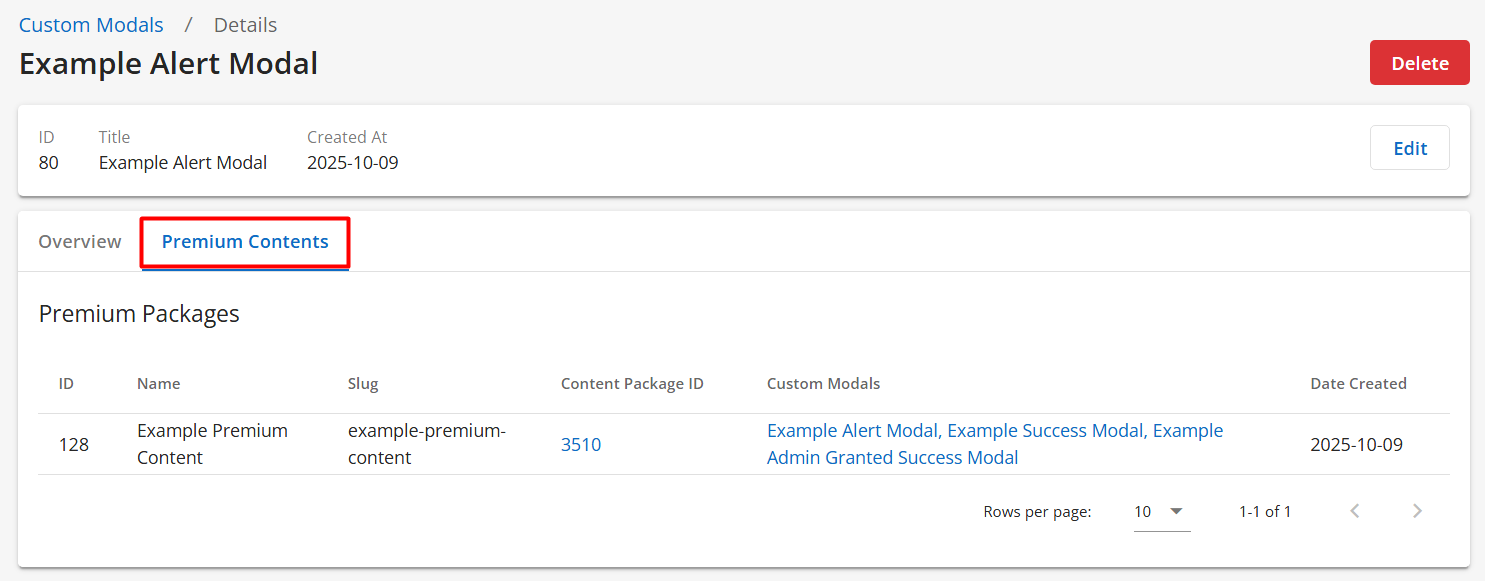
- Click on the Premium Contents tab to view what premium content packages and courses are currently associated with the modal.
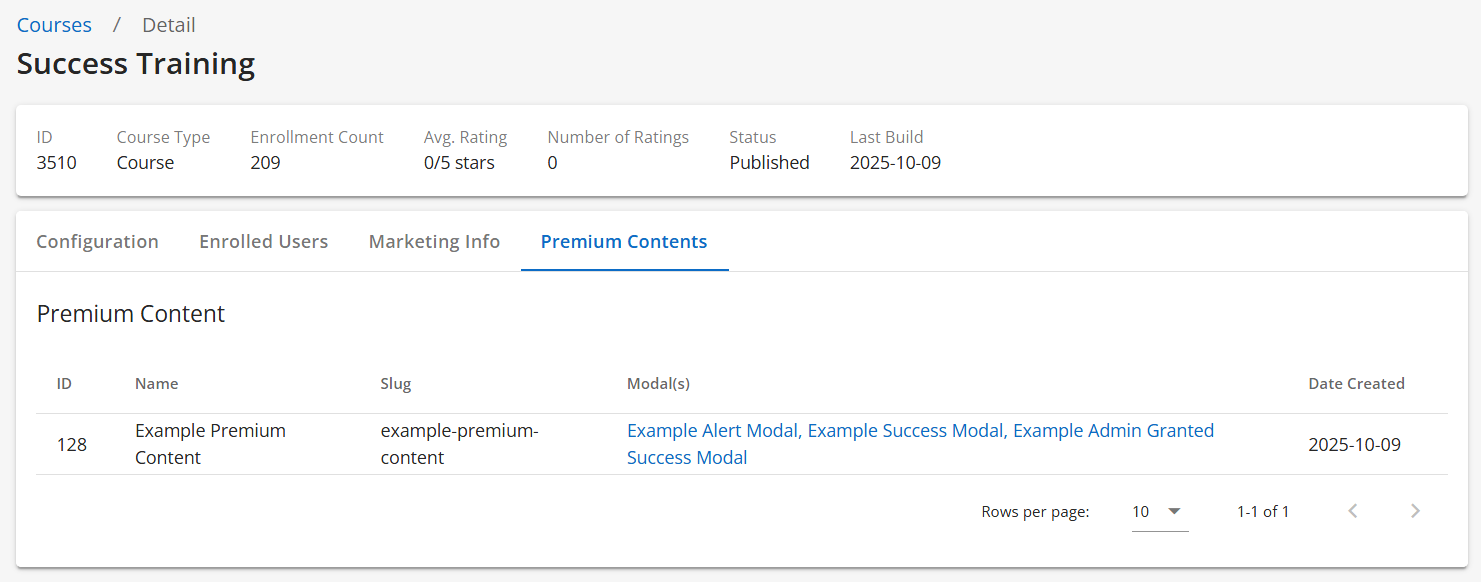
If you navigate to a course, you will also be able to see what premium content packages and modals are associated with the course under the Premium Contents tab.
Editing a Custom Modal
To edit a custom modal, follow these steps:
- Navigate to Console, and under the Experience tab, click on Custom Modals.
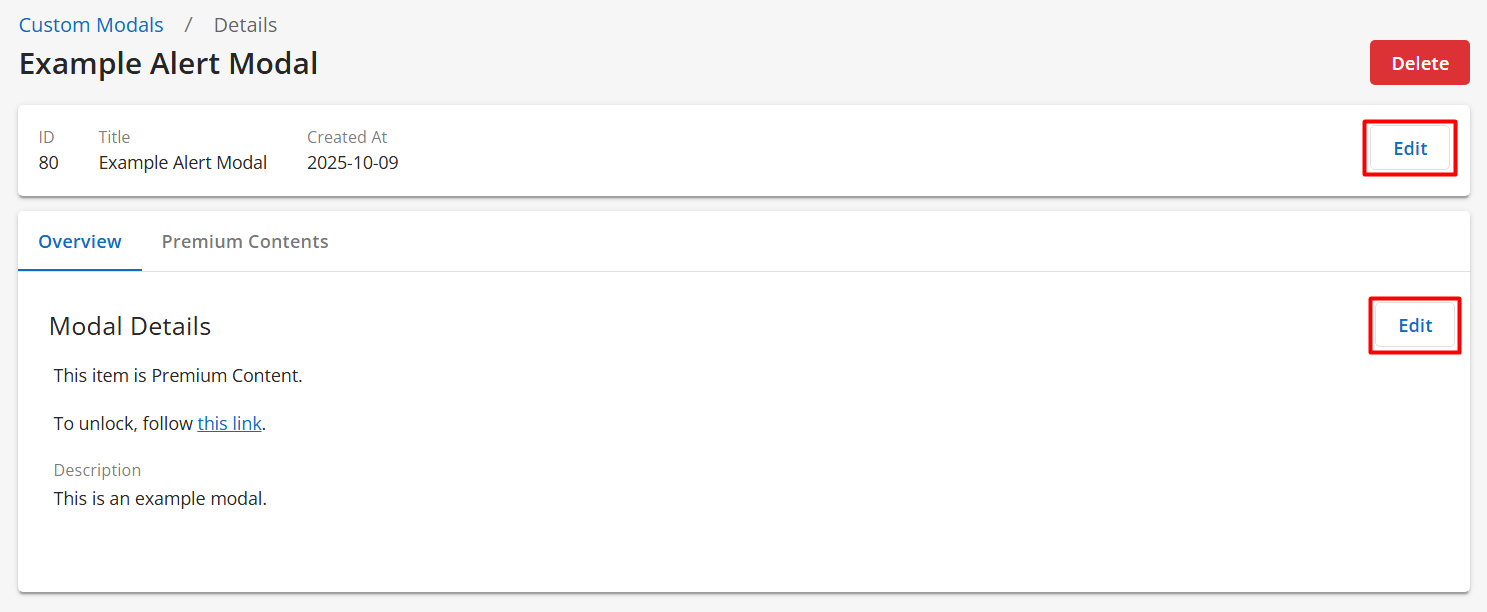
- Click on the name of the custom modal you’d like to edit.
- Click on Edit to update the name, description, and/or content of your custom modal.
- Click on Save.
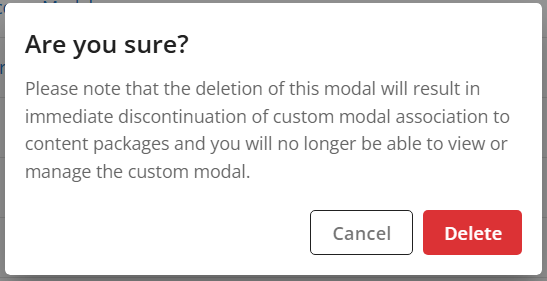
Deleting a Custom Modal
To delete a custom modal, follow these steps:
- Navigate to Console, and under the Experience tab, click on Custom Modals.
- Click on the name of the custom modal you’d like to delete. Then, click on Delete at the top-right.

OR
Click on Delete next to the custom modal you’d like to delete.
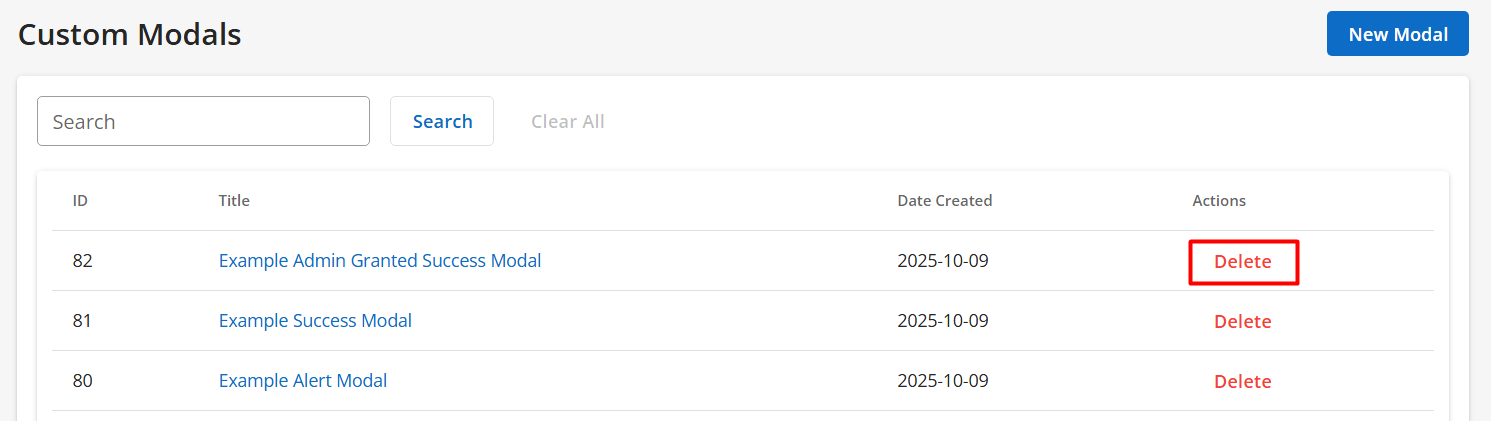
- Click on Delete to confirm.