
 3517
3517
Branch Membership
A user can be a member of one branch at a time. While branch members will not notice a difference in their BenchPrep experience compared to non-members, Console admins and branch managers, depending on their permissions, can view, create, edit, and move branch members around.
You can see if a user is a member of a branch, and which branch they’re a member of, on their details page in the Overview tab.

Scope and Access Context
Scope
A scope is the range of data that a user can view, determined by their role. For example, the scope of a user with the admin role is the tenant itself, since the admin role grants access to everything in the Console application.
When assigning a role to a user, you’ll also select the scope of that role. All roles can have the tenant scope (like the admin role), but some roles can also have a scope specific to a branch. If you give a user a role, and scope the role to Branch A, then the user will have all of the permissions associated with the role–but only within Branch A. For example, if this role allows the user to create other users, they can do so, but they can only create users for Branch A.
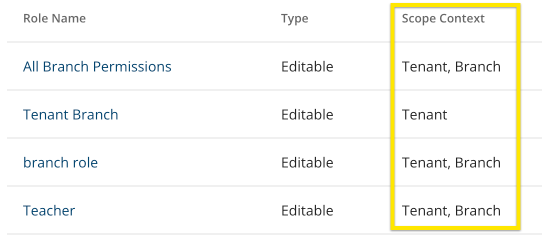
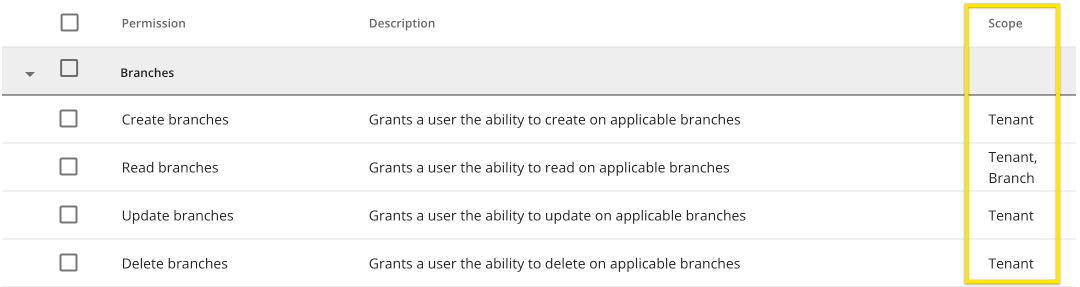
The permissions added to a custom role determine whether or not you can scope that role to a branch. During the role creation process, you’ll select which permissions the custom role will have. Each permission has its own scope listed in the “Scope” column. If you only add permissions to this role that have “Branch” listed as a potential scope, you’ll be able to scope this role to a branch. If a role has any permissions that can only be scoped to the tenant, you will only be able to scope this role to the tenant.
Access Context
An access context is the data and applications available to a user based on their role and the scope of that role. The Console header will display the role your account holds. If your account holds multiple roles, the Console header will display the role you’re currently using so that you know which access context you’re working in. You’ll also be able to use a drop-down menu to toggle between roles.
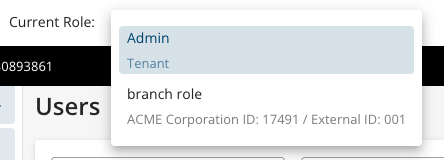
To understand how role switching and access contexts work in practice, let’s say you have an account with two roles: the Admin role and a custom role scoped to Branch A. After logging in, the platform will prompt you to select which role you’d like to use. The role you choose determines the access context you’ll work with.

If you select the admin role, you will see all of Console and be able to work with any user. If you select the custom role, you will only see the areas of Console this role has access to, and only be able to work with Branch A and its members. You can then use the drop-down menu in the Console header to switch between these two roles and access contexts.
Bulk Uploads
Bulk upload feature enables you to perform the following actions in bulk, via a CSV upload:
- Import Users - users with admin role or a custom role with create:users permission can perform this action
- Bulk Assign Users to Group - users with admin role or a custom role with update:users permission can perform this action
Import Users
If you’d like to create multiple users at once, you can bulk import them on the Users page. Bulk importing users does not allow you to edit/update user names, emails, or passwords for accounts that already exist. These will be skipped during the import process.
- Select Users under the Manage Users section in the left-hand navigation bar
- Click on Bulk Uploads at the top right-hand corner and select Import Users.

- Click on See upload instructions to download a template and create the CSV file.

- Select your CSV file for user import.
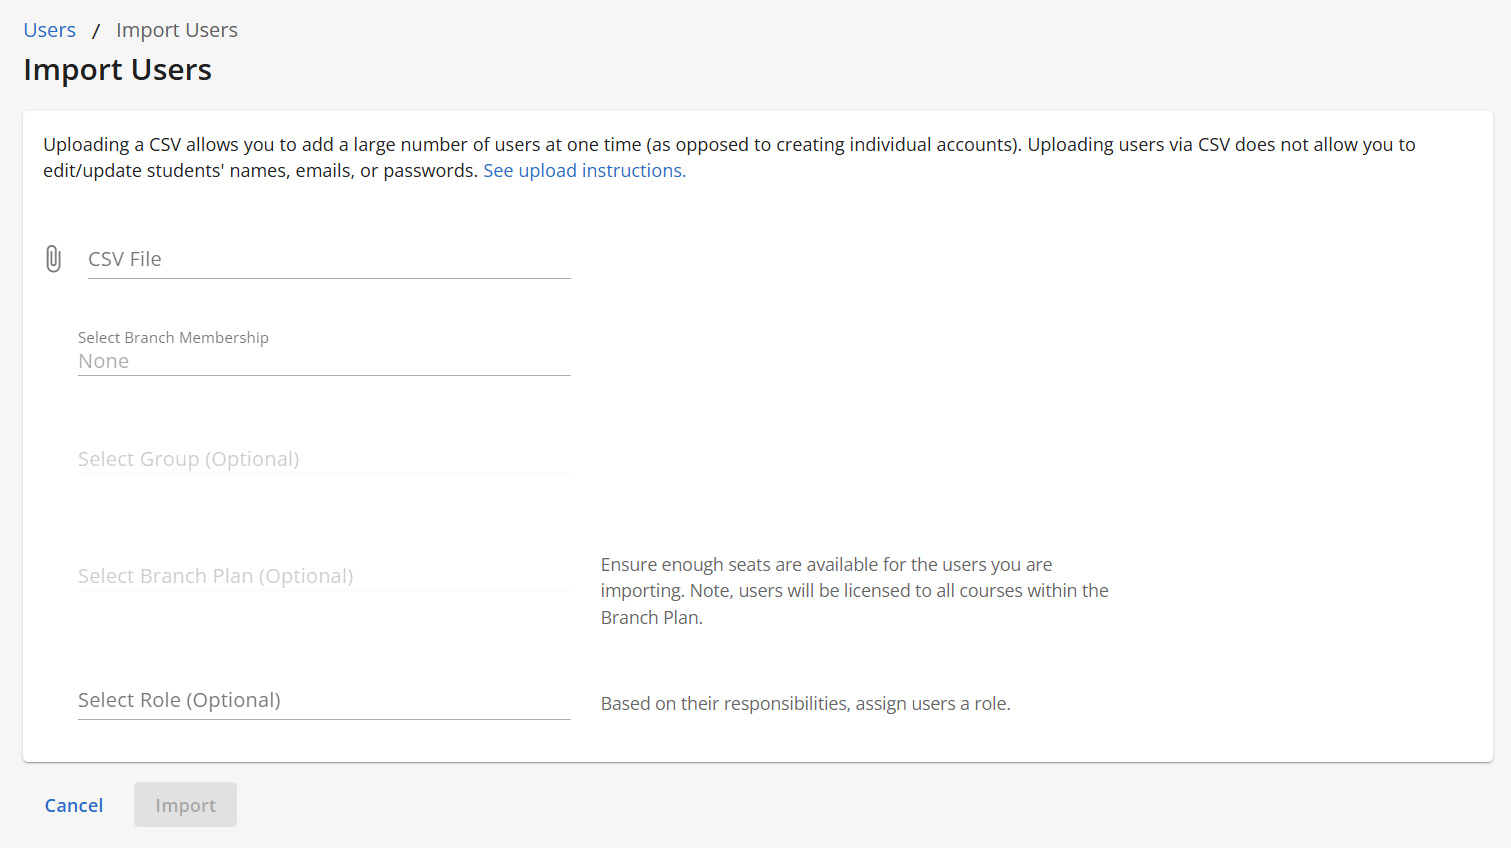
- Assign a branch (optional) for your users, and click Save.

- Assign a group (optional field if branch is selected) for your users, and click on Save. If there are no groups listed, the branch you selected does not have any groups yet.

- Assign a branch plan (optional if branch is selected) for your users, and click on Save. If there are no branch plans listed, the branch you selected does not have any plans yet. If a branch plan is expired, it will not be selectable as indicated by the ⮾ icon.

NOTE: Ensure enough seats are available in the branch plan for the users you are importing. For example, if a branch plan has a seat count of 10 and 7 have been used already, then you’ll only be able to assign 3 more users to the plan.- After selecting a branch plan, you'll be able to select which learnables from the branch plan to enroll your new users in (currently only courses are selectable). All courses associated to the branch plan will be selected by default. To remove a selected course, click on the - icon.
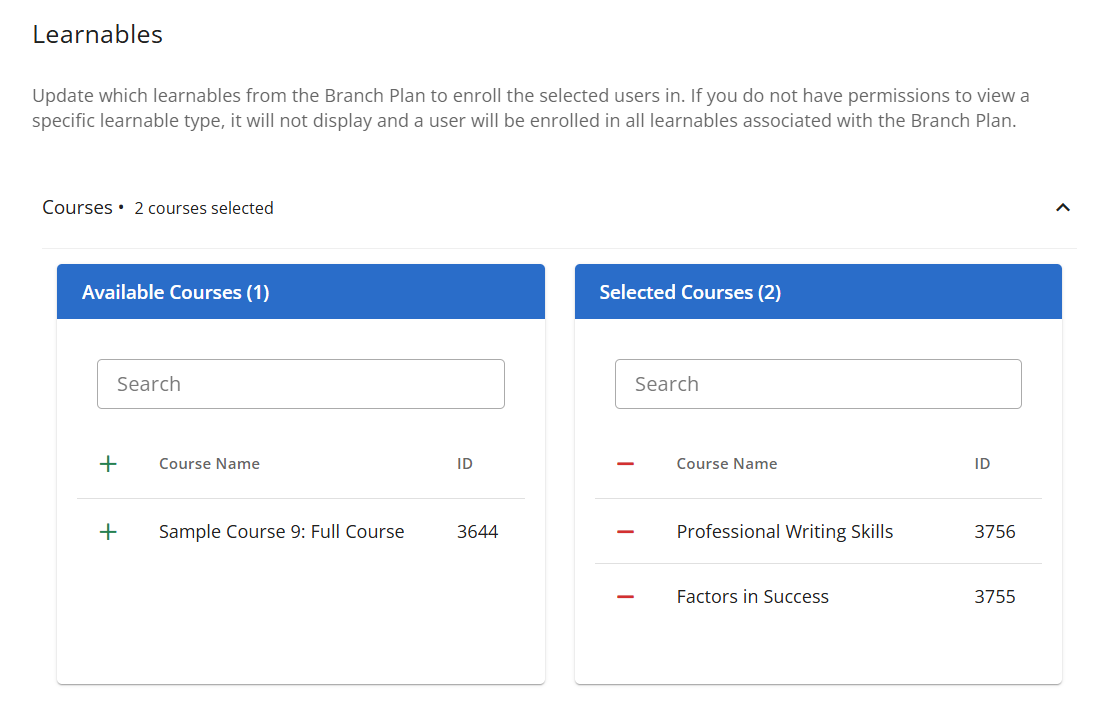
- After selecting a branch plan, you'll be able to select which learnables from the branch plan to enroll your new users in (currently only courses are selectable). All courses associated to the branch plan will be selected by default. To remove a selected course, click on the - icon.
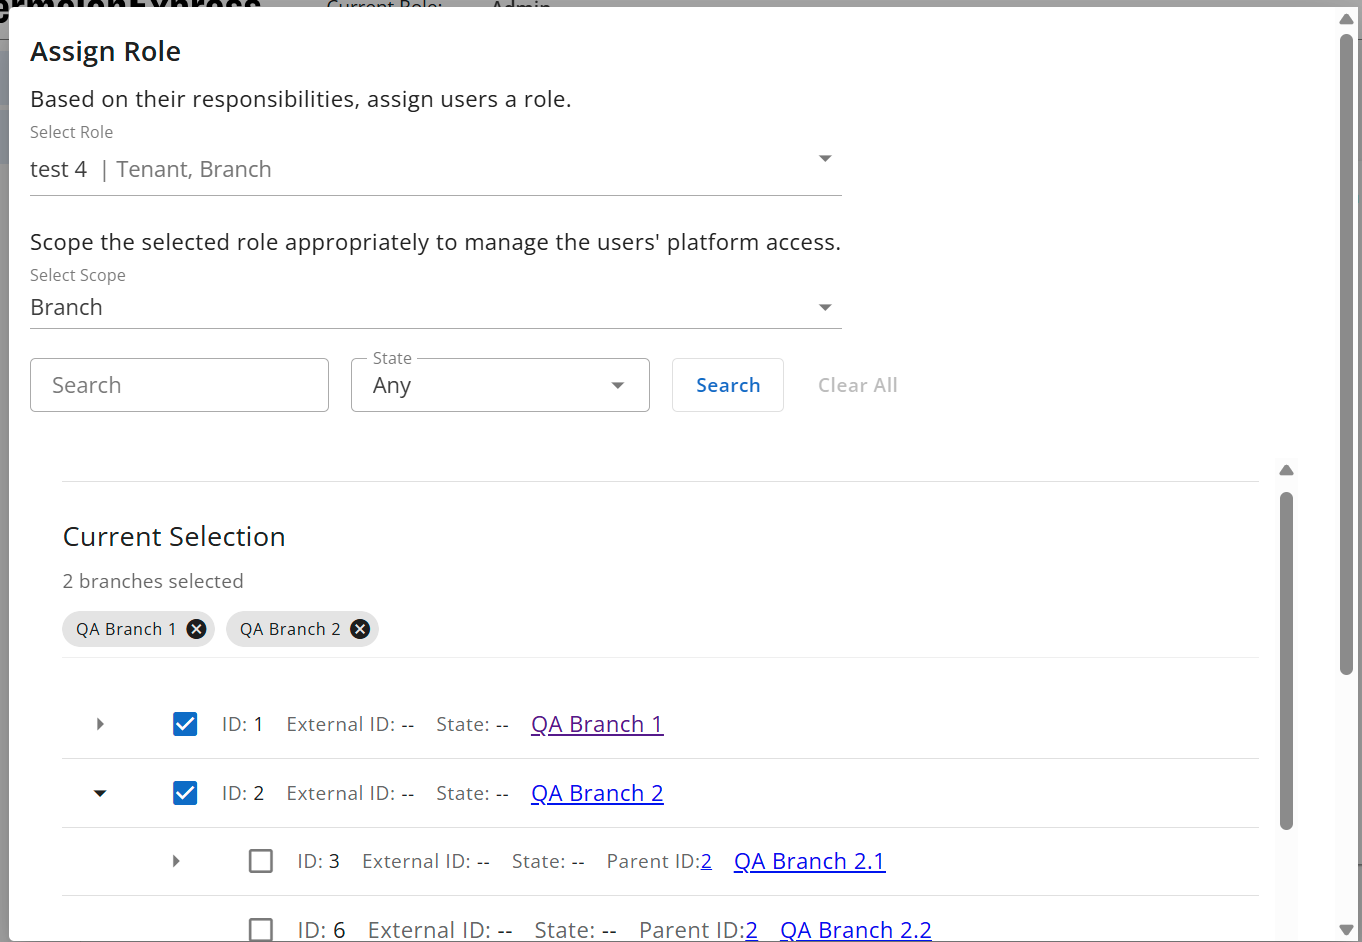
- Assign a role (optional) for your users, select the role’s scope (i.e. tenant, branch), and click on Save.

If you select a branch-scoped role, you can choose one or more branches from the multi-select list. The role will be scoped to the selected branches for all imported users.
If you’d like to create a new role, click on Create New Role. However, this will exit you from the importing page and will not save your changes. We recommend creating any custom roles that you need first before importing users. - Click on Import to import your users.

- A pop-up message will appear indicating your import is in progress. You won’t be able to upload an additional file until this import has been completed.

- Once the import is finished, you’ll receive a confirmation email that will provide more details on what was imported and if any errors occurred during the process.
Bulk Assign Users to Group
If you would like to assign users to groups, you can do so by bulk importing them on the Users page. Bulk importing does not permit the creation of new users or groups. Users can only be assigned to groups within branches where they are already members.
- Select Users under the Manage Users section in the left-hand navigation bar.
- Click on Bulk Uploads at the top right-hand corner and select Bulk Assign Users to Groups.

- Click on See upload instructions to download a template and create the CSV file.

- Select your CSV file for the import.
- Click on Import to import your users.
- A pop-up message will appear indicating your import is in progress. You won’t be able to upload an additional file until this import has been completed.
- Once the import is finished, you’ll receive a confirmation email that will provide more details on what was imported and if any errors occurred during the process.
Editing User Roles in Bulk
Admins, or users with a custom role with create:user_roles and delete:user_roles permissions, can bulk assign or remove user roles.
Assigning User Roles in Bulk
To add roles to users in bulk, follow these steps:
- Select Users under the Manage Users section in the left-hand navigation bar.
- Select the users that you’d like to add roles to.
- Click on Edit User Roles, and select Assign User Roles.

- Select a role to assign, select the role’s scope (i.e. tenant, branch), and click on Save. For branch-scoped roles, you can select multiple branches in a single action by clicking the relevant checkboxes before saving. The selected role will be created/assigned for all chosen branches, limited to branches within your current role scope.


Note: An admin user can only assign roles to a scope within their active role scope (i.e. A branch manager cannot assign a role at the Tenant scope or to a branch outside of their scope).
Removing User Roles in Bulk
To remove roles from users in bulk, follow these steps:
- Select Users under the Manage Users section in the left-hand navigation bar.
- Select the users that you’d like to remove roles from.
- Click on Edit User Roles. Select Remove User Roles to remove specific user roles, or select Remove All User Roles to remove all of them.

- If you selected Remove User Roles, select the roles you’d like to remove, and click on Save. Only roles and their respective scopes that are contained within the admin user’s active role scope will appear as available options to remove (i.e. If a branch manager is removing a role from a user which has the role at tenant scope and branch scope, only branch scope will appear in the modal and only the branch scoped role will be removed).

If you selected Remove All User Roles, click on Continue to confirm. Choosing to remove all user roles will only remove those user roles that are contained within the admin user’s scope.

Note: Legacy roles like District Admin., District Supervisor, Institution Admin., Institution Supervisor, and Instructor roles cannot be removed via Console. Please contact BenchPrep support for assistance in removing these roles.
Assigning Members to Branches
One-by-One
- In Console, go to the Users section.
- Select the user you’d like to work with.
- In the Overview tab, select Edit next to Branch Membership.
- Use the pop-up window to select the branch this user should be a member of.
- Select the Save button to finalize the branch assignment.

Bulk
Console offers an in-app wizard to add members to a branch or branch plan in bulk.
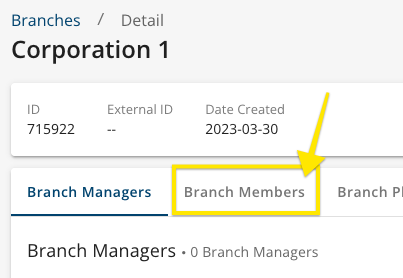
- In Console, go to the Branches section.
- Select a branch.
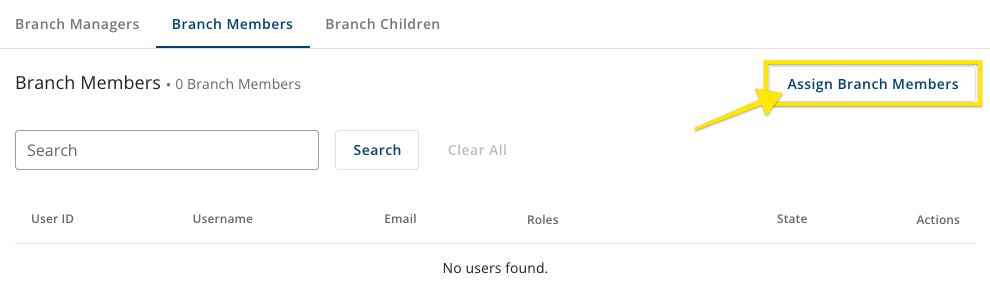
- Toggle to the Branch Members tab.
- Select the Assign Branch Members button.
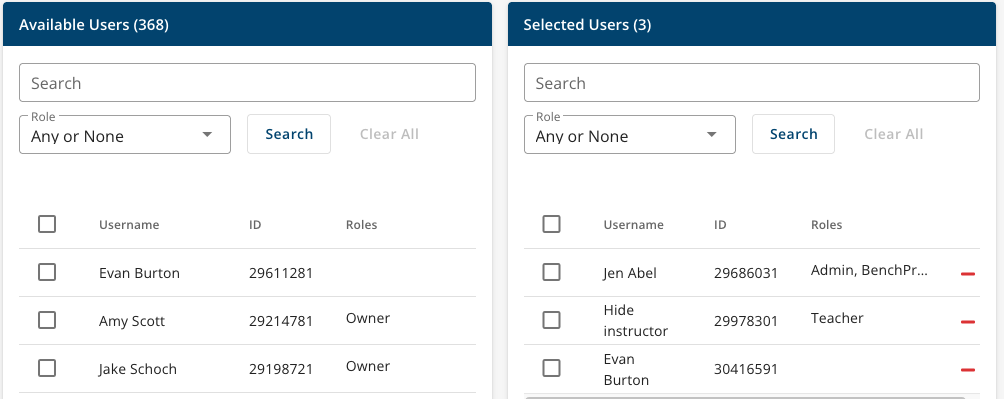
- Move any users you want to be members of this branch from the Available Users table to the Selected Users table. Available Users only displays users who are not associated with any branch.
- Select the Assign Users button at the bottom of the page to finalize the branch assignment.


Bulk Editing Branch Membership
Edit Branch Membership allows you to seamlessly move multiple users to a different branch. A user can only be a member of one branch at a time. Admins, or users with a custom role with update users permission, can edit branch membership in bulk.
To edit the branch membership of users in bulk, follow these steps:
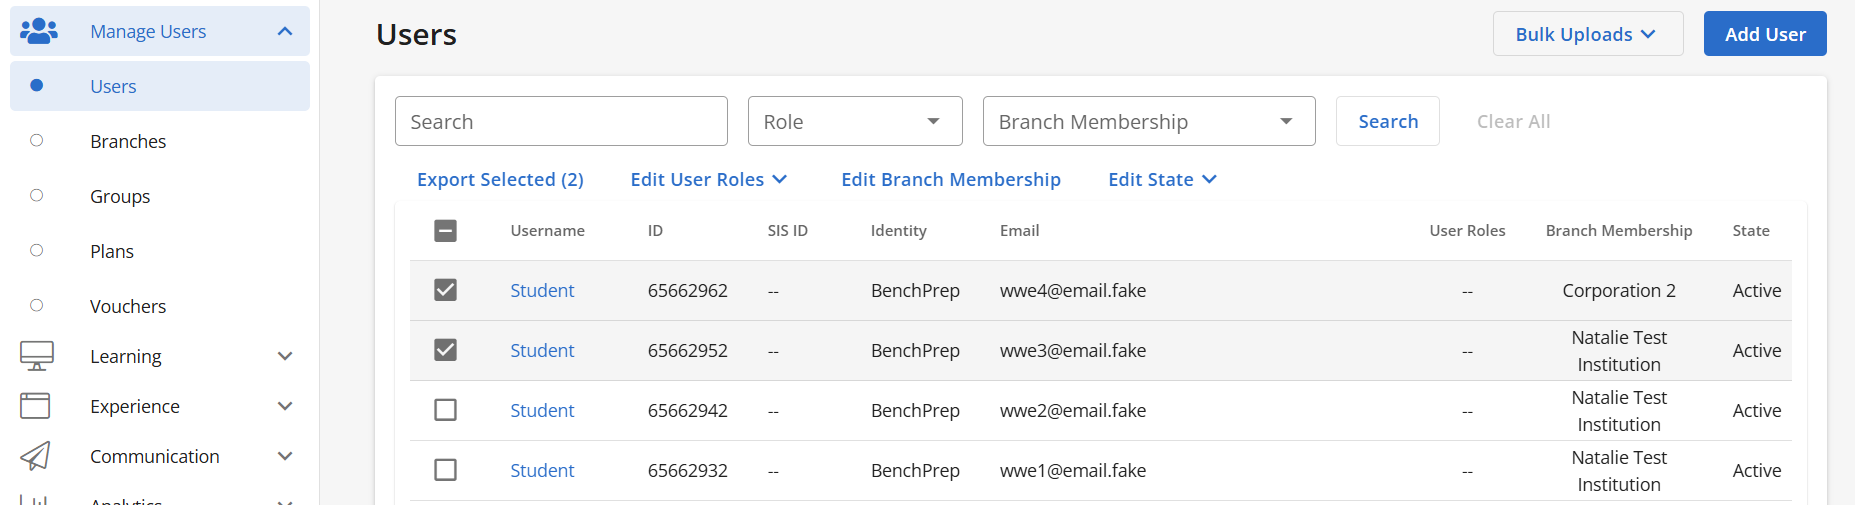
- Select Users under the Manage Users section in the left-hand navigation bar.
- Select the users that you’d like to edit.
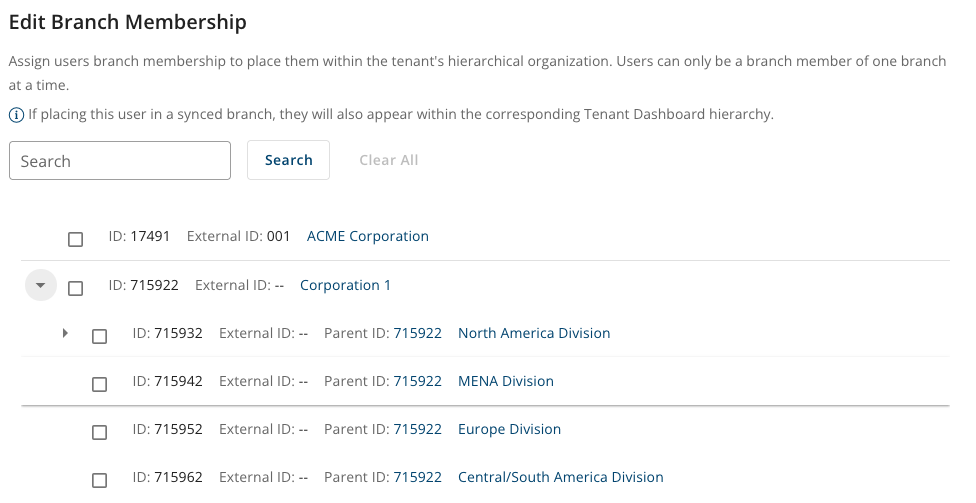
- Click on Edit Branch Membership.

- Select the branch you’d like to assign the users to, and click on Save. Selecting None in this modal will set the branch membership to None for all of the selected users.

Note: Users belonging to a group will fail to have their branch membership updated until they are removed from their group.
Importing Branch Members
Using the Import Branch Members option allows you to import NEW users and assign them as Branch Members to a specific branch. Bulk importing users does not allow you to edit/update user names, emails, or passwords for accounts that already exist. These will be skipped during the import process.
- In Console, go to the Branches section.
- Select a branch.
- Click the Import Branch Members button.

- Click on See upload instructions to download a template and create the CSV file.

- Select your CSV file for user import.
.
- Note that Branch Membership will be pre-selected.
- Assign a group (optional) for your users, and click Save. If there are no groups listed, the branch you selected does not have any groups yet.
- Assign a branch plan (optional) for your users, and click Save. If there are no branch plans listed, the branch you selected does not have any plans yet. If a branch plan is expired, it will not be selectable as indicated by the ⮾ icon.

- After selecting a branch plan, you'll be able to select which learnables from the branch plan to enroll your new users in (currently only courses are selectable). All courses associated to the branch plan will be selected by default. To remove a selected course, click on the - icon.
- After selecting a branch plan, you'll be able to select which learnables from the branch plan to enroll your new users in (currently only courses are selectable). All courses associated to the branch plan will be selected by default. To remove a selected course, click on the - icon.
- Assign a role (optional) for your users, select the role’s scope (i.e. tenant, branch), and click Save. If you choose a branch-scoped role, use the multi-select screen to select one or more branches by clicking the relevant checkboxes. The role will be applied to all selected branches, provided they are within your active role’s scope.
- If you’d like to create a new role, click on Create New Role. However, this will exit you from the importing page and will not save your changes. We recommend creating any custom roles that you need first before importing users.

- Click on Import to import your users.
- A pop-up message will appear indicating your import is in progress. You won’t be able to upload an additional file until this import has been completed.

- Once the import is finished, you’ll receive a confirmation email that will provide more details on what was imported and if any errors occurred during the process.
Removing Branch Membership
Console admins can remove users from a branch. To do so, follow these steps:
- In Console, go to the Branches section.
- Select a branch.
- In the Branch Members tab, select Edit next to any branch member you want to remove.
- In the pop-up window, un-check the box next to the name of the branch the user is currently in, then select the Save button.

You can also remove a user’s branch membership via their user details page by following these steps:
- In the Overview tab, select Edit next to Branch Membership.
Note that you must remove the user from any groups they’re in before removing them from their branch. If the user you attempt to remove from a branch is part of one or more groups, you will receive a message prompting you to remove them from the groups first.
- In the pop-up window, un-check the box next to the name of the branch the user is currently in.
- Select Save to remove the user from the branch.


NOTE: Branch managers cannot remove members from the branch they manage–they can only change the user’s membership from their current branch to a child of that branch (if the current branch has children).
Branch managers who manage unrelated branches will not be able to move users between those branches. Each time a user accesses Console, they select a role to operate within, and Console will not factor in other roles they may have. Because of this, branch managers will not be able to view all branches they manage at the same time, unless the branches they manage have an ancestor/descendant relationship.
Bulk Deactivating or Activating Users
If you'd like to deactivate or activate users in bulk, follow these steps:
- Locate the users you want to deactivate or activate, and select the checkbox next to each name.

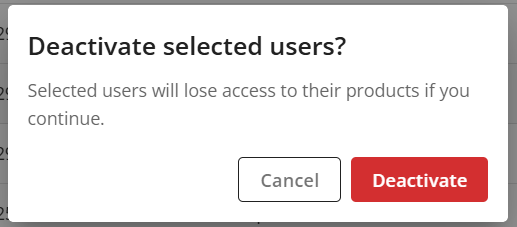
- Click on Edit State, and select Deactivate or Activate.

- Click on Deactivate or Activate again on the confirmation modal to proceed.
Once confirmed, you will not be able to initiate another bulk deactivation or activation until you have received the confirmation email the previous bulk action was completed successfully.
Within Tenant Dashboard, you can also deactivate users in bulk. To learn more about deactivating users in bulk through Tenant Dashboard, click here.
Bulk Deactivating or Activating Users via CSV
To deactivate or activate users via a CSV, follow these steps:
- On the Users page in Console, click on Bulk Uploads and select Bulk Deactivate Users or Bulk Activate Users.
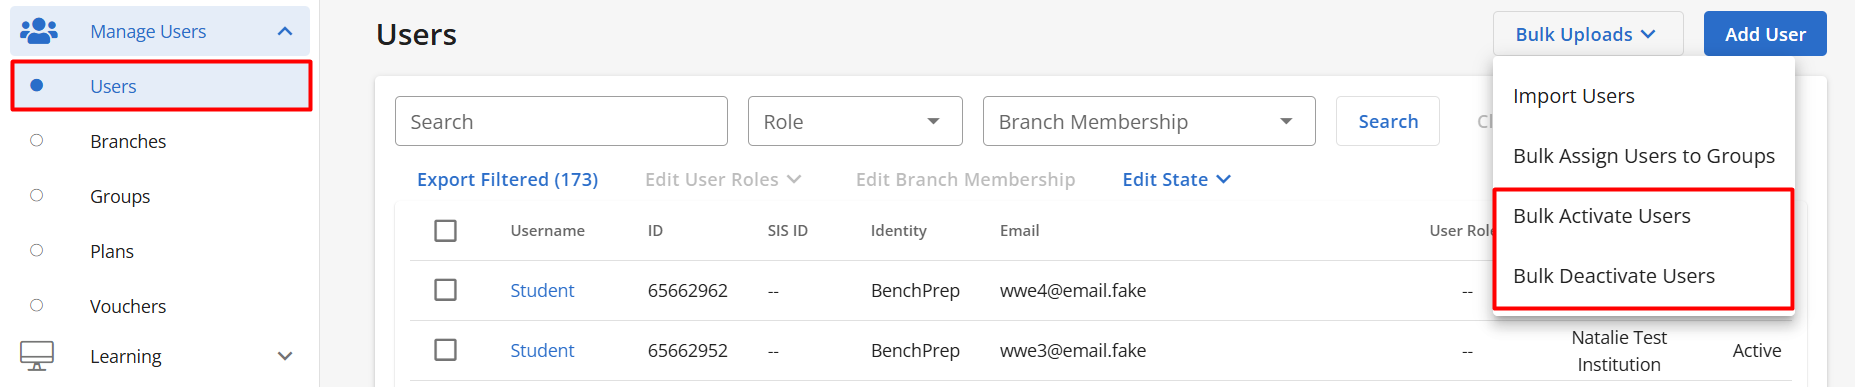
- Upload a CSV file. For more information on how to format your file or download a template, click on See upload instructions.

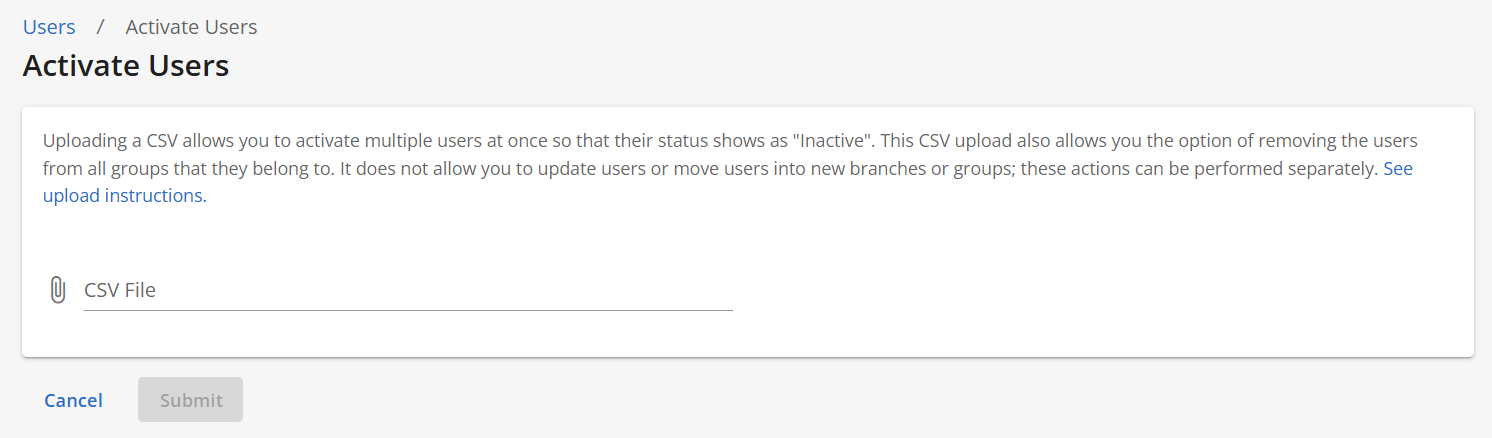
- Click on Submit.
- Once the deactivation or activation is complete, you will receive a confirmation email.
When setting up branches and users, you may run into different scenarios on how these need to be set up. Check out our article here for further instructions and recommendations on how to manage your users based on these scenarios.

